Setting up a Java application to launch with Lightrun in the VS Code IDE🔗
Introduction🔗
When you'd like to debug your application using Lightrun, running the application with Lightrun's agent directly from VSCode becomes very handy and useful.
It is no longer needed to leave VSCode to an external terminal to run the agent and the application. There is also no need to run Java explicitly in that terminal.
This can be achieved by a simple, straight-forward configration (JSON based) which holds the required attributes and values for launching your application.
Just add a single line of conifugration as described below and you're good to go.
Before you begin
To be able to launch your application with Lightrun directly from VSCode, make sure:
- Extension Pack for Java is installed in VSCode
- Lightrun's extension is installed and you've authenticated
- Your Java application is compiled with the
-gflag - Lightrun's Java agent is installed to a known location
Configuring VSCode🔗
Adding a Configuration🔗
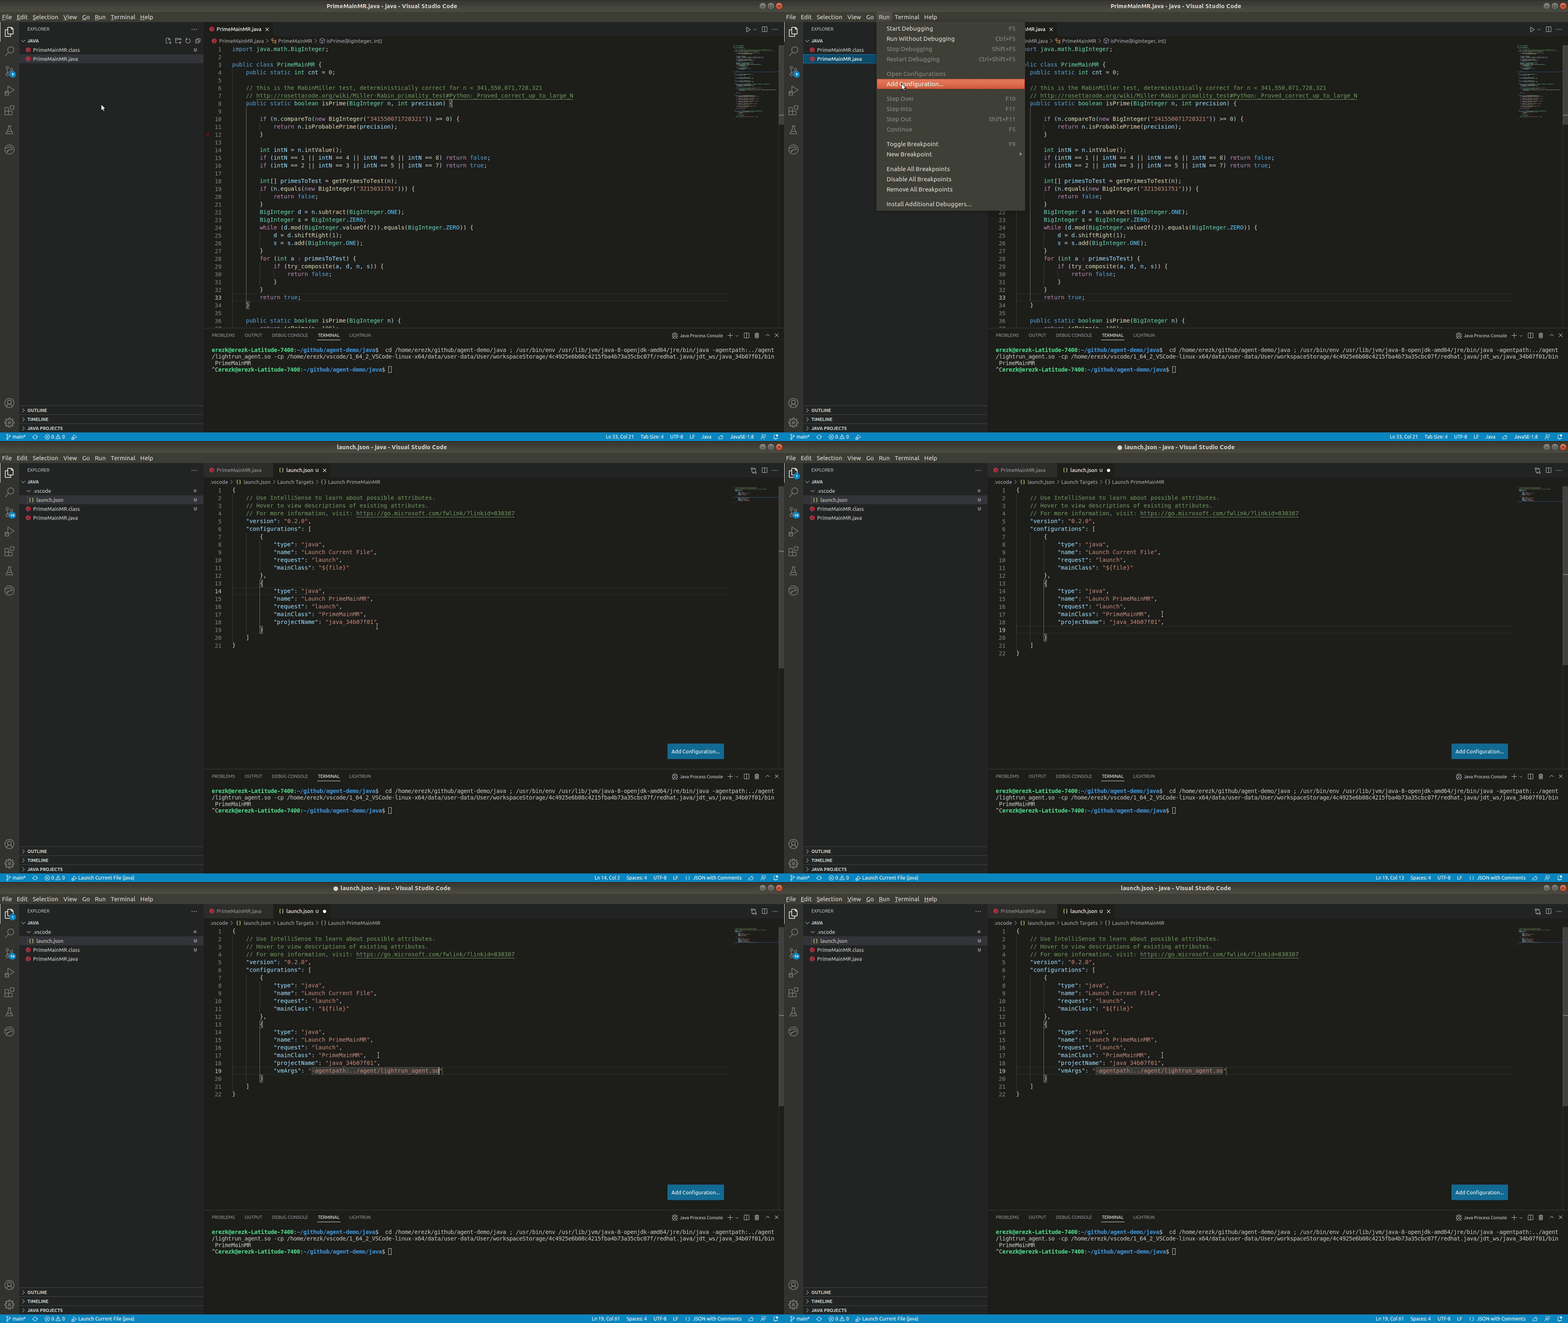
- Set focus on your code
- From the Run menu select Add Configuration
- Go to the configuration section where the application's class appear as
mainClass - Add the agent's path to the vmArgs attribute.
Replace the path below with the actual path to the agent.
Linux:Windows:"vmArgs": "-agentpath:/path/to/agent/lightrun_agent.so""vmArgs": "-agentpath:C:\\path\\to\\agent\\lightrun_agent.dll" - Save the configuration
CTRL+S
Note
If you already have a run configuration, simply select Open Configurations from the Run menu

A simple launch configuration🔗
{
    "version": "0.2.0",
    "configurations": [
        {
            "type": "java",
            "name": "Launch PrimeMainMR",
            "request": "launch",
            "mainClass": "PrimeMainMR",
            "projectName": "java_34b07f01",
            "vmArgs": "-agentpath:../agent/lightrun_agent.so"
        }
    ]
}
Info
Additional vmArgs can be added, such as -Xmx1G to increase the heap size to 1GB, see Java debugging options
Tip
You can easily add attributes by using VSCode's Intellisense CTRL+SPACE
Adding extra class paths🔗
This step is not mandatory
In some cases you might need to add additional classes to the agent's path, as described here.
{
    "version": "0.2.0",
    "configurations": [
        {
            "type": "java",
            "name": "Launch PrimeMainMR",
            "request": "launch",
            "mainClass": "PrimeMainMR",
            "projectName": "java_34b07f01"
            "vmArgs": "-agentpath:/path/to/agent/lightrun_agent.so=--lightrun_extra_class_path=/path/to/extra/classes"
        }
    ]
}
Running the application🔗
Using Lightrun to debug your application does not require an actual debugger, and does not require setting breakpoints to debug.
Instead, you run your application using Lightrun's agent and insert snapshots, logs and metrics as you like.
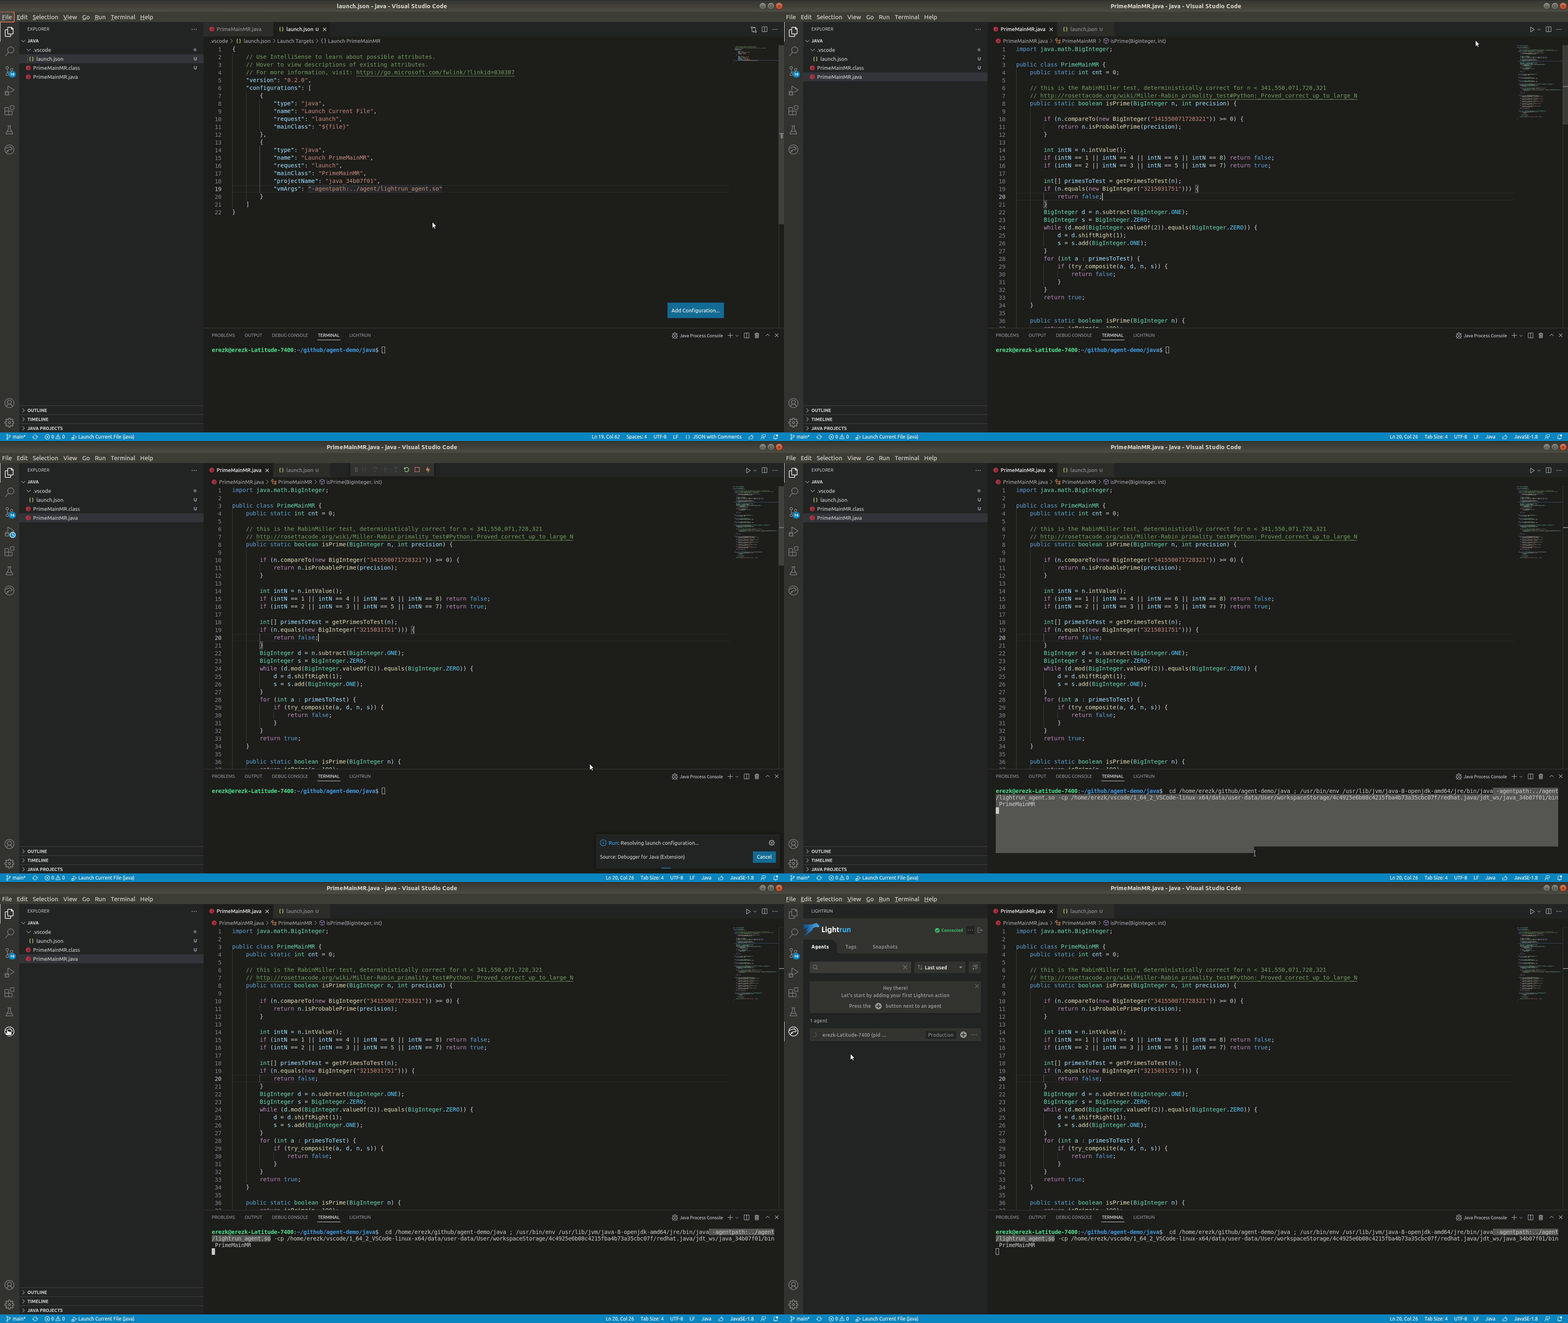
- Set focus back on your code
- Run the application from the debugger extension by selecting "Run Java"
Do not select "Debug Java", only "Run Java".
Other options to run the application are hittingCTRL+F5or selecting Run Without Debugging from the Run menu.
Good job!
The application will run now by Lightrun's agent as can be seen in the TERMINAL.
You can now select Lightrun's extension to see the running agent on the sidebar.

Debugging the application with Lightrun🔗
Now that you've successfully launched you application using Lightrun's agent, it's debugging time...
See how you can use snapshots, logs, and metrics to gain dynamic observability into your application.
Stopping the application🔗
In case the application needs to be stopped (e.g. debugging has ended), just go to the terminal window and hit CTRL+C
