SSO JIT provisioning using Okta🔗
🔒 Enterprise plan required. Contact Support for access.
Note
Starting from version 1.54, SSO OIDC support is available, and the term SAML JIT has been renamed to SSO JIT.
Lightrun supports JIT (Just-In-Time) user provisioning capabilities using Okta. Provisioning SSO JIT accounts using Okta involves setting up a seamless and automated user account creation process for applications integrated with Okta.
By configuring JIT provisioning, administrators can ensure that when users log in to a web application for the first time via Single Sign-On (SSO), their account is automatically created based on the information passed through SSO assertions from Okta. This eliminates the need for manual account creation during onboarding, significantly reducing administrative overhead and improving the user experience.
To set up SSO JIT provisioning using Okta, first set up the Lightrun Application within the Okta. This involves defining the necessary user attributes and mappings that the service provider (the web application) requires.
Once configured, when a user authenticates through Okta, the system sends the relevant user attributes—such as name, email—in the SSO response to Lightrun. If the user does not already have an account, the application uses this information to create one automatically, allowing the user immediate access without further intervention.
Prerequisite: Set up Lightrun with SSO in Okta🔗
Set up the Lightrun application using Okta for the SSO integration using one of the following SSO protocols:
Step 1: Configure SAML Attributes in Okta for Lightrun🔗
- Sign in to Okta.
- In the Administration console, navigate to the Application >
and click the General tab. - Under the App Settings > SAML Setting section, click Edit.
- Click Next to reach the Configure SAML step in the wizard.
-
Under the Attribute Statements (Optional) section addd the following new claims with the indicated Name and Source attributes values.
Name Source attribute firstName user.firstNamelastName user.lastName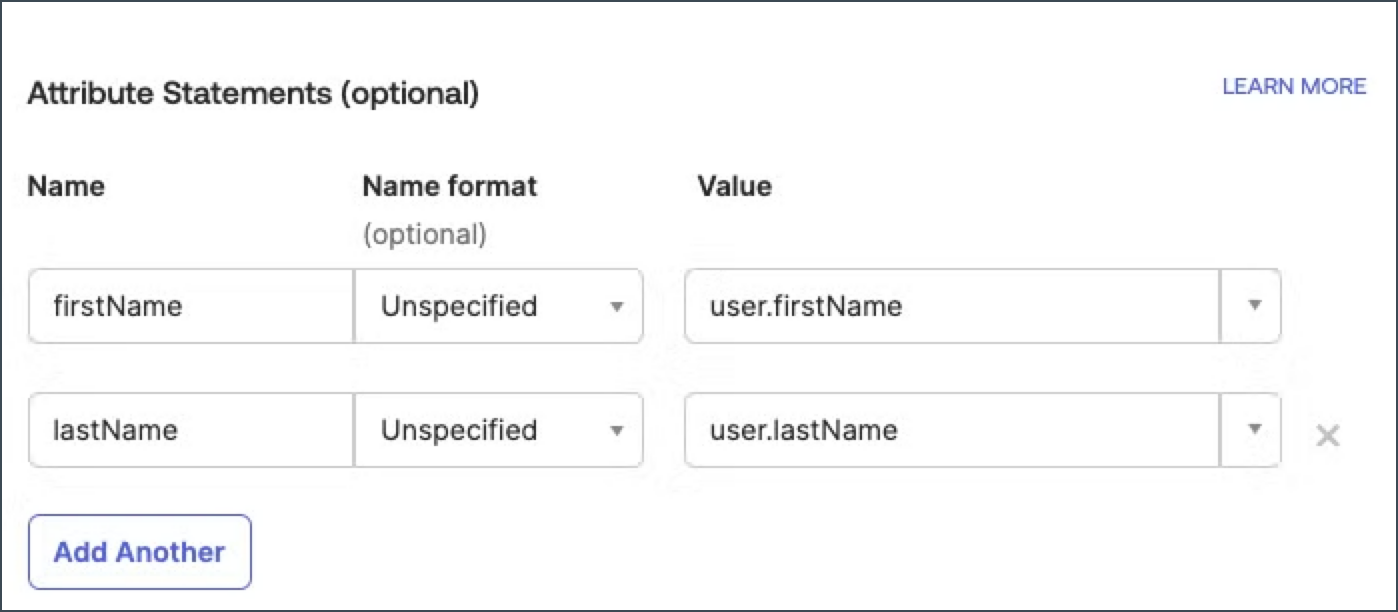
-
Click Next.
-
Fill in the feedback form, and click Finish.
Step 2: Enable SSO JIT Provisioning in Lightrun🔗
-
Log in to your Lightrun Management Portal.
-
Click Settings on the top right-hand side of your screen to navigate to the Identity and Access Management tab > Identity Configuration.
-
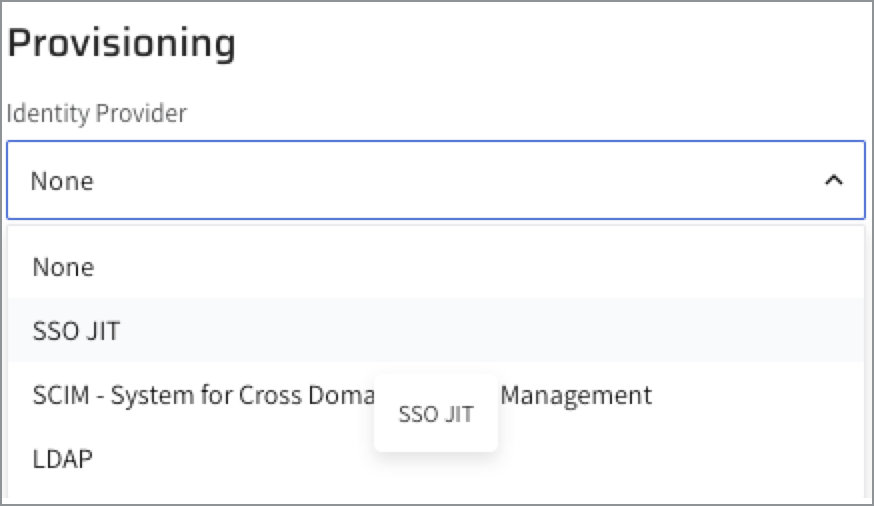
Scroll down to the Provisioning section and select the appropriate option based on your version:
-
Version 1.54 and later:
Click the SSO JIT toggle to enable SSO JIT.
-
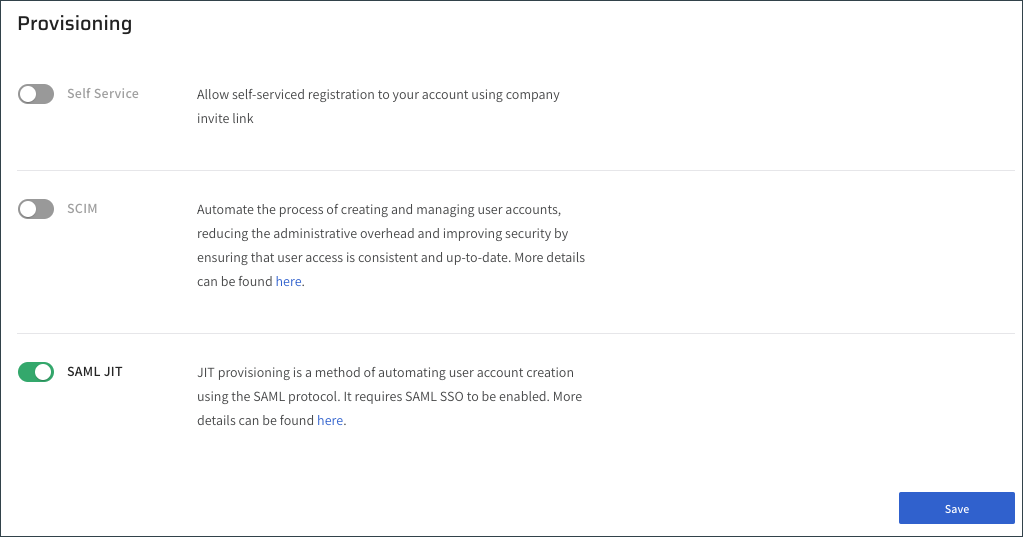
Version 1.53 and earlier:
Click the SAML JIT toggle to enable SAML JIT.
-
-
Click Save.
Guidelines for managing users using JIT provisioning🔗
When managing users through JIT provisioning, the following guidelines apply:
-
Provisioning Method
Only one provisioning method can be used at a time.
-
Identity management integration
Only a single Identity Management (IdM) system can be set with SSO JIT.
- Adding users
When a user is provisioned through Okta, they are automatically added to the Lightrun Management Portal and flagged as JIT-provisioned.
- Removing users
Removing a user from JIT provisioning will not remove the user from Lightrun; manual removal is required.
- Default Pool Assignment
JIT-provisioned users are automatically added to the default Agent Pool and assigned user-role permissions.
- Roles and Permissions
Lightrun-specific roles and permissions must be assigned directly within the Lightrun Management Portal. Users can be assigned to different agent pools, inheriting the roles and permissions associated with those pools.