SCIM provisioning using Ping Identity🔗
🔒 Enterprise plan required. Contact Support for access.
Starting from version 1.43, Lightrun supports using the open standard System for Cross-domain Identity Management (SCIM 2.0) to:
- Grant users in your company seamless access to the Lightrun Application using their credentials.
- Add, remove, and assign your users in your organization.
- Starting with version 1.52, you can provision Lightrun groups through SCIM in addition to managing Lightrun users. This functionality enables you to delegate the management of Lightrun groups to a supported identity provider (IdP). Before migrating group management to SCIM, ensure that the relevant Lightrun groups are preconfigured within the identity provider.
For more information, see SCIM provisioning Overview.
Lightrun supports SCIM provisioning using both HTTP Header authentication and OAuth 2.0 authentication, allowing flexibility based on your security and identity provider requirements.
Prerequisites🔗
- Enable SSO in the Identity Configuration page located under the Identity and Access Management tab. For more information, see Configure SAML SSO with Ping Identity for your organization.
- To provision SCIM groups, you need to have RBAC enabled. Supported from version 1.50 and higher.
- Ensure that the email attribute is mapped to the userName in Ping Identity, or use the userName if it is already in email format.
Configure SCIM using HTTP Header authentication🔗
Prerequisite🔗
Generate a dedicated API Key for your integration with SCIM. For more information, see Lightrun System API Keys.
Set up SCIM in Lightrun🔗
- Log in to your Lightrun account.
- Navigate to Identity and Access Management > Identity Configuration > Provisioning.
- Select Use Identity Provider.
- Enable SCIM by selecting SCIM - System for Cross-Domain Identity Management.
-
Select HTTP Header as your authentication method.
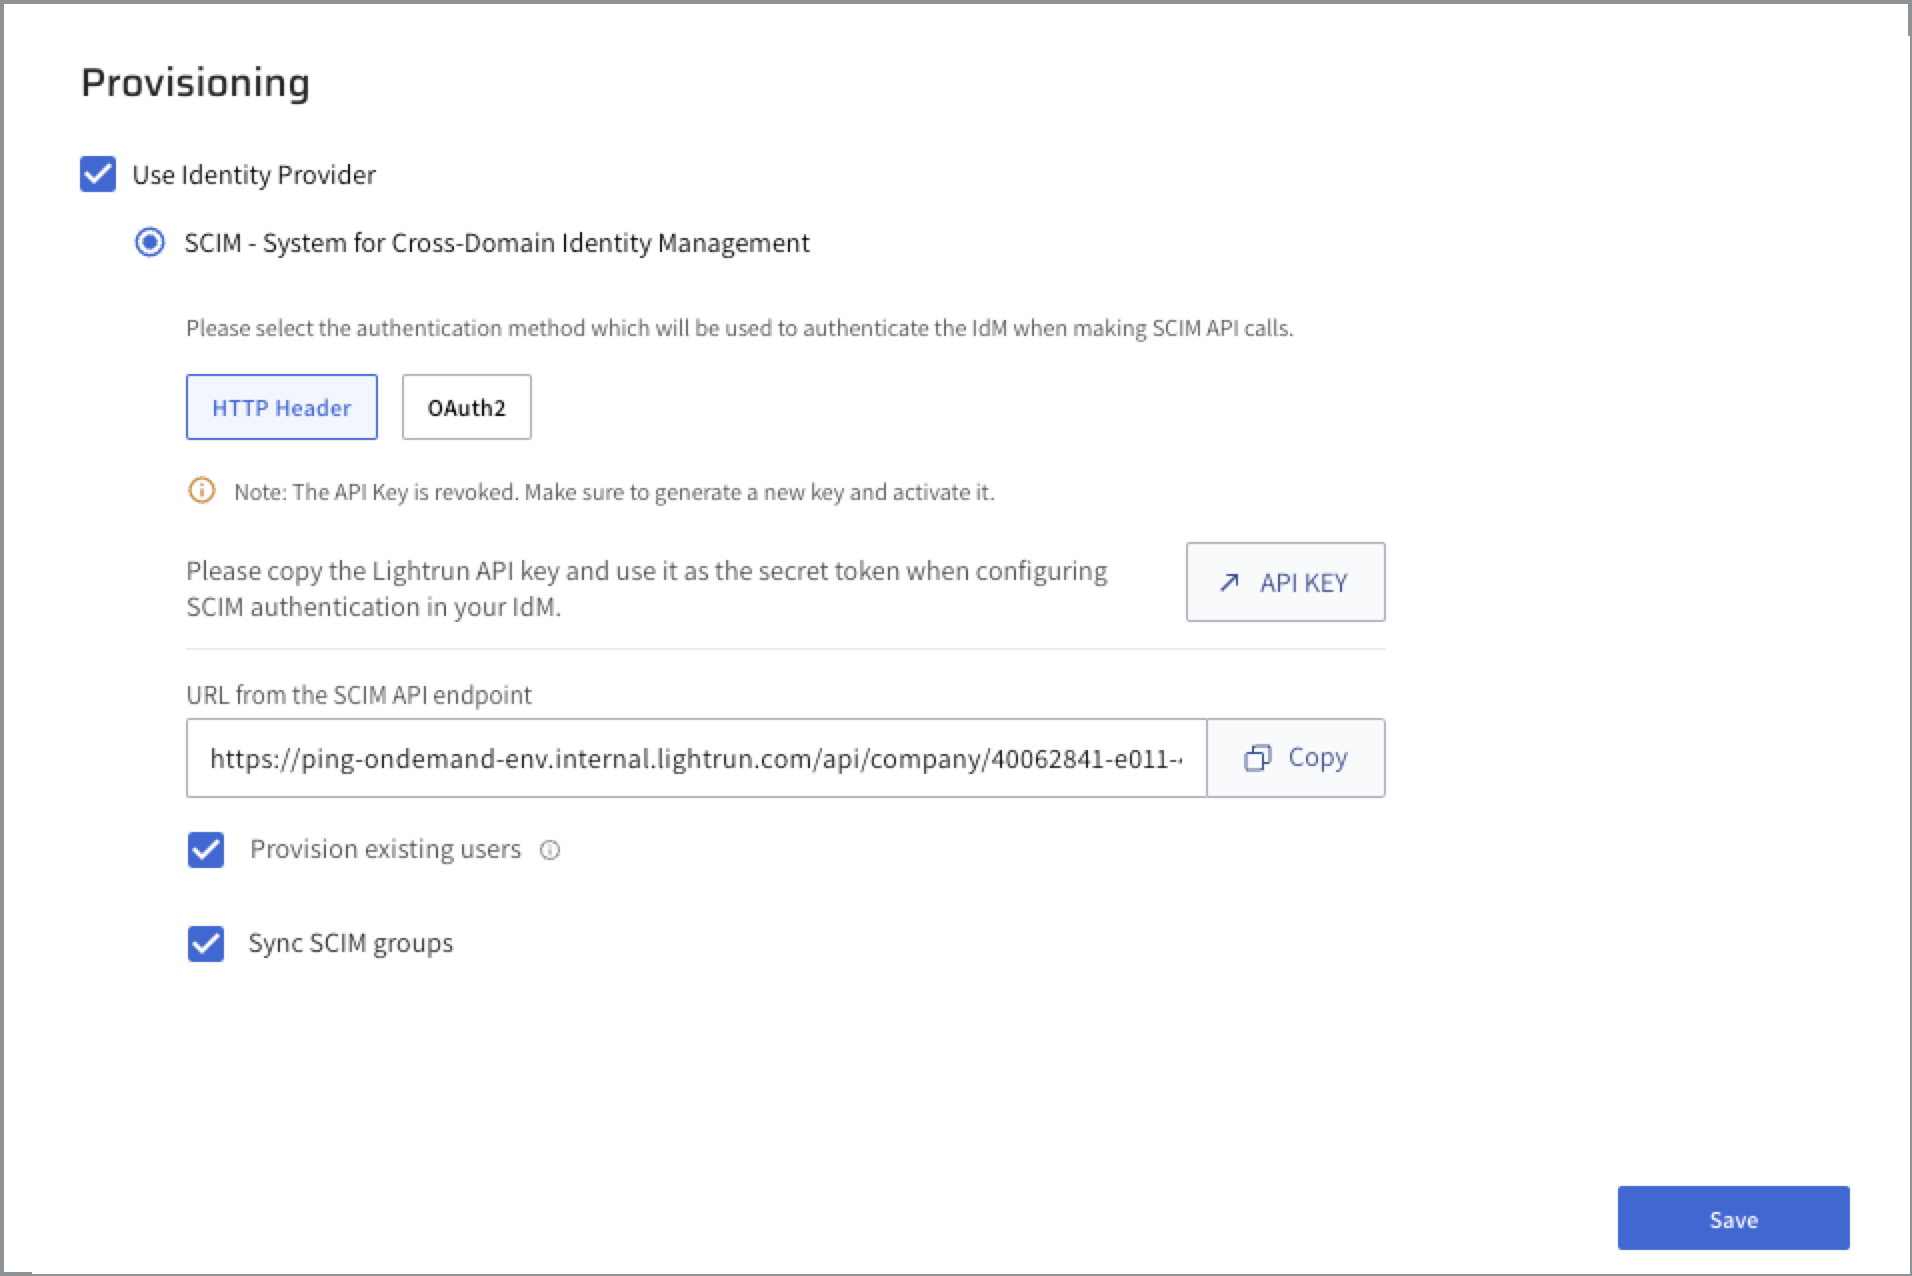
The required fields are automatically populated for copying into Ping Identity.
-
In the URL from the SCIM API endpoint field, click Copy to paste into the SCIM BASE URL field in the Provisioning settings in Ping Identity.
- Select the Provision existing users to transfer user management to your identity provider. Ensure that these users have been pre-managed through SCIM before proceeding. For more information, see Provisioning Existing Users with SCIM.
-
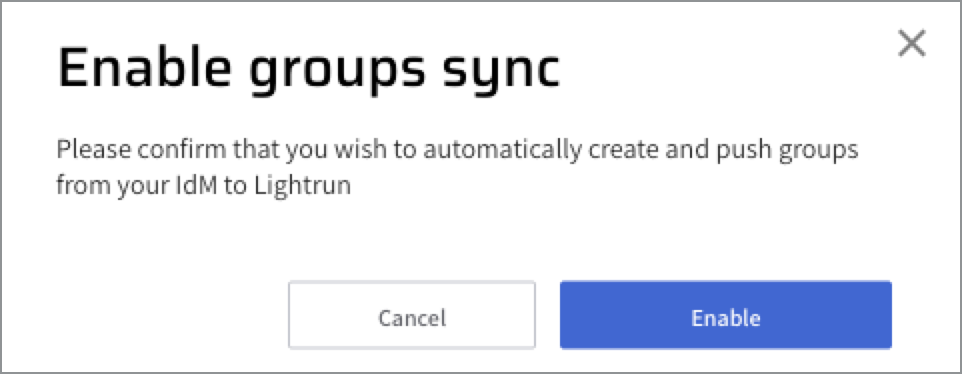
Select Sync SCIM groups to enable group synchronization. For more information, see Provisioning Lightrun Groups using SCIM.
The Enable groups sync dialog opens.
-
Click Enable.
- Click Save.
Proceed to set up Provisioning Lightrun in Ping Identity.
Configure the Lightrun-Ping integration using HTTP in Ping Identity🔗
- Sign in to Ping Identity.
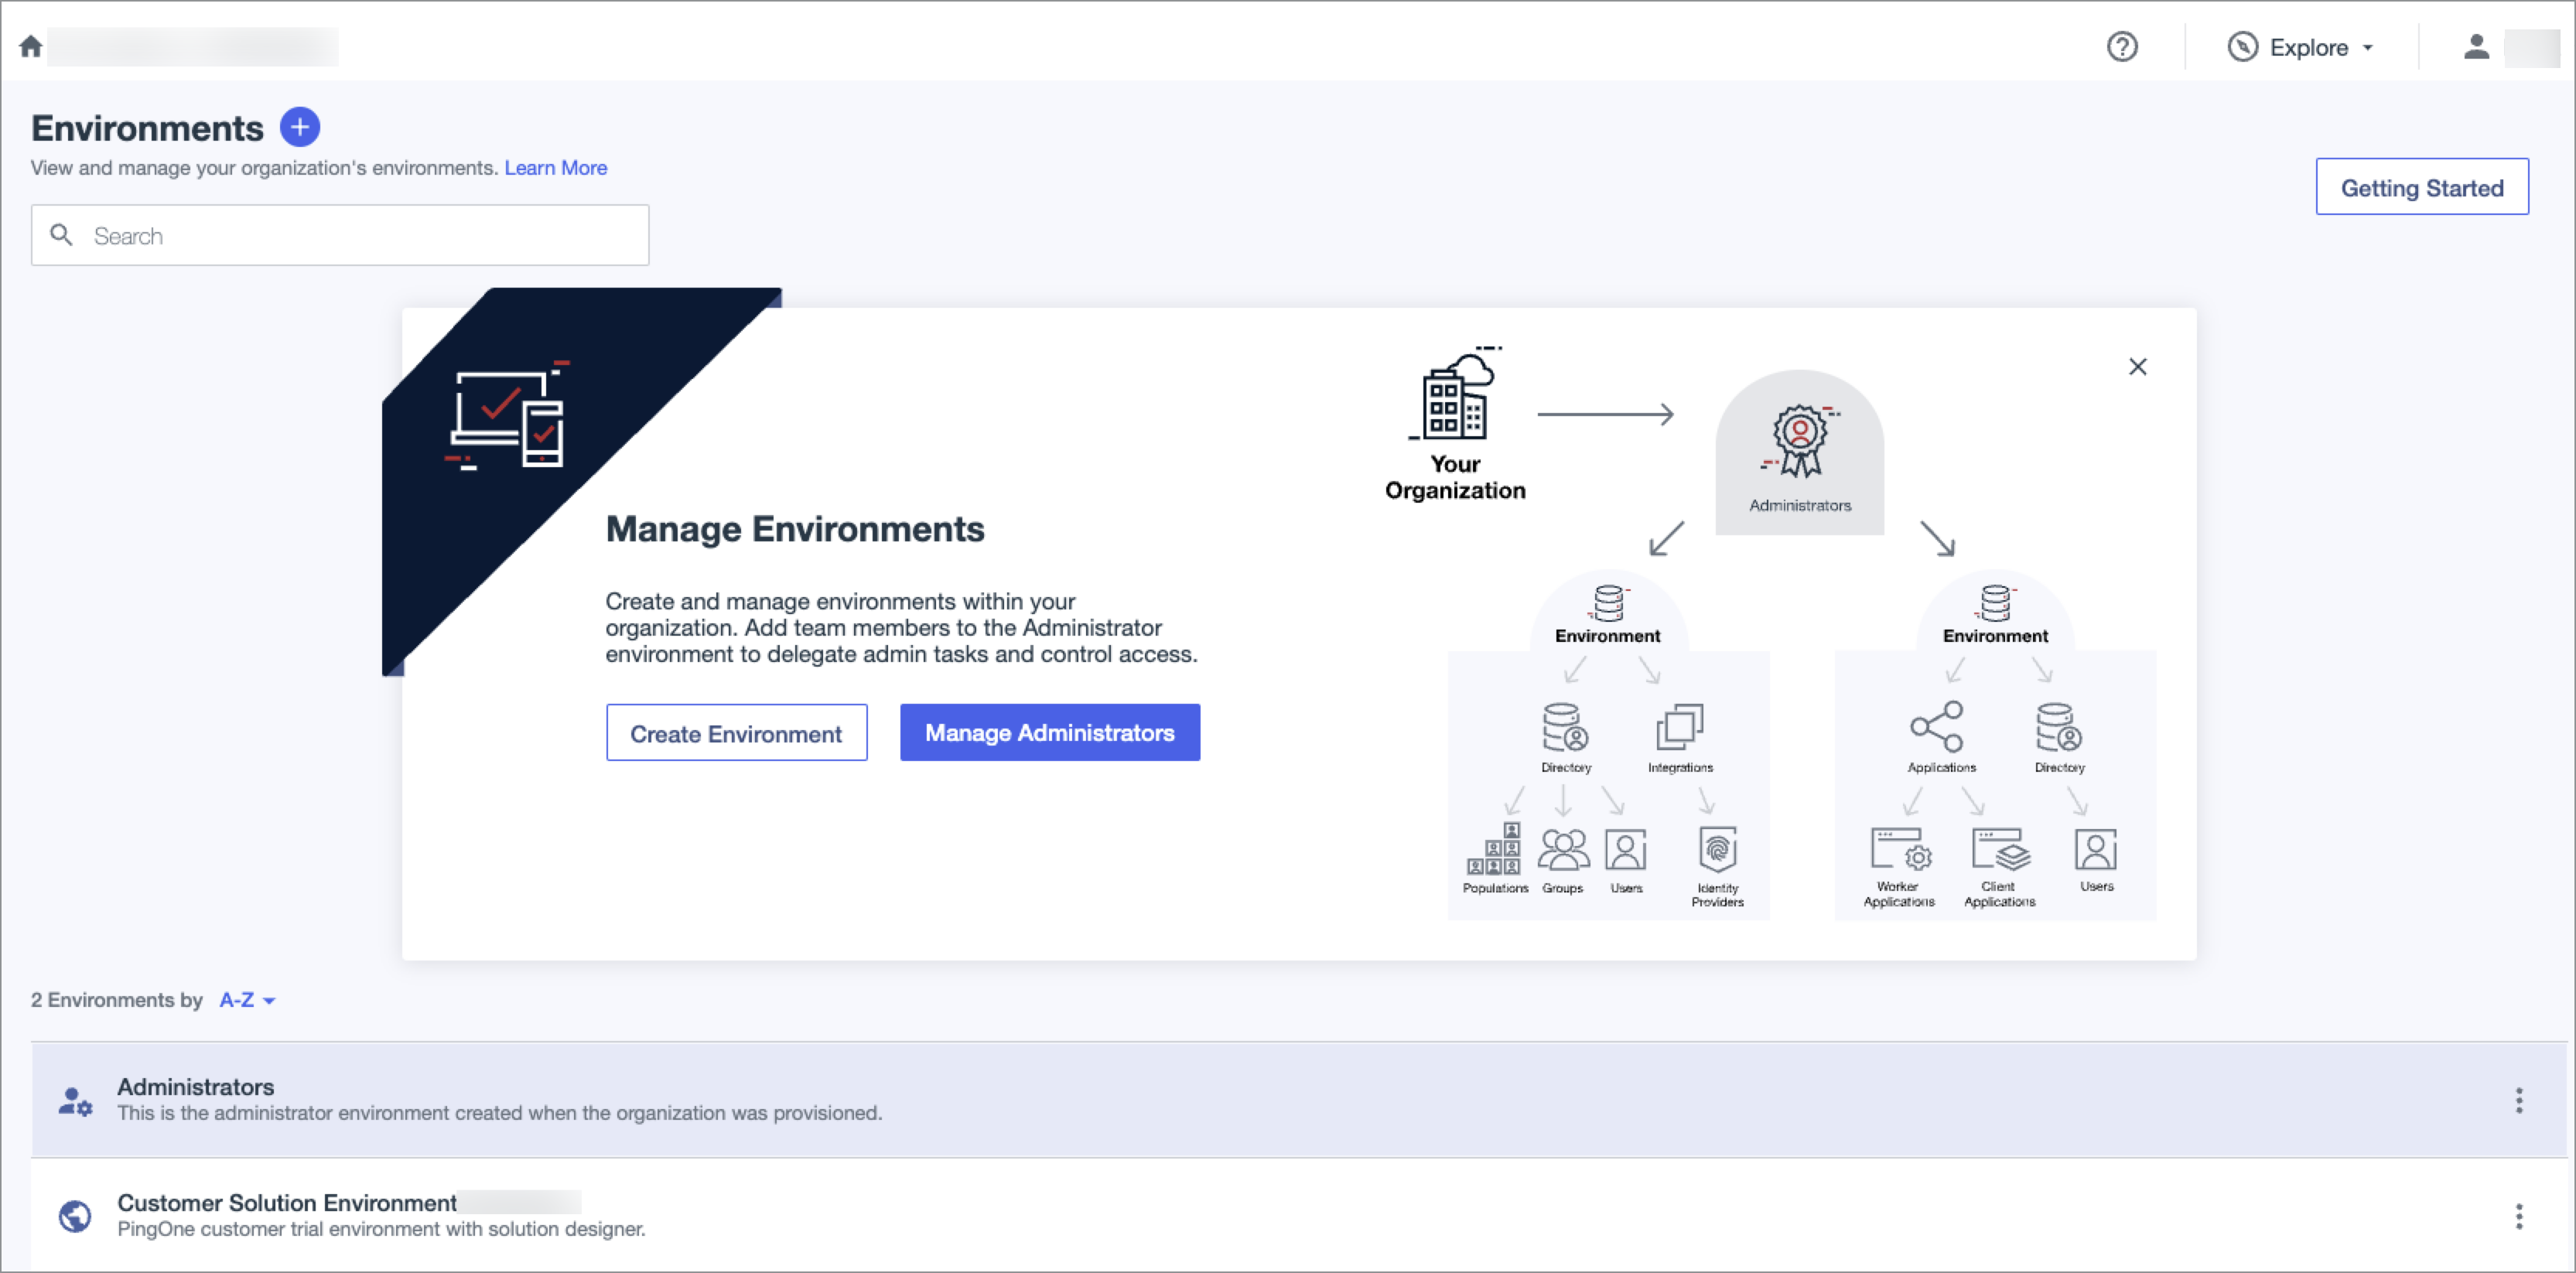
- In the Administration console, Select Environments.
-
Under Environments, select the application you created for the SSO integration.
-
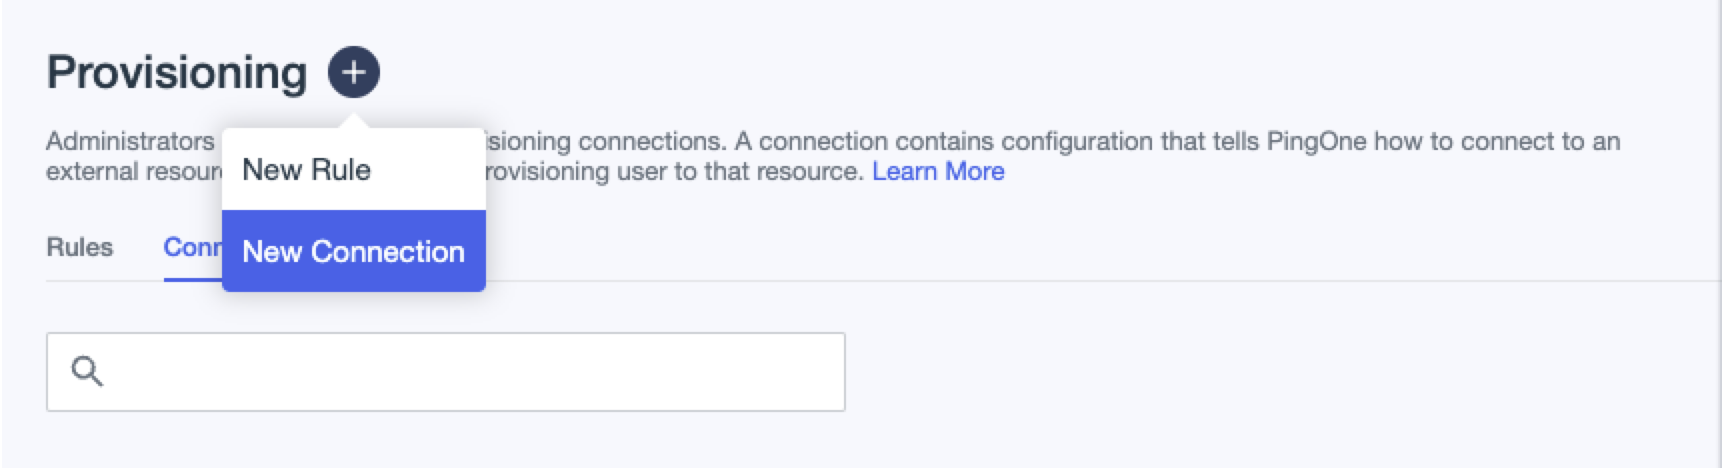
Navigate to the Integrations section and select Provisioning.
-
Click + (Plus symbol) next to Provisioning, then select New Connection.
The Create a New connection page opens.
-
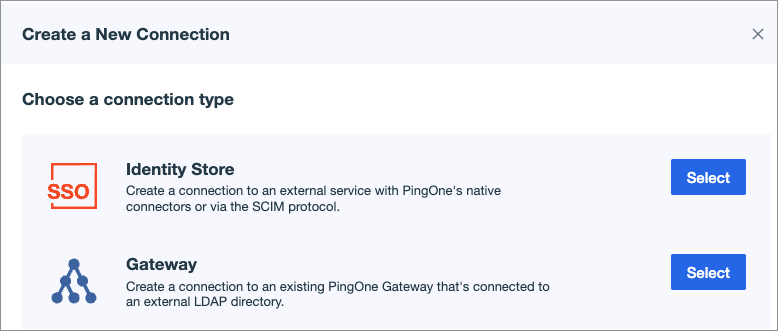
In the Identity Store, click Select.
The Create a New Connection wizard opens.
-
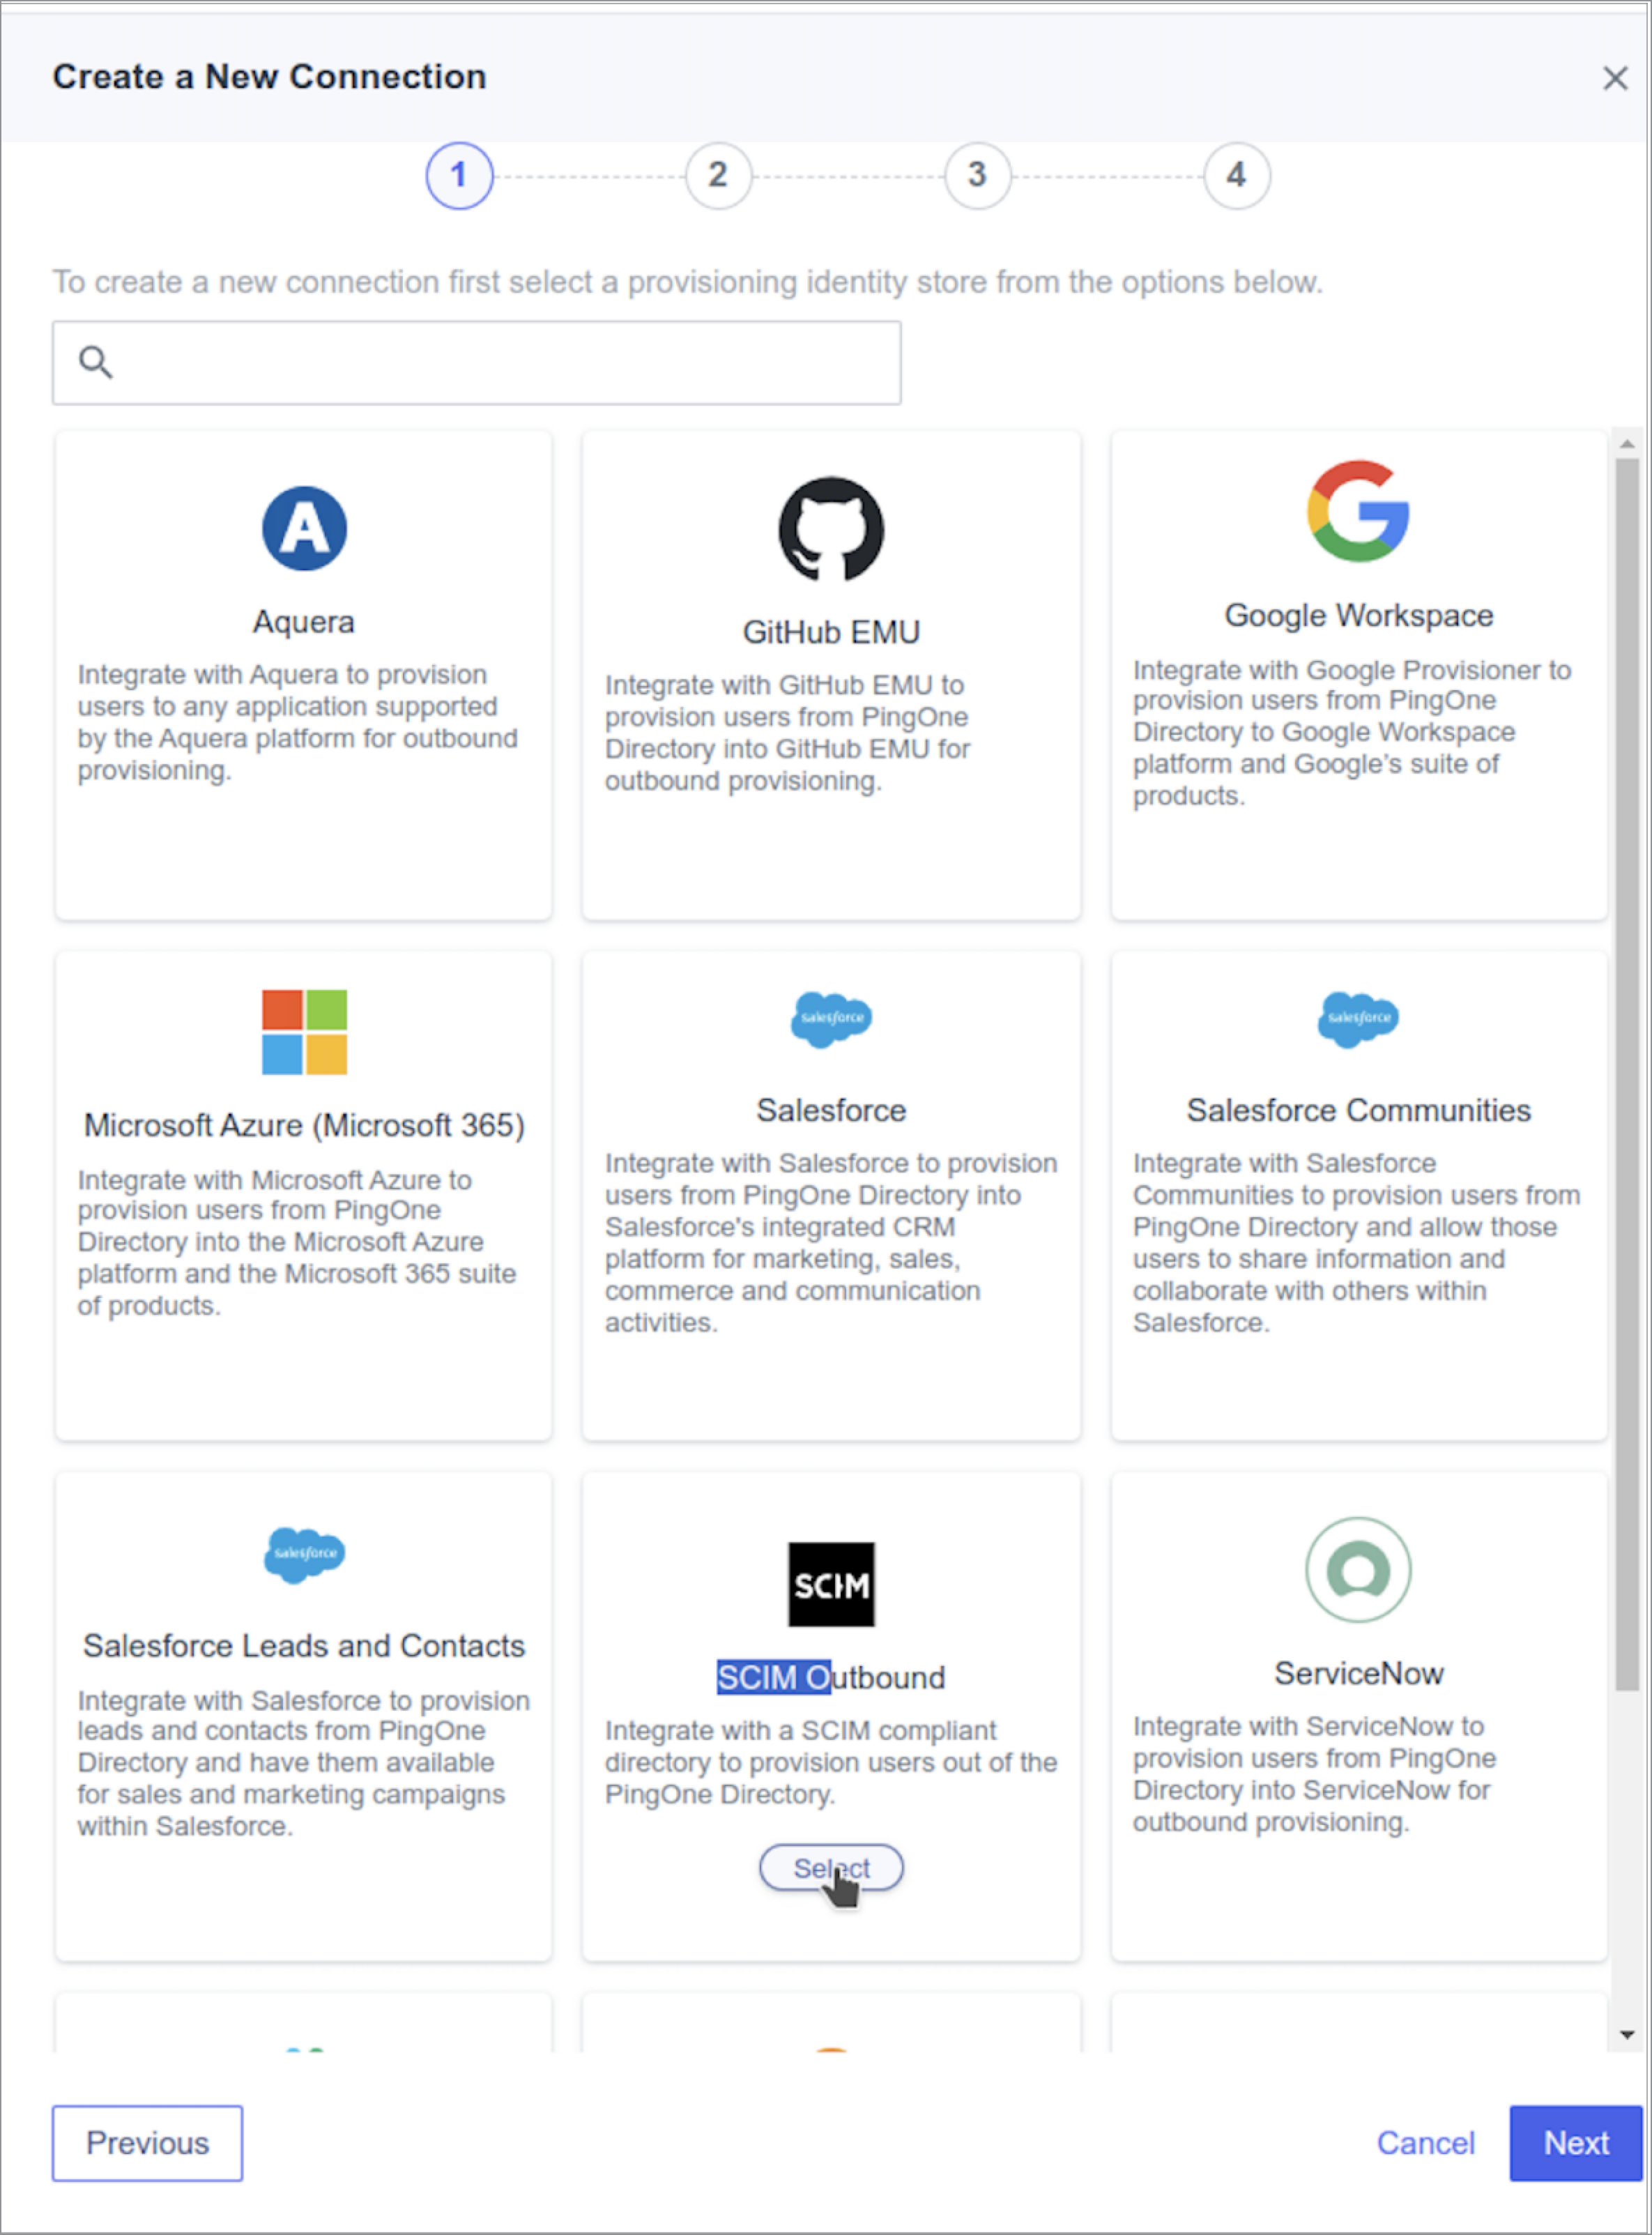
Scroll down to SCIM Outbound and click Select.
-
Click Next.

-
Provide a name and description, then click Next.
The Configure Authentication page opens.
-
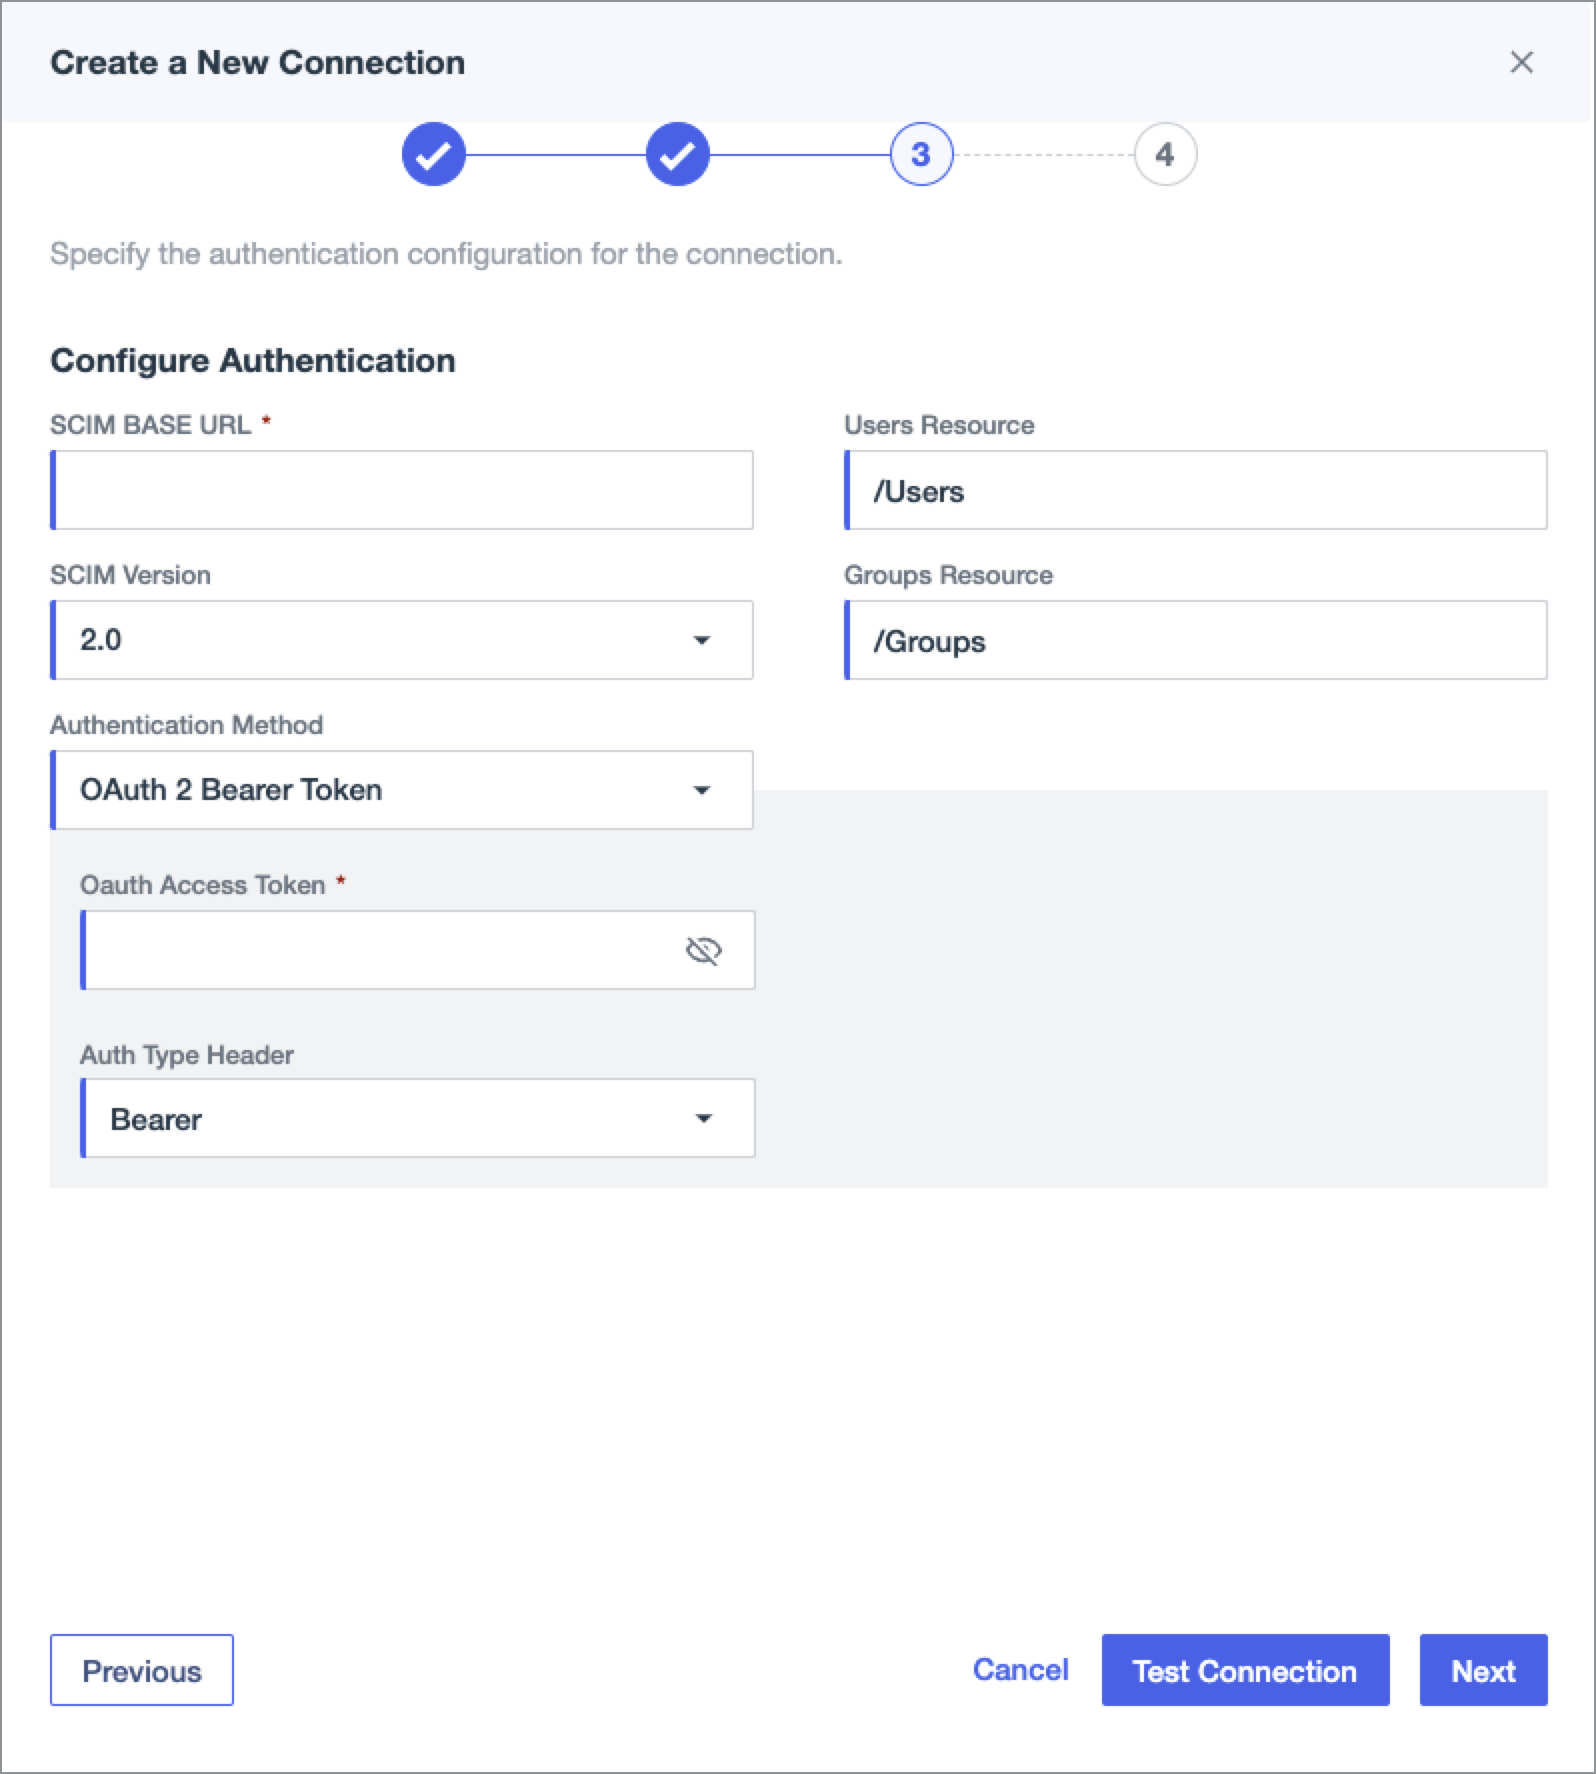
Paste the SCIM API endpoint URL in the SCIM BASE URL field.
- From the Authentication Method list, select OAuth 2 Bearer Token.
- In the Oauth Access Request field, paste the API key generated in the Lightrun Management Portal.
- From the OAuth Type Header list, select Bearer.
- Ensure that the Users Resource value is set to /Users and Groups Resource is set to /Groups.
- Click Test Connection.
-
Click Next.
 17. Click Save.
In the Activation and Summary page, turn on the connection.
-
Click Save.
Configure SCIM using OAuth authentication🔗
Set up SCIM with Lightrun🔗
- Log in to your Lightrun account.
- Navigate to Identity and Access Management > Identity Configuration > Provisioning.
- Select Use Identity Provider.
- Enable SCIM by selecting SCIM - System for Cross-Domain Identity Management.
-
Select OAuth2 as your authentication method.

The required fields are automatically populated for copying into Ping Identity.
-
Click Copy for each of the following fields to be pasted in the Provisioning settings in Ping Identity.
- Access token endpoint to Oauth Token Request.
- Authorization endpoint to Authorization Endpoint.
- ClientId to Oauth Client ID.
- ClientSecret to Oauth Client Secret.
- URL from the SCIM API endpoint to SCIM BASE URL.
-
Select Provision existing users to transfer user management to an identity provider. Ensure that these users have been pre-managed through SCIM before proceeding. For more information, see Provisioning Lightrun Groups using SCIM.
-
Select Sync SCIM groups to enable group synchronization. For more information, see Provisioning Lightrun Groups using SCIM.
The Enable groups sync dialog opens.
-
Click Enable.
- Click Save.
Proceed to set up Provisioning Lightrun in Ping Identity.
Configure the Lightrun-Ping integration Using OAuth2 in Ping Identity🔗
Sign in to Ping Identity. 2. In the Administration console, Select Environments. 3. Under Environments, select the application you created for the SSO integration.
- Navigate to the Integrations section and select Provisioning.
-
Click + (Plus symbol) next to Provisioning, then select New Connection.
The Create a New connection page opens.
-
In the Identity Store, click Select.
The Create a New Connection wizard opens.
-
Scroll down to SCIM Outbound and click Select.
-
Click Next.
-
Provide a name and descripton, then click Next.
The Configure Authentication page opens.
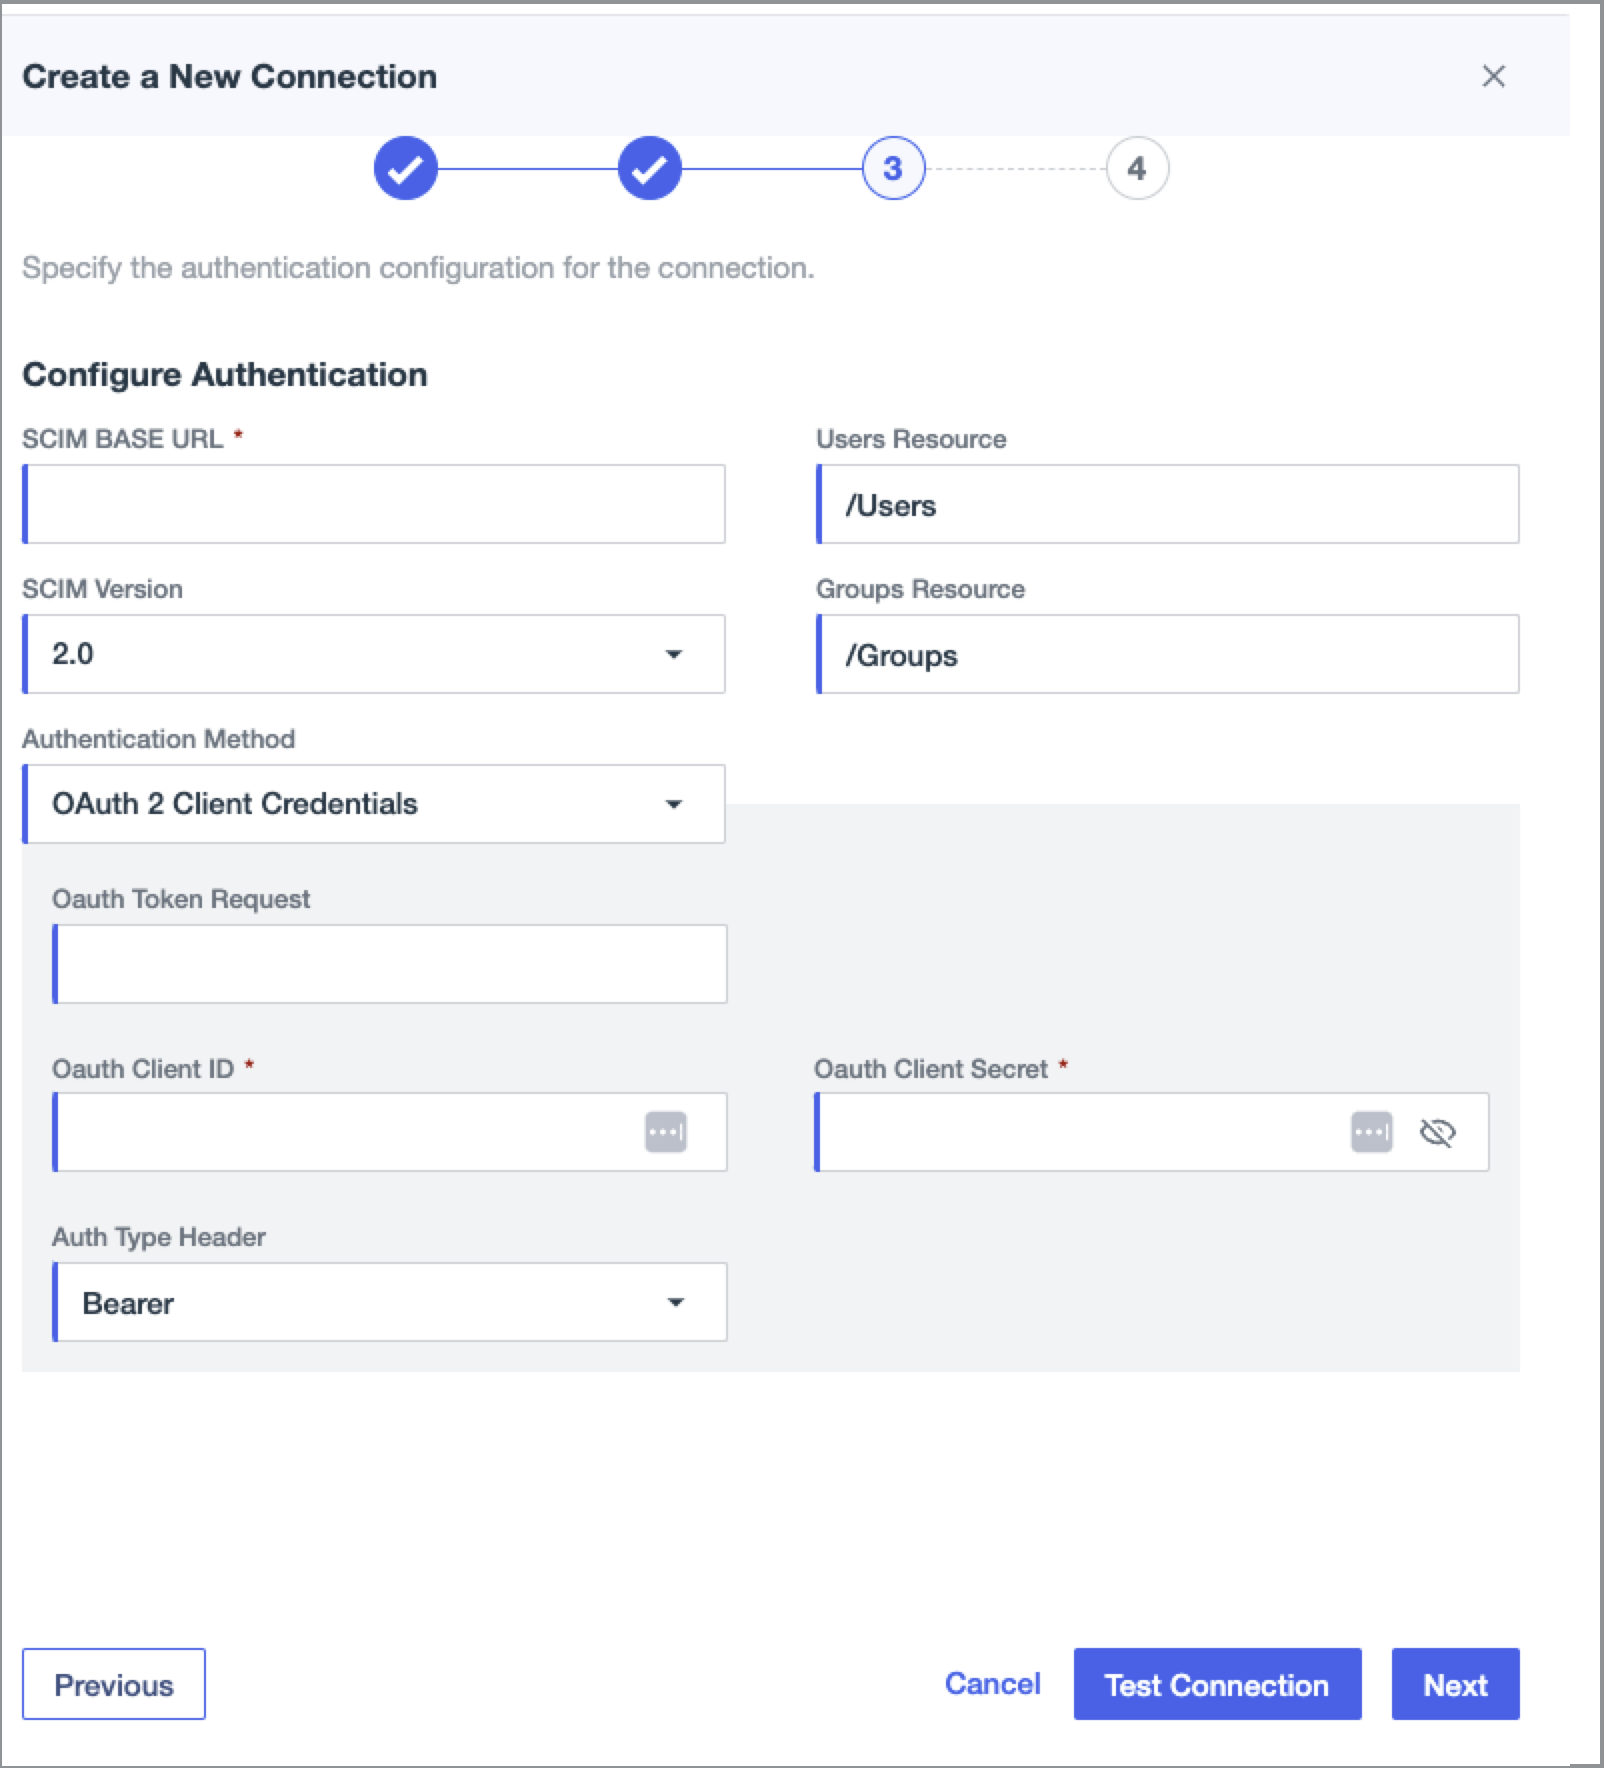
-
Paste the URL from the SCIM API endpoint into the SCIM BASE URL field.
- Ensure that the Users Resource value is set to /Users and Groups Resource is set to /Groups.
- Set Authentication Method to OAuth2 Client Credentials.
- In the Oauth Token Request field, paste the Access token endpoint URL.
- In the Oauth Client ID field, paste the ClientId value.
- In the Oauth Client Secret field, paste the ClientSecret value.
- From the Auth Type Header list, select Bearer.
- Click Test Connection.
-
Click Next.
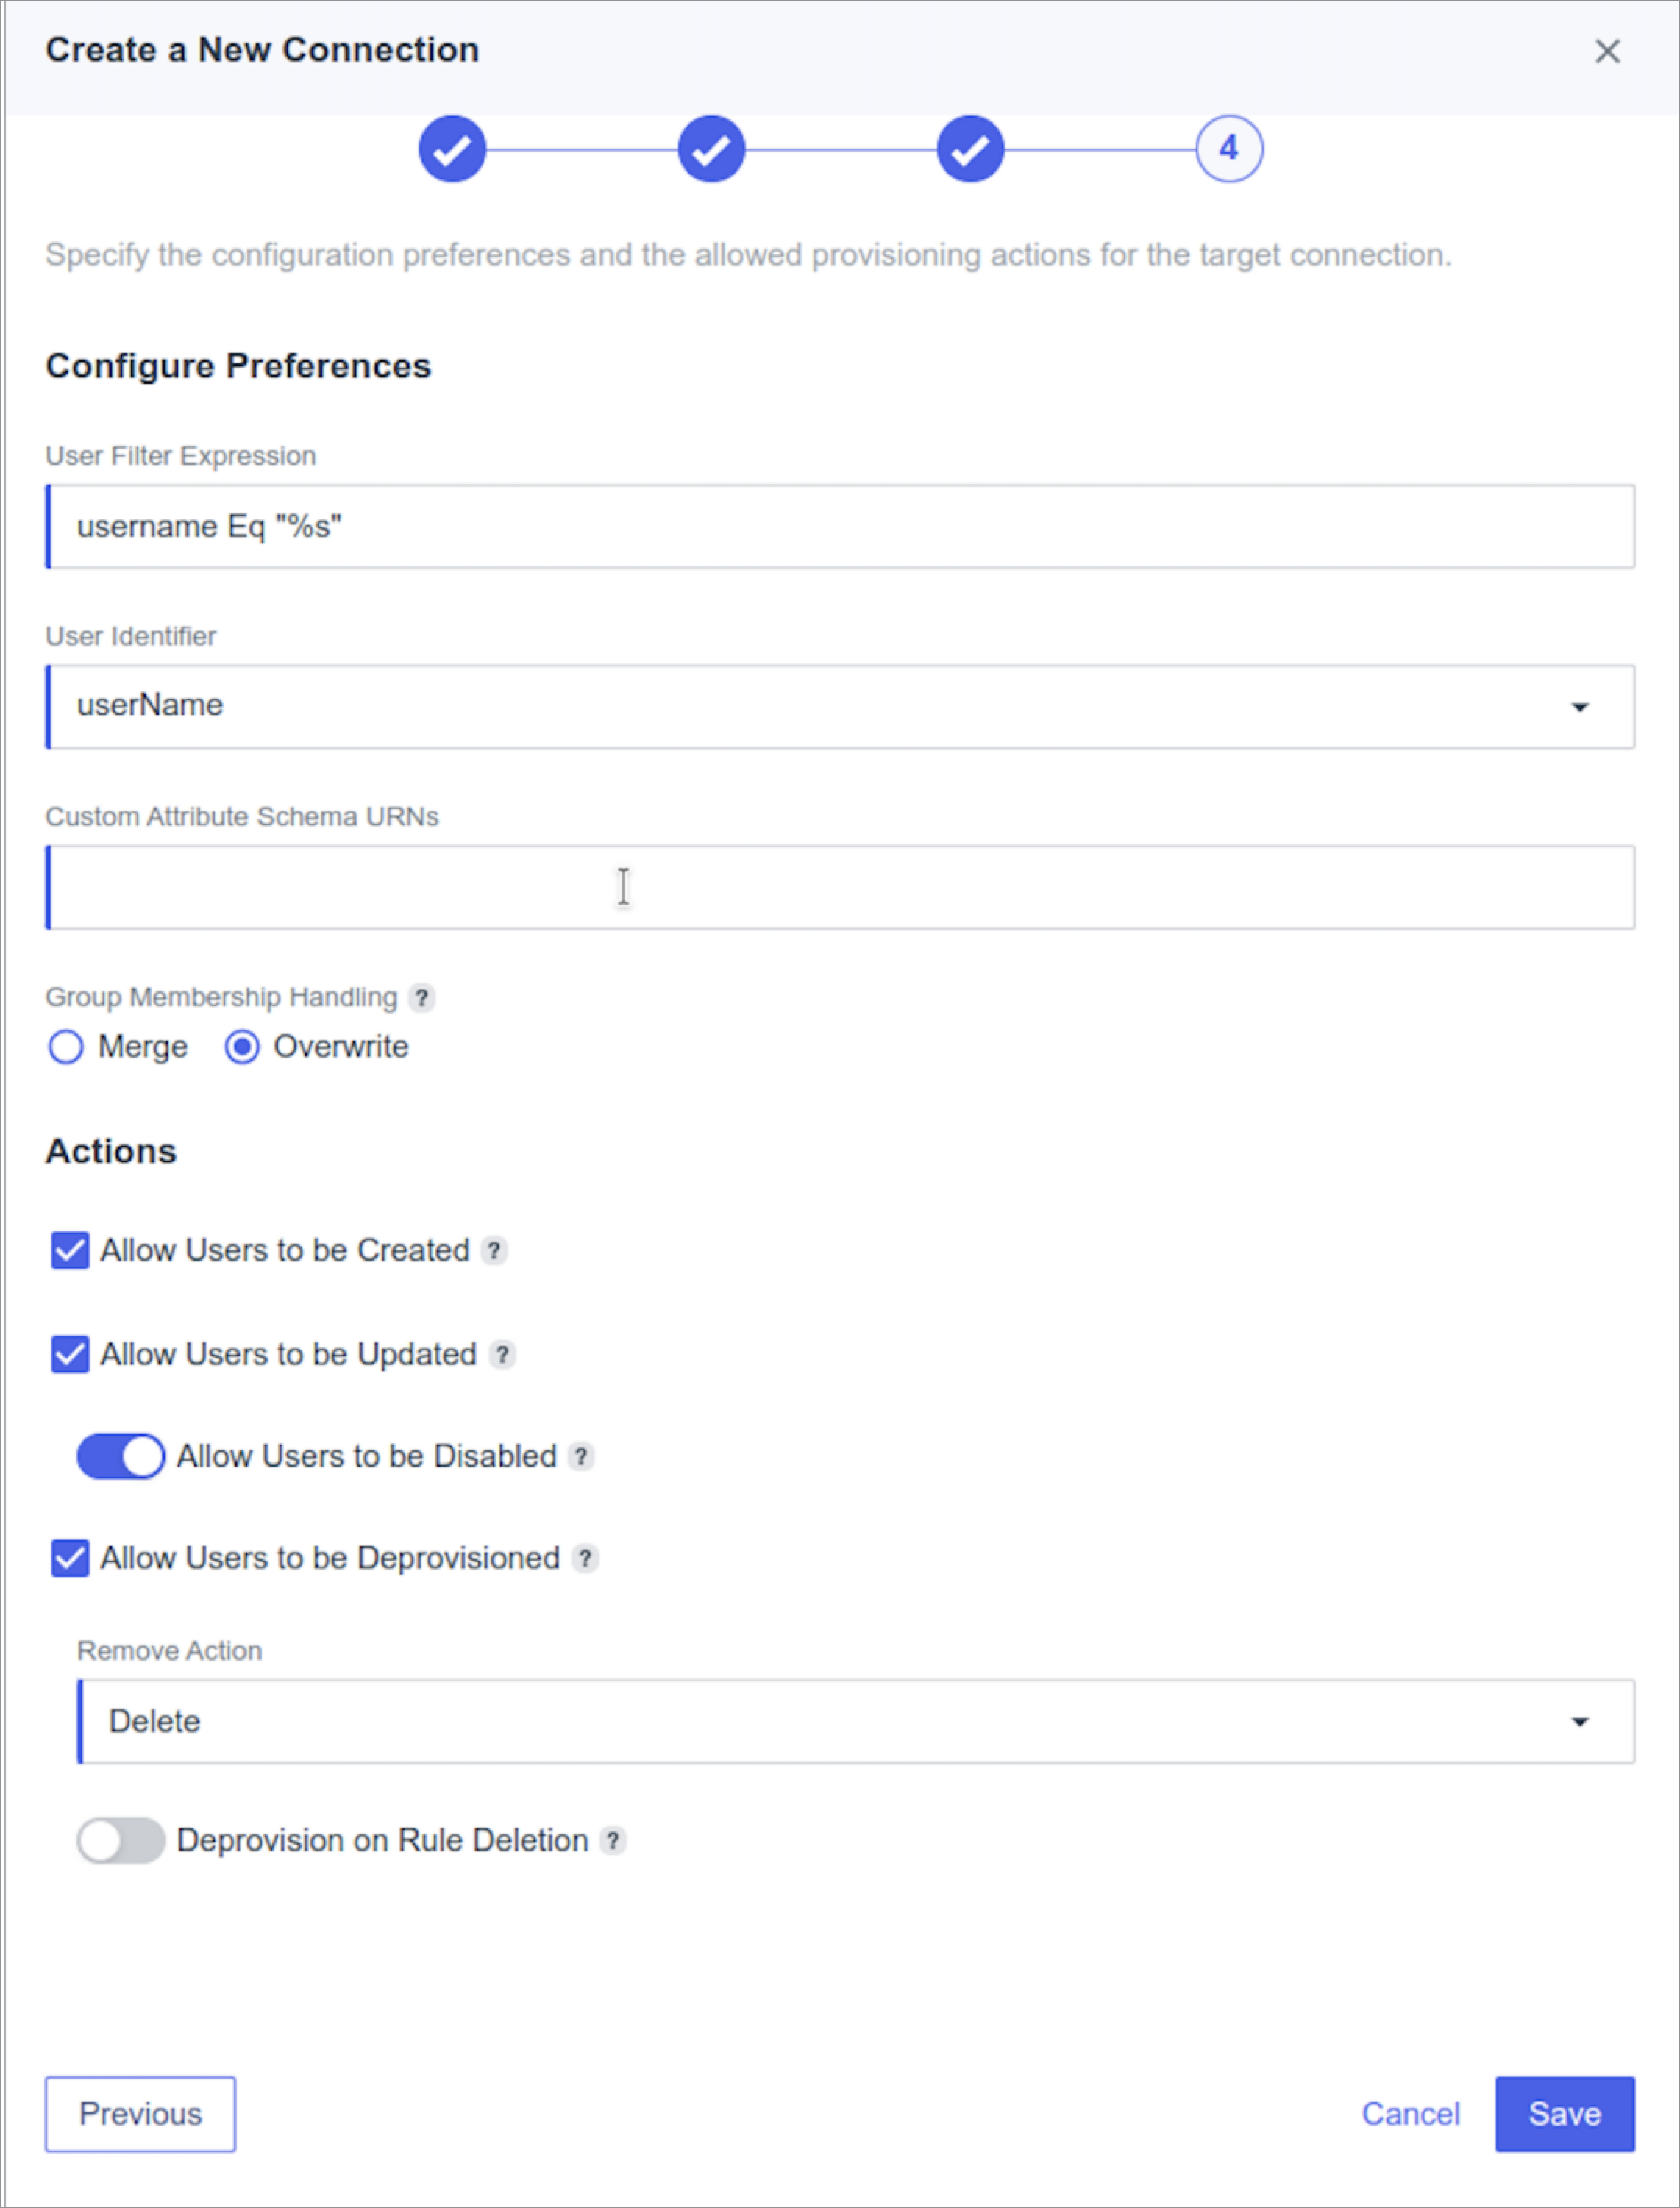
The Configure Preferences dialog opens.
-
Click Save.
In the Activation and Summary page, turn on the connection.
-
Click Save.