SCIM provisioning using Microsoft Entra ID🔗
🔒 Enterprise plan required. Contact Support for access.
Lightrun supports adding SCIM user provisioning capabilities with Microsoft Entra ID (formerly Azure Active Directory (AD)). For more information, see SCIM provisioning overview.
Using the open standard System for Cross-domain Identity Management (SCIM), Lightrun enables you to:
- Provide seamless access to Lightrun for your users using Microsoft Entra ID credentials.
- Add, remove, and assign users to Lightrun's basic or manager roles in your organization.
- As of version 1.51, provision Lightrun groups through SCIM, enabling delegation of group management to a supported identity provider (IdP). For more information, see Provision Lightrun groups using SCIM.
Prerequisites🔗
To implement SCIM provisioning in Lightrun, ensure the following prerequisites are met:
- Lightrun supports Cross-domain Identity Management (SCIM 2.0).
- Set up SSO in the Identity Configuration page located under the Identity and Access Management section. For more information, see SSO.
- Generate a dedicated API Key for SCIM integration. For more information, see Lightrun System API Keys.
- To provision SCIM groups, ensure that RBAC is enabled and that the relevant Lightrun groups are pre-configured in the identity provider before migrating group management to SCIM.
Set up SCIM in Lightrun🔗
- Log in to your Lightrun account.
-
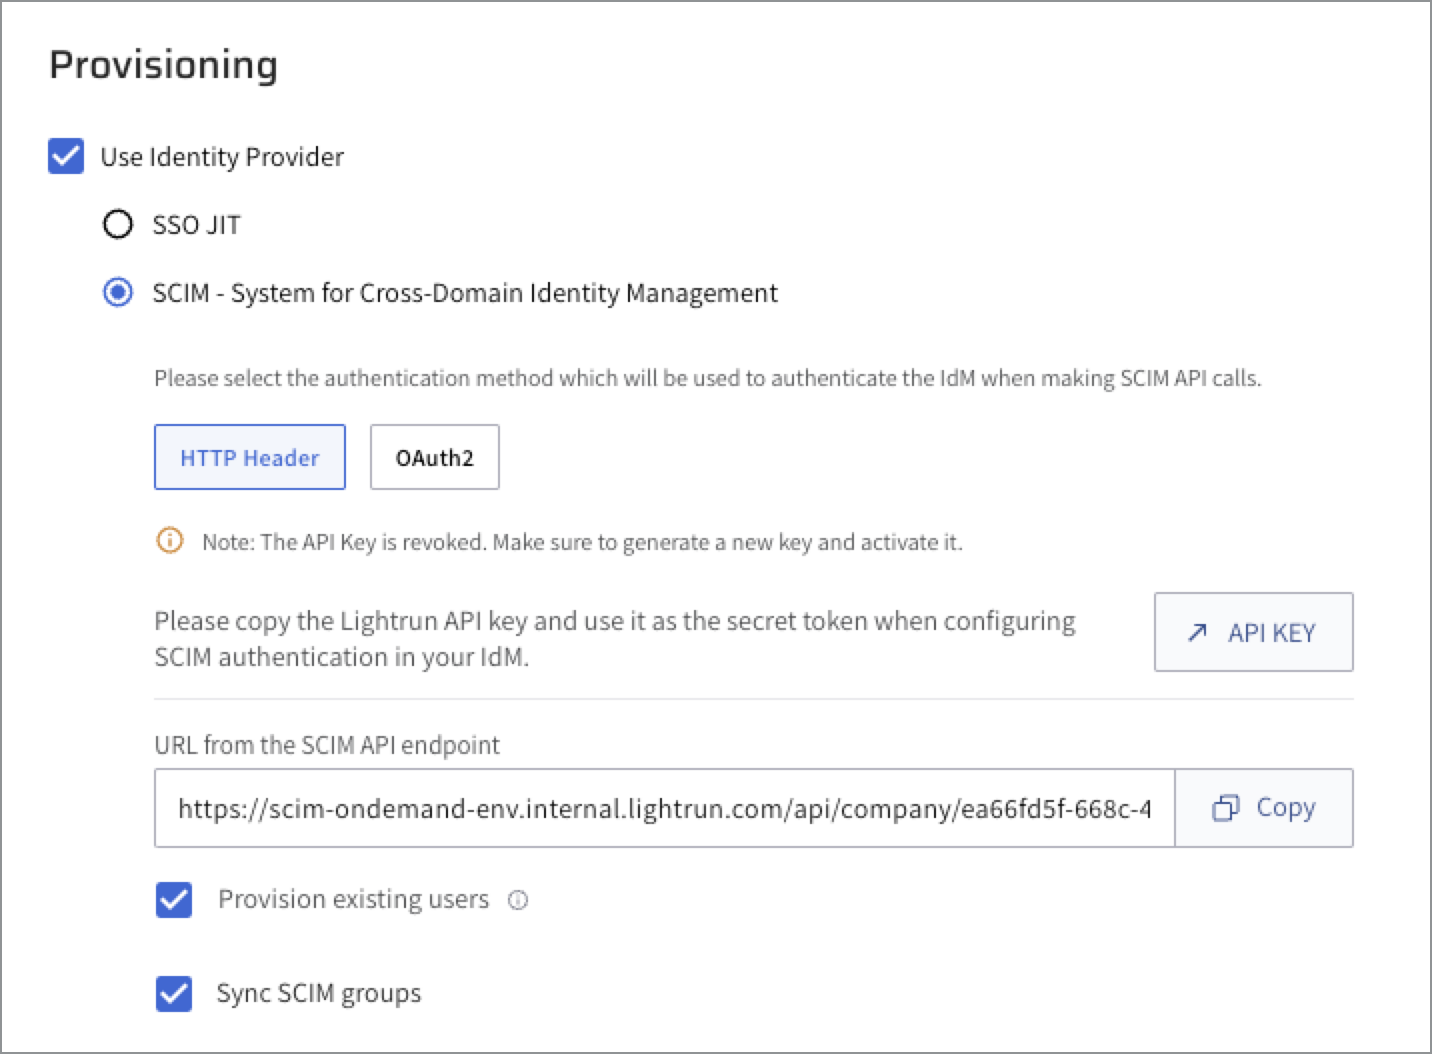
Navigate to the Identity and Access Management section > Identity Configuration > Provisioning section.
-
Select the Use Identity Provider checkbox.
- Select SCIM - System for Cross-Domain Identity Management.
- Select HTTP Header as your authentication method.
- Click Save.
- In the API KEY field, click API KEY to be routed to the API key page. You will need to generate an API Key and copy it to Microsoft Entra ID’s SCIM settings. The API Key is used for authentication and authorization between the SCIM server and the connected Lightrun Management Portal. For more information, see Lightrun API Keys.
- In the URL from the SCIM API endpoint field, click Copy and save the URL.
- Select the Provision existing users checkbox to shift the responsibility of managing your current Lightrun users to a chosen identity provider. For more information, see Provisiong Existing Lightrun Users with SCIM.
-
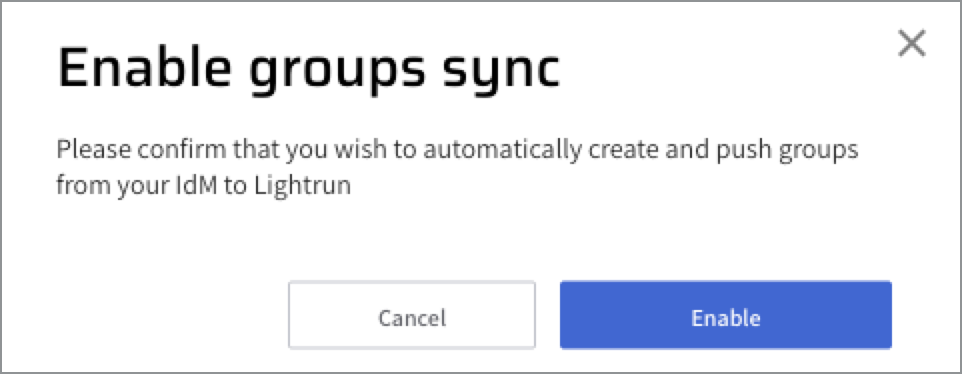
(Optional) Select the Sync SCIM groups checkbox. For more information, see Provisioning Lightrun Groups using SCIM.
The Enable groups sync dialog opens.
-
click Enable.
Proceed to configure Microsoft Entra ID as your identity provider.
Configure SCIM in Microsoft Entra ID🔗
-
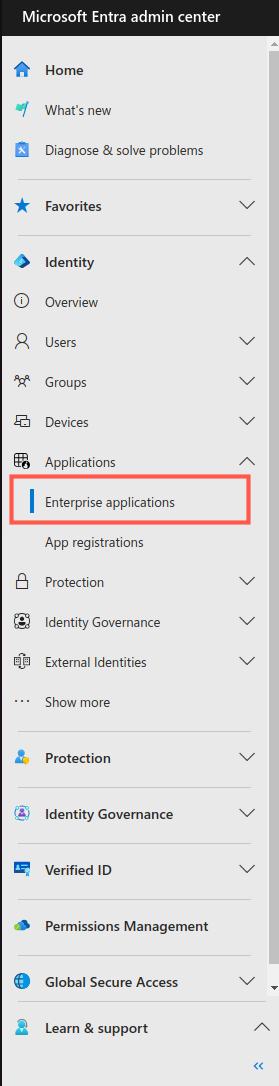
Sign in to the Microsoft Entra ID Portal, and click Enterprise applications in the sidebar.
-
Click +New Application in the top bar.

-
Click Create your own application.
The Create your own application dialog opens.
-
Provide a name for your
<App-Lightrun>and select integrate any other application you don’t find in the gallery (Non-gallery).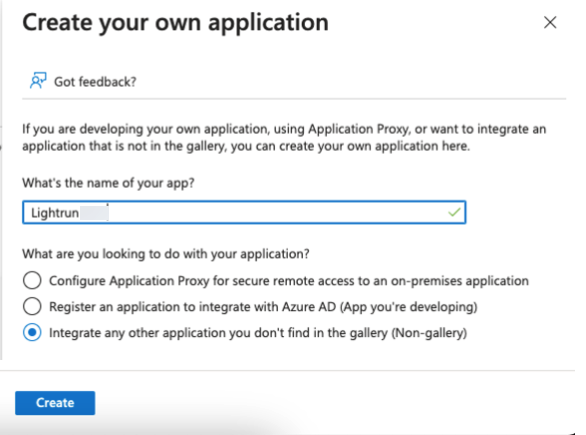
-
Click Create.
-
Click the Provisioning tab and Click Get Started.
The New provisioning configuration dialog opens.
-
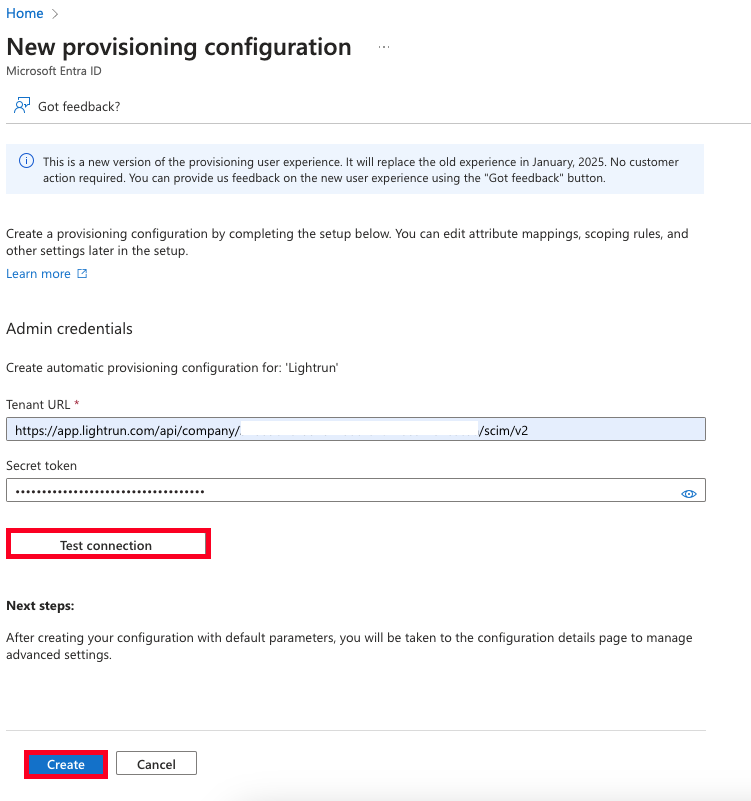
Scroll down to the Admin Credentials section, paste the fields that you saved in the SCIM page in the Lightrun Management Portal.
-
In the Tenant URL field, paste the URL you copied from Service Provider's Redirect URL from the SSO page in the Lightrun Management Portal, then add
?aadOptscim062020to the end of the URL.Example Tenant URL:
https://your-company-domain/auth/realms/lightrun/broker/ea66fd5f-668c-4e15-a676-7acc1e6487fa/endpoint?aadOptscim062020 -
In the Secret Token field, paste the API Key from the API Keys page in your Lightrun Management Portal.
- To verify the configuration, click Test Connection.
- Select Provisioning to manage user account provisioning settings for Lightrun.
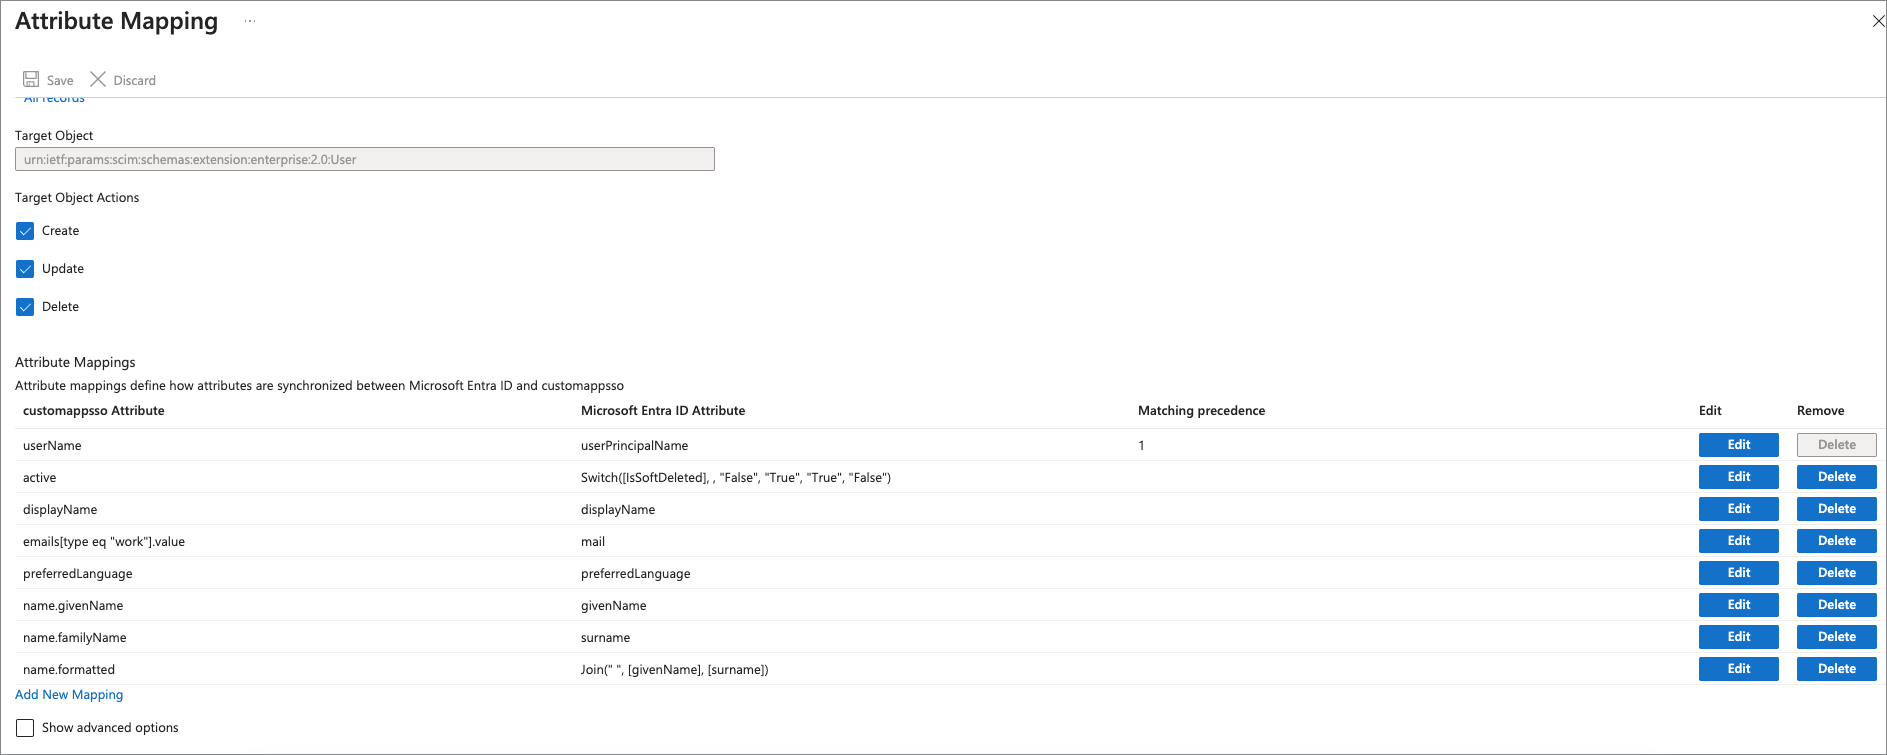
- Select a Mappings configuration to open the related Attribute Mapping dialog.
-
Validate that only the following mappings displayed in the image are listed. Any mappings that are not listed should be removed:
userNameactivedisplayNameemails[type].valueprefferedLanguagename.givenNamename.familyNamename.formatted
-
Click Save.
-
Click Users and groups.
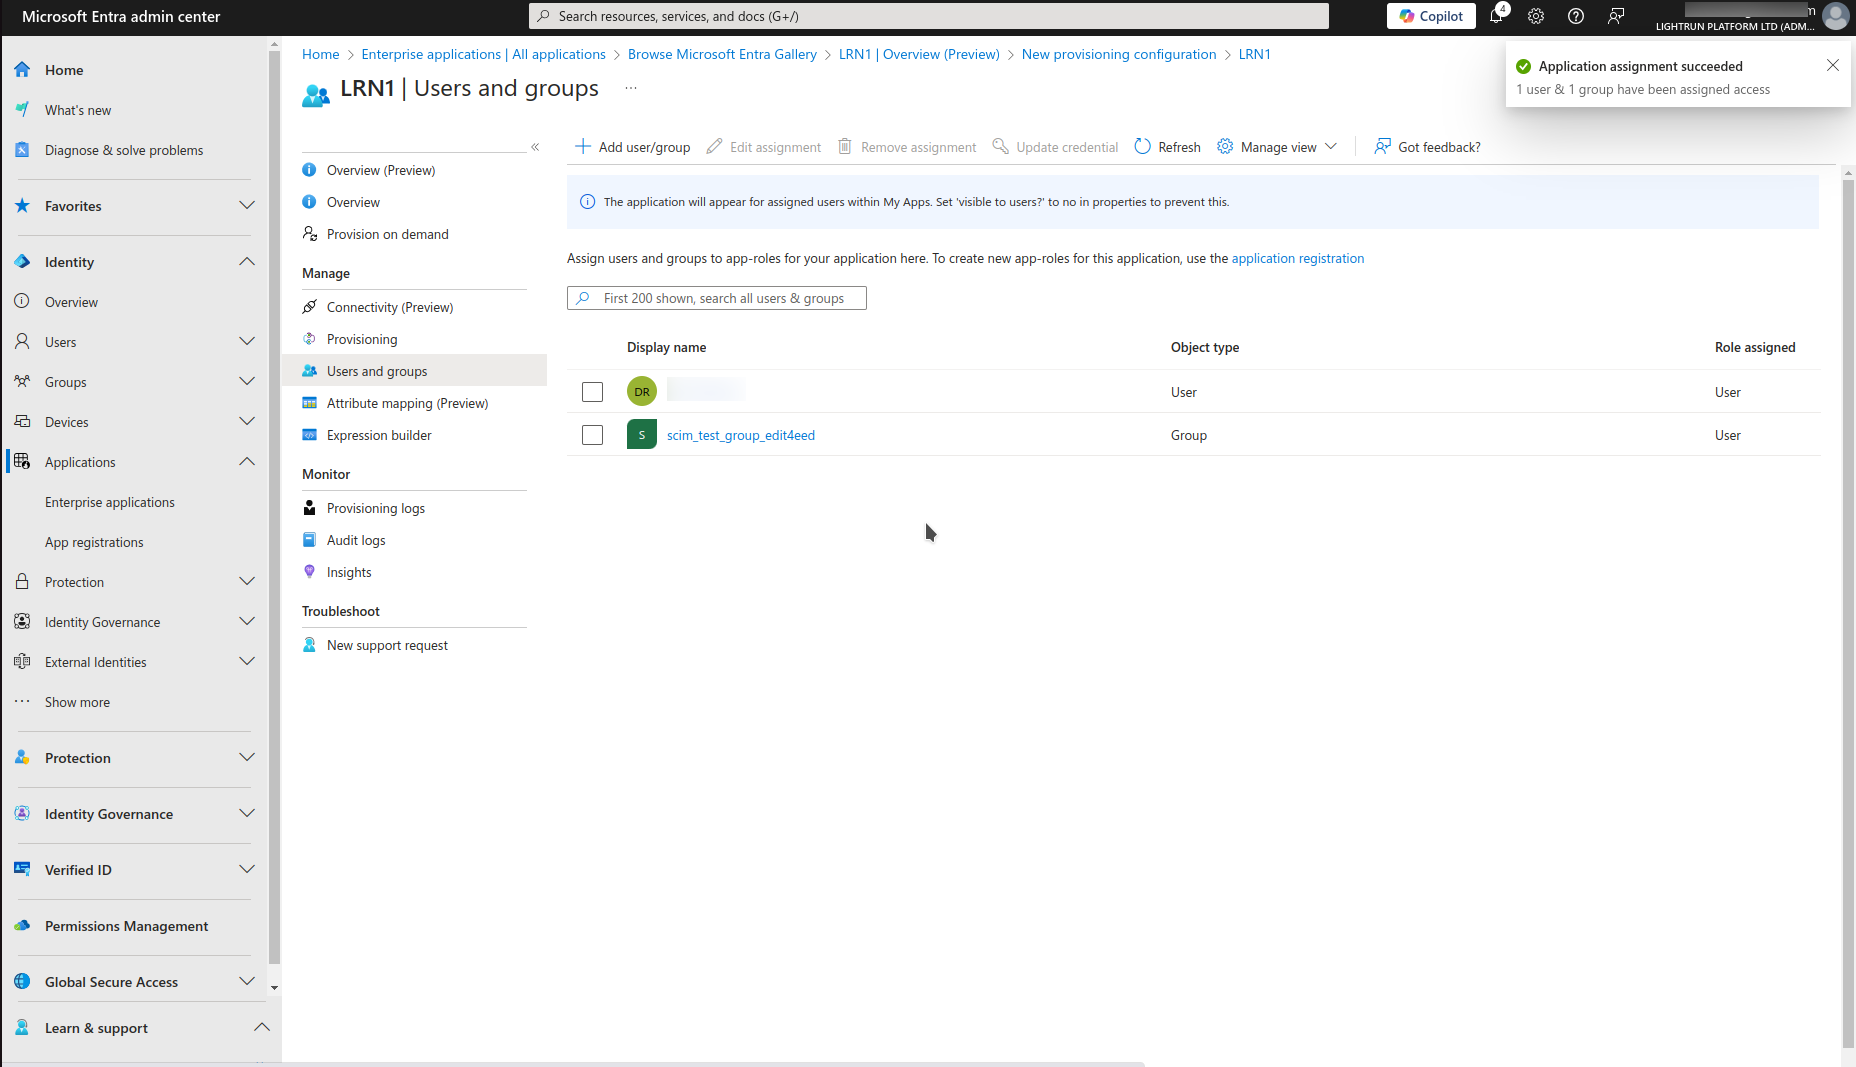
The Users and Groups dialog opens.
-
Click Add User/groups and select users and groups to be synched with Lightrun.
-
Click Assign.
- Return to Application Overview and toggle the Provisioning Status to On.
-
Click Save.
The provisioning process takes a while. Wait for the process to complete.