Manage users in RBAC environments using persona-based roles🔗
Version applicability
This topic applies managing users with persona-based roles in an RBAC environment. This mechanism, introduced in version 1.70.4, as a replacement to the role mechanism supported up to version 1.69 and including. For more information, see Lightrun persona-based roles overview.
With Lightrun Role-Based Access Control (RBAC), roles are assigned directly to users. A user’s role determines the actions they can perform in the Lightrun Management Portal, while group access membership determines which resources (such as agents and agent pools) they can access. For more information, see Lightrun persona-based access control (RBAC).
When you add a user, they are automatically assigned the Developer role and associated with the Default group, which is linked to the default agent pool. To extend user access, add them to additional groups that provide access to resources such as agents and agent pools.
Create a new user🔗
You can manually add users to your Lightrun organization, one at a time. This is suitable for scenarios where you need to add a small number of users, such as a small organization or when adding specific individuals.
- Log in to your Lightrun account.
- Click Settings in the Management Portal menu bar.
-
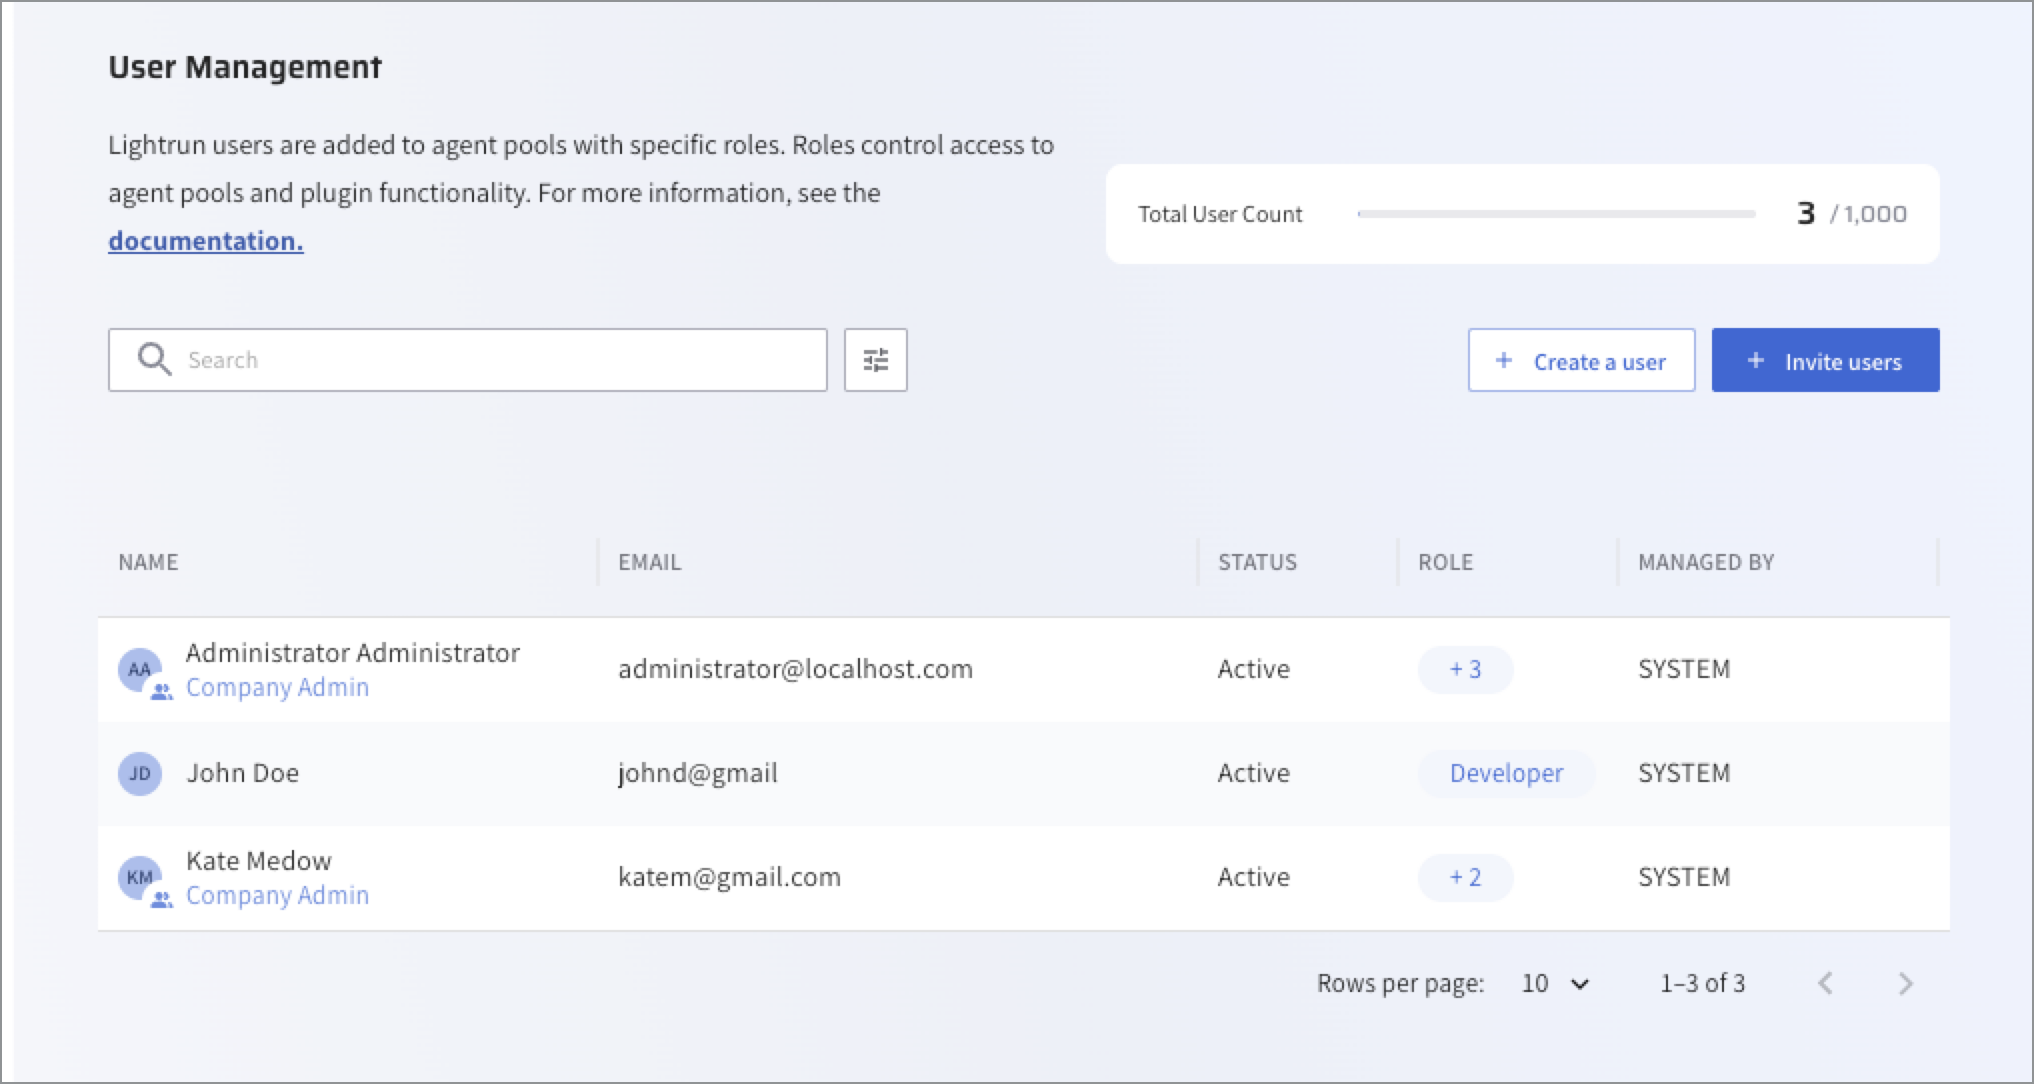
Select Users under Identity and Access Management.
The User Management page opens.
-
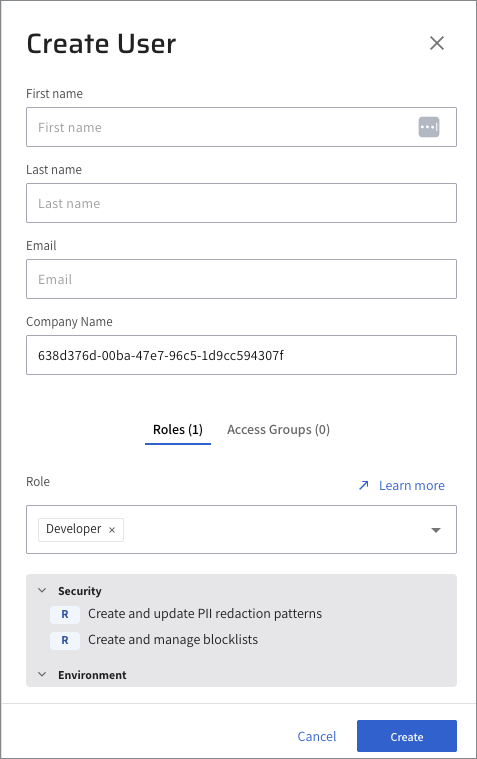
Click + Create a user.
The Create User dialog opens.
-
Enter the user-related information including Name, Last name, and Email address. New users are automatically assigned the Developer role by default. This role is not mandatory and can be replaced with another role from the list.
- Scroll through the list of permissions by category to identify the most suitable roles for your user.
- From the Roles list, select the roles to assign to the user. You can assign more than one role.
- (Optional) From the Access Groups list, select a predefined group from the dropdown menu. By default, users are automatically assigned to the Default group. For more information, see Manage groups using RBAC.
- Click Create.
- The user is added to the management user list.
- An email will be sent to the user for account verification, after which the user can log in to Lightrun.
Administer users🔗
Delegate RBAC-related tasks to users🔗
Company admins can delegate RBAC-related roles to users by assigning them Company Admin or Company Viewer roles. The permissions associated with each role determine what actions the user can perform.
| Role | Permission | Description |
|---|---|---|
Company Admin | W/R | Create and manage user groups. |
W/R | Create and manage agent pools. | |
W/R | View registered agents and their status. | |
W/R | Grant users temporary access to agent pools. | |
Company Viewer | R | Create and manage user groups. |
R | Create and manage agent pools. | |
R | View registered agents and their status. | |
R | Grant users temporary access to agent pools. |
W/R = Write/Read access, R = Read-only access
Filter users by persona roles🔗
- In the User Management page, click the Filter icon next to the Search bar.
-
From the list, select the required persona role.
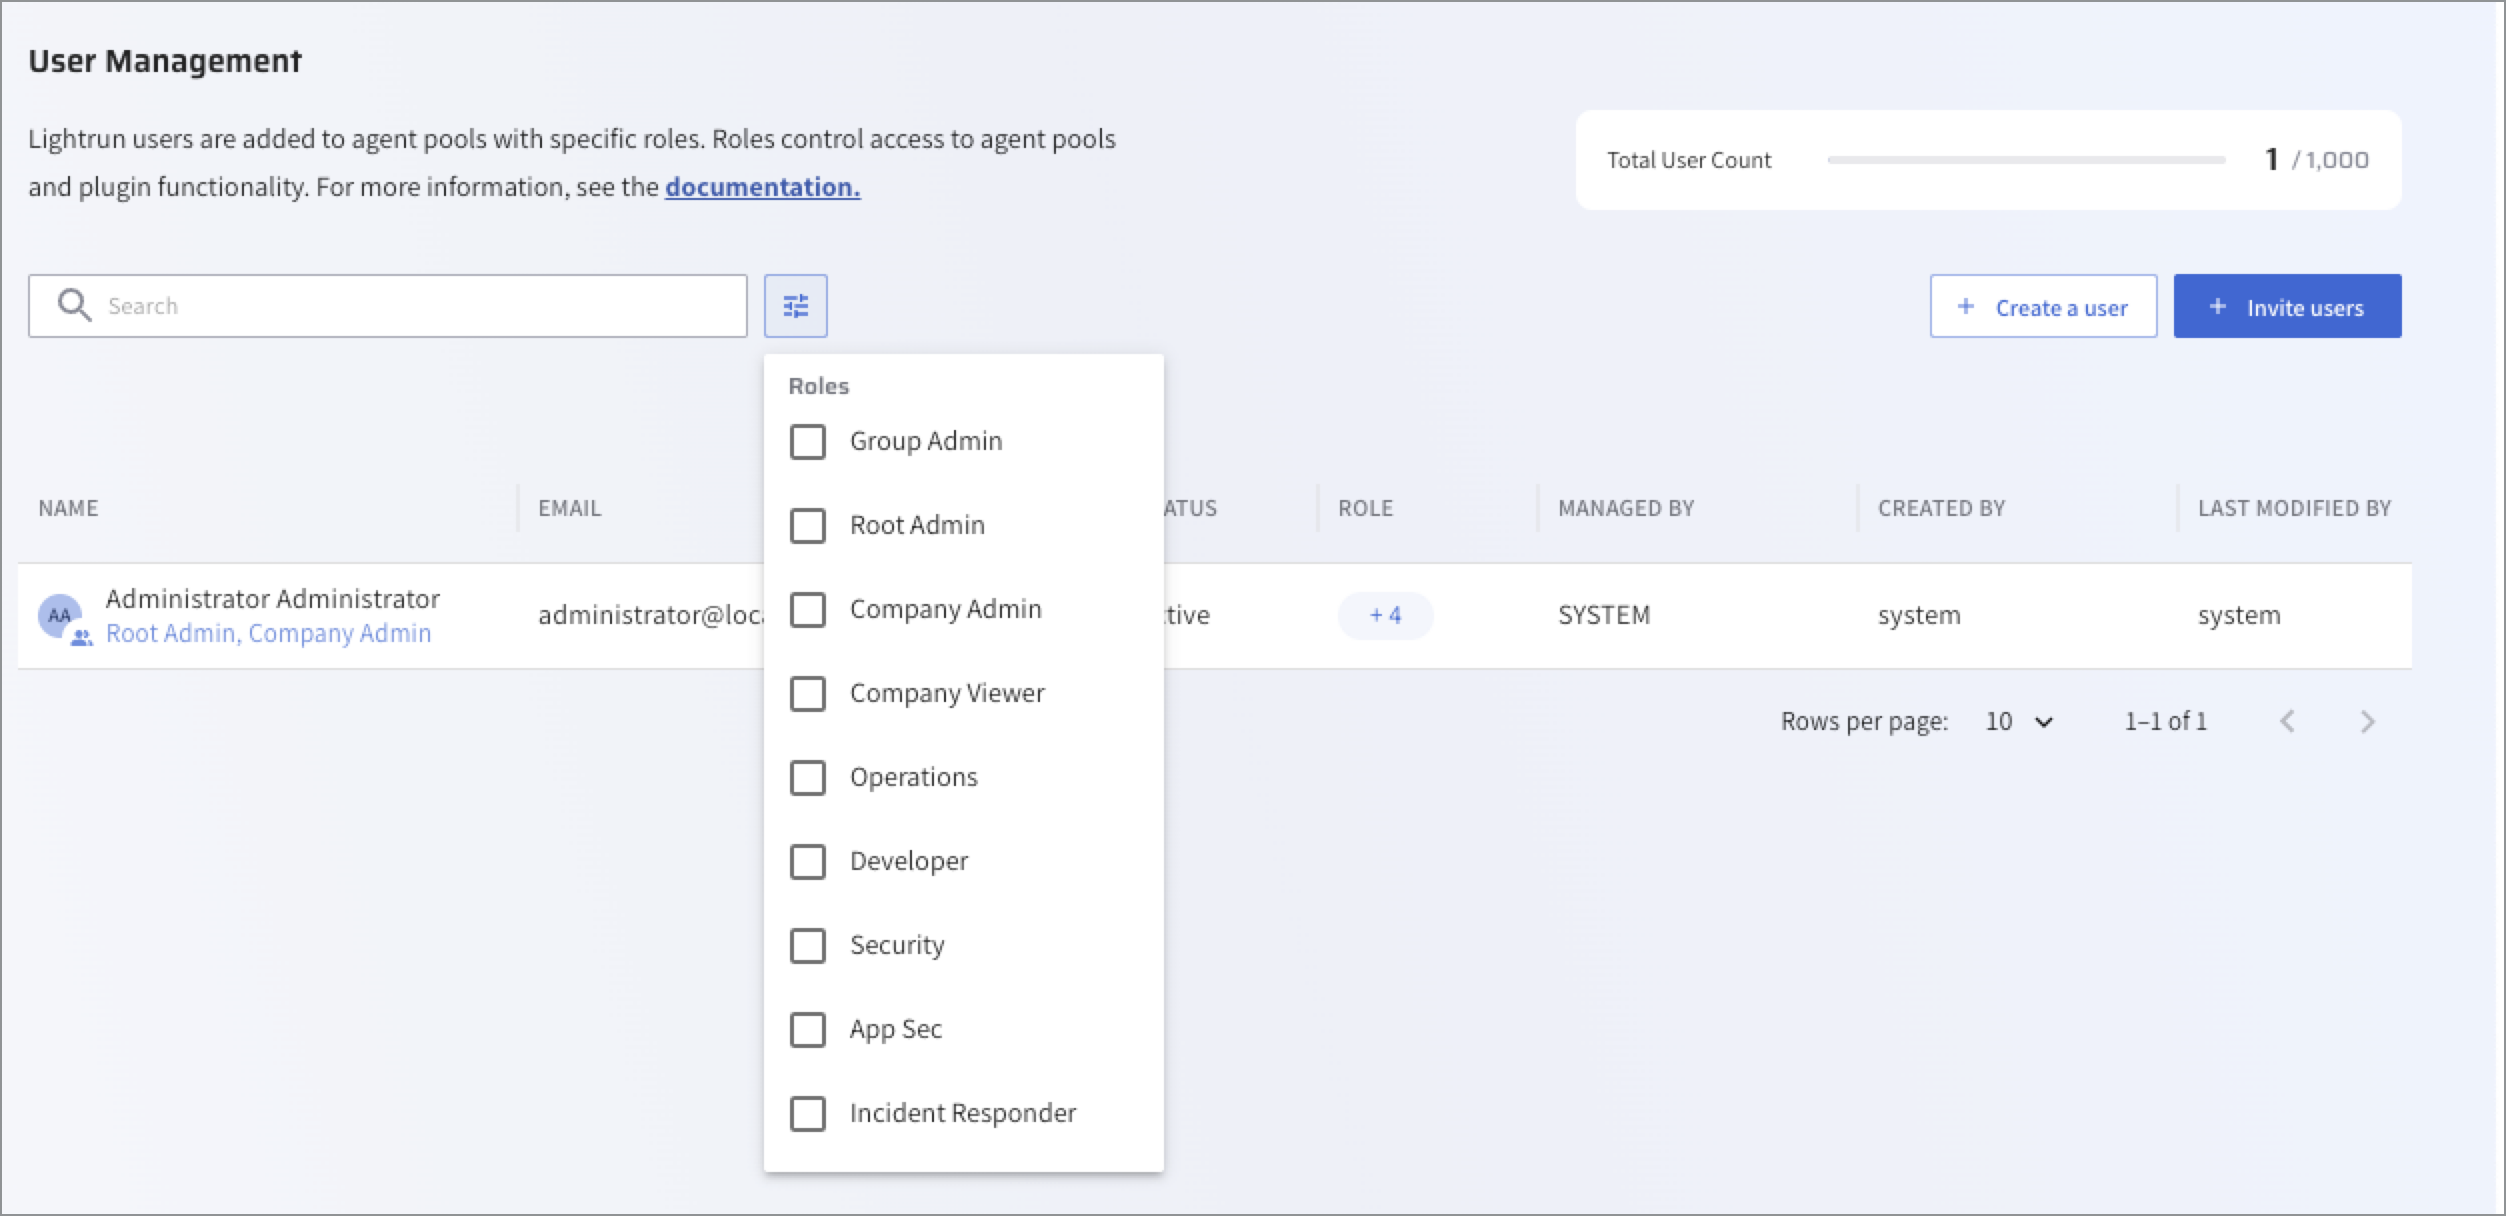
The filtered results are displayed.
View user status🔗
In the User Management page, the following user status indicators are displayed to indicate whether users are registered:
| Status | Description |
|---|---|
Active | The user is active and has completed the activation process. |
Deactivated | The user is disabled. The Active toggle in the User Details page is turned off. |
Pending | The user account exists but has not completed the activation process. |
Edit a user🔗
-
In the User Management page, click the required user in the user list.
The User details pane opens.
-
Apply the changes and click Save.
Delete a user🔗
-
In the User Management page, click the required user in the user list.
The User details pane opens.
-
Click the Active toggle to deactivate the user, then click Save.
-
Access the User details pane again.
The Delete User option is active and appears in red.
-
Click Delete User.
- Click Save.