Manage RBAC access groups with persona-based roles🔗
Version applicability
This topic applies to managing groups with persona-based roles in an RBAC environment, introduced in version 1.70.4 as a replacement to the role mechanism supported up to version 1.69 and including. For more information, see Lightrun persona-based roles overview.
Groups are a fundamental part of Role-Based Access Control (RBAC), enabling administrators to efficiently manage access to agent and agent pools. In Lightrun, an access group represents a collection of agent pools and users who share specific access to resources. When you create a Lightrun account for your organization, a default access group is created, comprising all users within your organization.
Dedicated roles for managing groups🔗
Company admins can delegate group-related roles to users by assigning them Company Admin or Group Admin roles. The permissions associated with each role are as follows:
| Role | Permission | Description |
|---|---|---|
Company Admin | W/R | Create and manage user groups. |
| W/R | Create and manage agent pools. | |
| W/R | View registered agents and their status. | |
| W/R | Grant users temporary access to agent pools. | |
Group Admin | W/R | Create and manage user groups. |
| W/R | Create and manage agent pools. | |
| W/R | View registered agents and their status. | |
| W/R | Grant users temporary access to agent pools. |
W/R = Write/Read access, R = Read-only access
In addition to roles, a permission can also be assigned at the group level. The Allows members to ignore quota permission, when enabled, is automatically inherited by all users who belong to the group.
Create an access group🔗
- Log in to your Lightrun account.
- Click Settings in the Management Portal menu bar.
-
Select Access Groups under Identity and Access Management.
The Access Groups page opens.
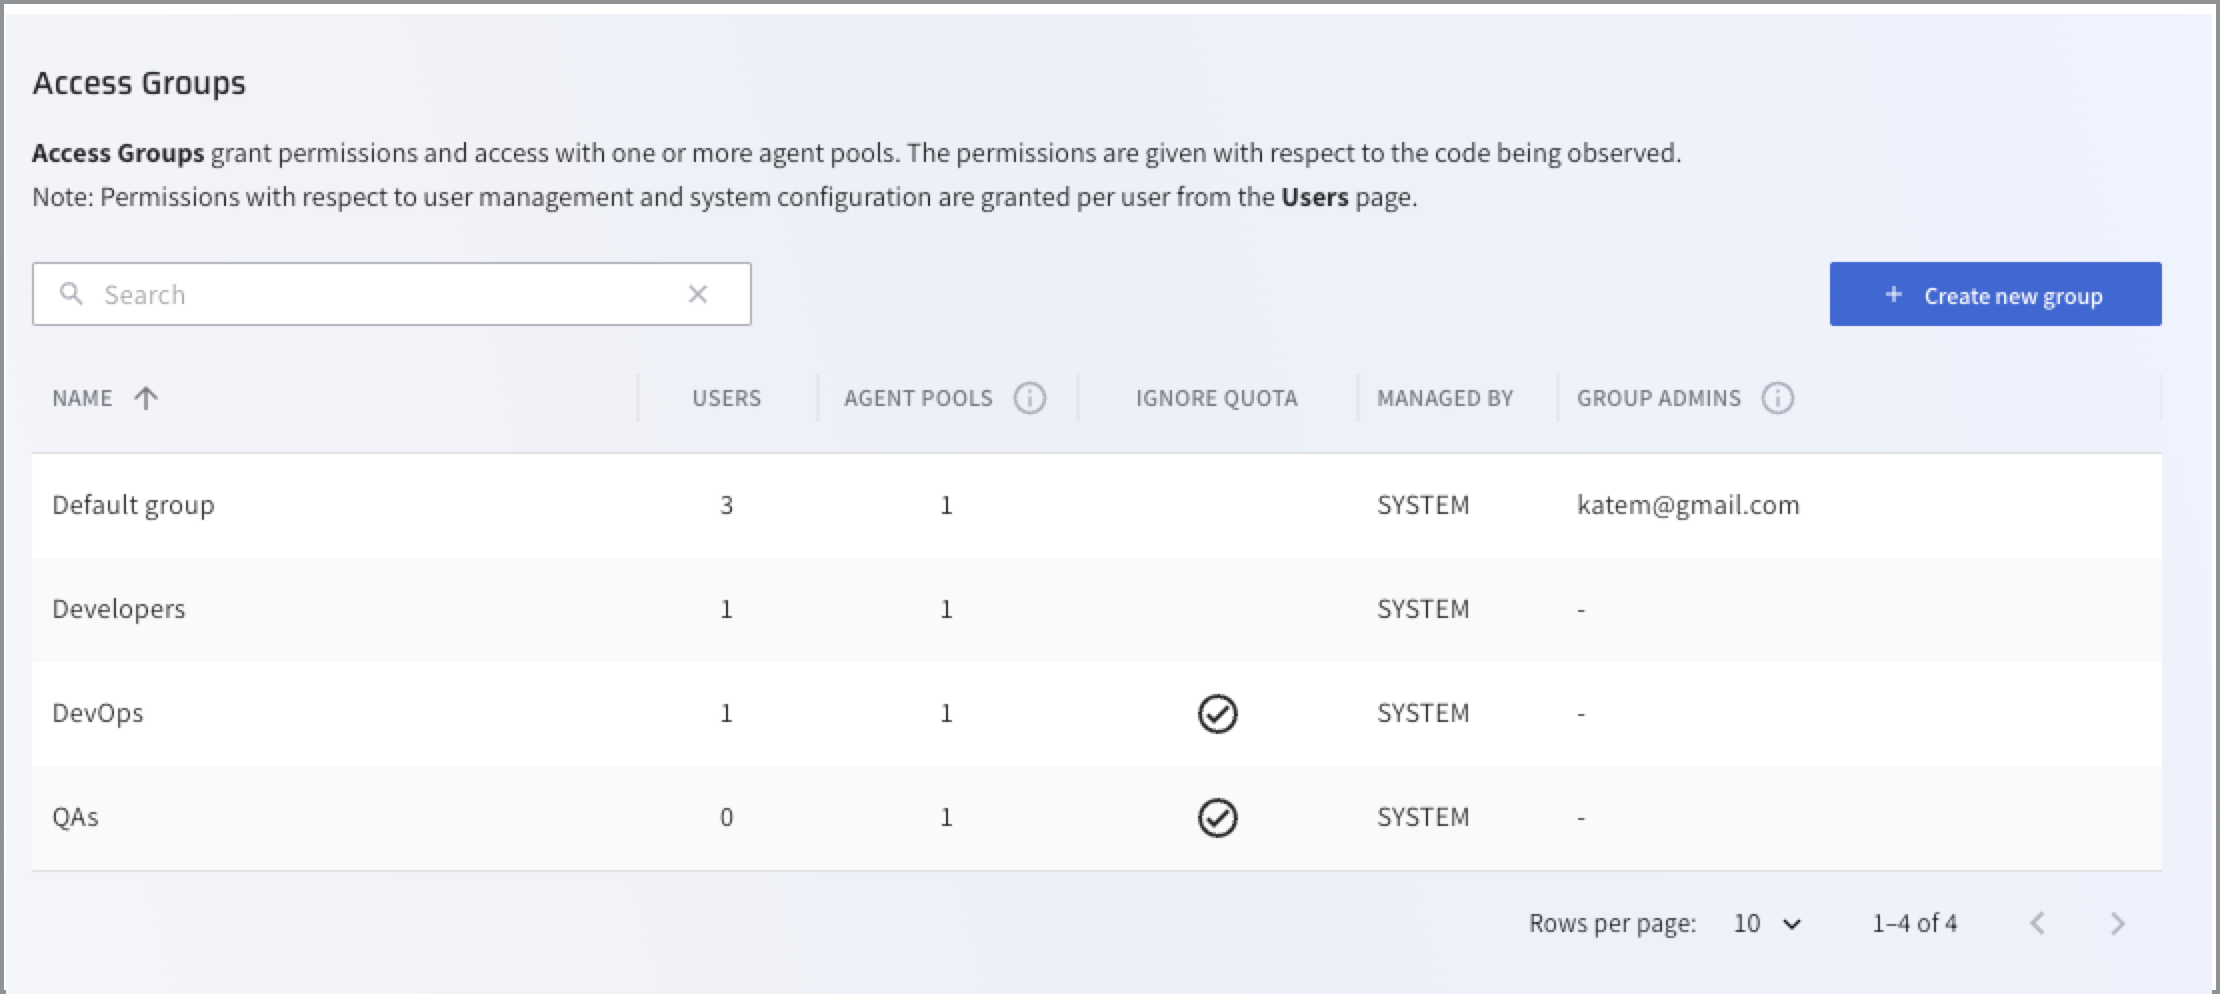
-
Click + Create new group.
The Create group dialog opens.
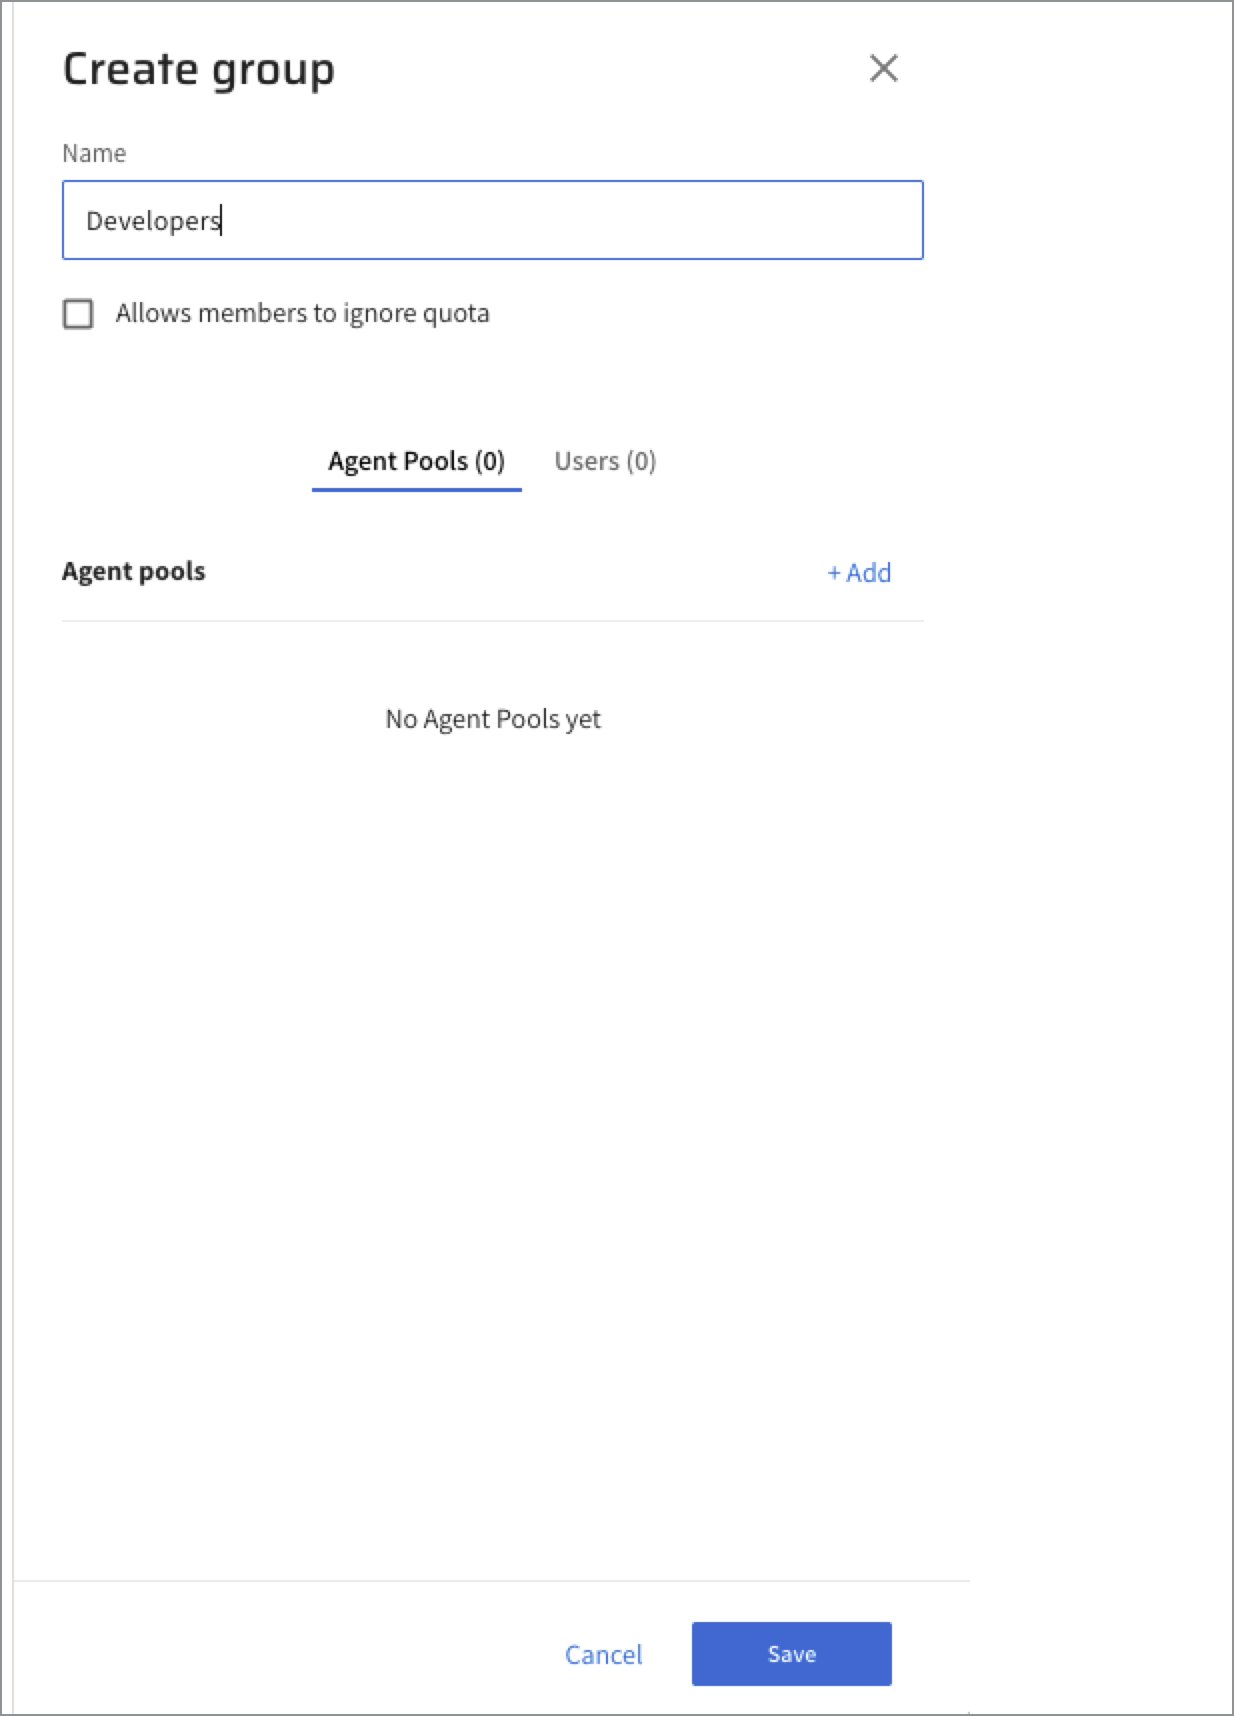
-
Enter a unique name for the new group.
- [Optional] Select the Allows members to ignore quota checkbox to grant all members of the group this permission.
-
In the Agent Pools tab, click + Add.
The Add Agent Pool dialog opens.
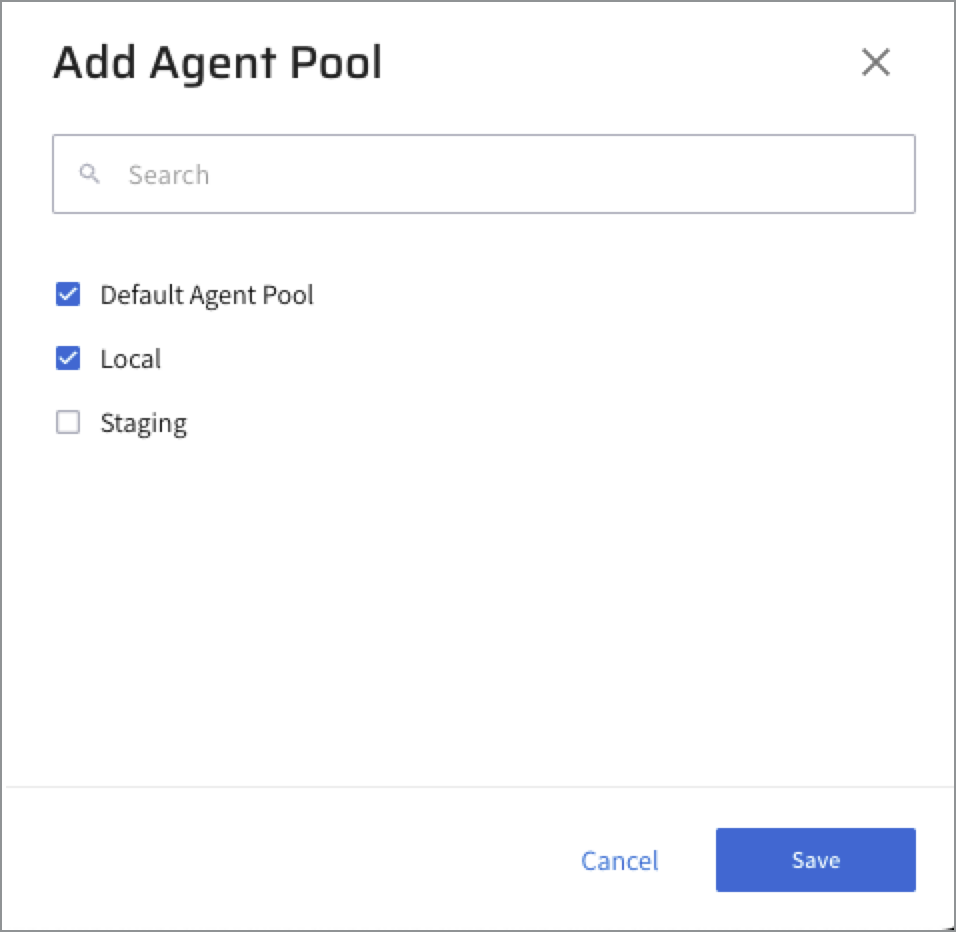
-
Select the agent pools associated with the group and click Save.
-
In the Users tab, click + Add.
The Add User dialog opens.
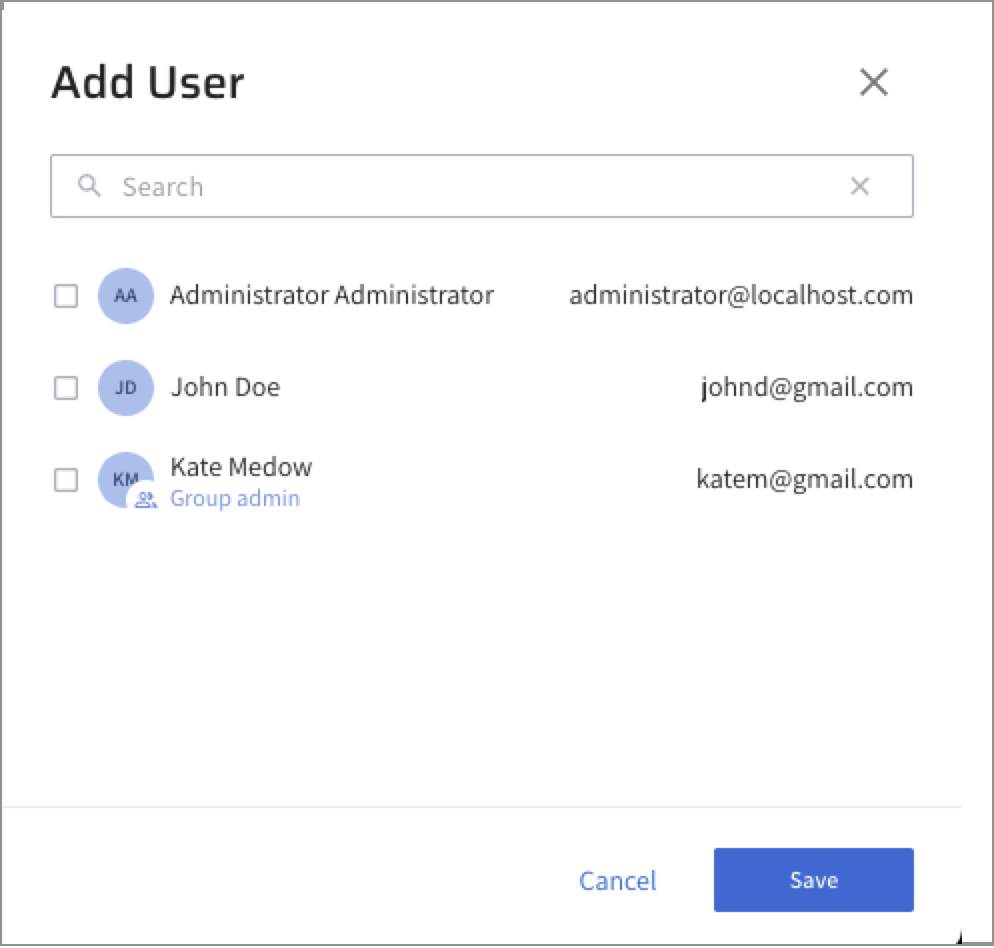
-
Select the users to be associated with the group and click Save.
The newly created access group is added to the list.
Administer access groups🔗
Edit a group🔗
- Log in to your Lightrun account.
- Click Settings in the Management Portal menu bar.
- Select Access Groups under Identity and Access Management.
- Click the access group you want to edit to open the Access Group dialog.
- Modify the group settings as required.
- Click Save.
Manage access groups with Lightrun REST API🔗
Starting from version 1.55, you can run group-related operations using the Lightrun REST API. For more information, see Manage Groups API.