Configuring PII Redaction in Lightrun🔗
Required Roles
| Up to version 1.69 inclusive | From version 1.70.4 and higher |
|---|---|
ROLE_MANAGER | Company Admin |
In the process of setting up PII Redaction, begin by configuring templates that contain patterns serving as rules to specify which data should undergo redaction. For an overview on PII Redaction in Lightrun, see PII Redaction in Lightrun. Note that if you are working with multiple Agent Pools, see Manage PII Redaction Templates for Agent Pools.
The following table highlights the various data redaction methods supported by Lightrun, assisting you in choosing that most suitable approach for your requirements. For detailed insights into creating redaction patterns, see PII Redaction Best Practices.
| Redaction Type | Description | Example |
|---|---|---|
| Variable name | Data is redacted based on a variable name. Any variables which match the supplied pattern will be excluded from the data Lightrun captures. | Adding a pattern apiToken will prevent Lightrun from logging data from any variable which includes apiToken in the variable name. So variables my_apiToken, theOtherapiToken, and someapiTokenVariable will all be redacted. |
| Variable value | Data is redacted based on a variable value. The regex pattern is matched to a value, not a variable name. | The regex pattern \b5[1-5]\d\d([\-\]?)(?:\d{4}\1){2}\d{4}\b will redact all Mastercard debit or credit card data from Lightrun. |
Lightrun supports creating PII redaction using one of the following methods:
- Configure custom PII redaction patterns: Depending on your Lightrun subscription, you can apply a single pattern to the default agent pool or create templates for multi-agent environments.
- Configure PII Redaction for a single Agent Pool environment: To configure PII redaction in a single-agent pool environment, see Configure PII Redaction.
- Configure PII Redaction templates for multiple Agent Pools (RBAC required): You have the flexibility to either apply a single template across all agent pools or create specific patterns for individual agent pools. For environments with multiple agent pools, see Manage PII Redaction templates for Agent Pools.
- Configure PII Redaction pattern using predefined patterns from a library: You can leverage predefined patterns from a library to configure PII redaction. This approach simplifies the process by providing a set of established patterns that cover common types of PII, ensuring a convenient and standardized way to handle sensitive information. This feature is supported from Lightrun version 1.22.
Note
PII redaction is not supported on the following platforms:
- Python version 3.8 and lower
- Node version 10.0.0 on ARM
Configure a custom PII redaction pattern🔗
- Log in to your Lightrun account.
- Click Settings on the top right hand side of your screen to navigate to the Settings dashboard.
-
Select PII Redaction under Security in the Settings dashboard sidebar.
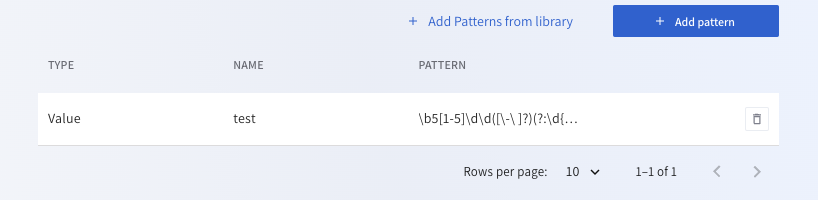
The Data Redaction window opens with a table of existing patterns.
-
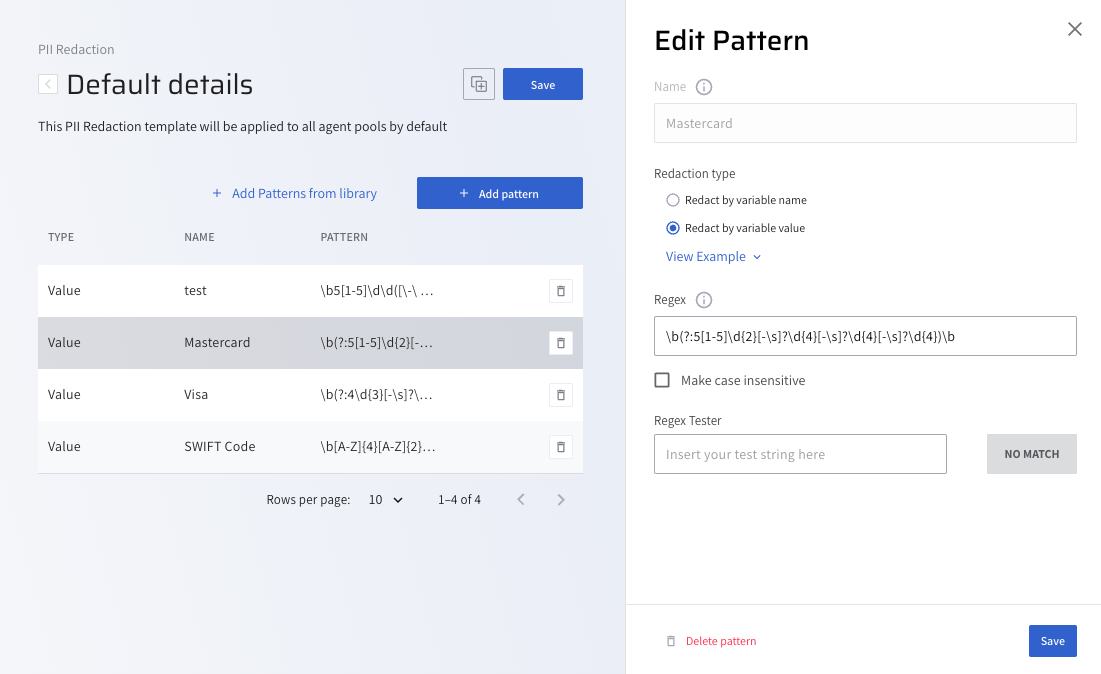
To add a new pattern for redaction, click + Add pattern.
The Add Pattern dialog opens.
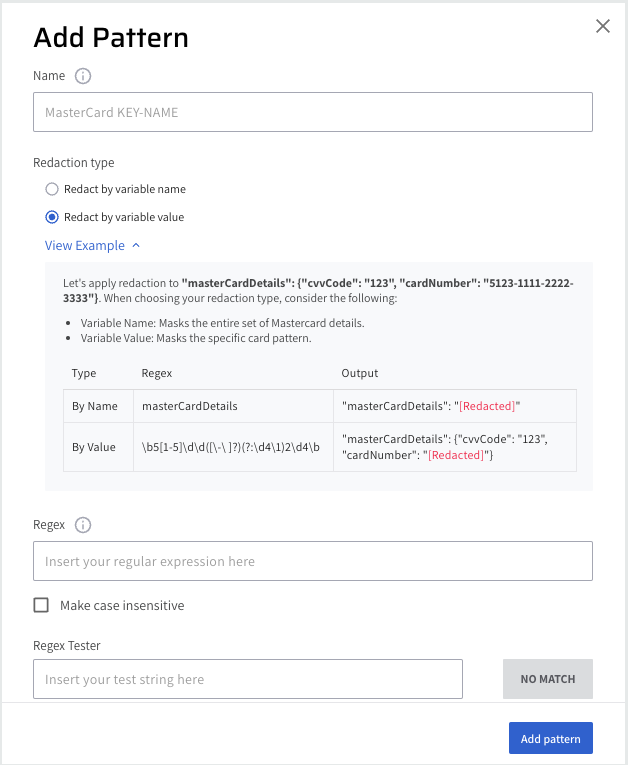
-
In the Name text field, enter a unique name for the added pattern.
- Select your preferred data redaction type:
- Redact by variable name
- Redact by variable value
- Enter the Regex pattern depending on the mode you selected.
- (Optional) Enable the Make case insensitive option to support case insensitive values. The default is set as case sensitive. From Lightrun version 1.14, the Variable name pattern is set by default as case sensitive. By enabling the Make Case Insensitive field when specifying accountName, data will be redacted from
ACCOUNTNAME,accountname, andAccountNamevariables. - To verify the pattern, in the Regex Tester field, enter a test string corresponding to the pattern specified in the previous step. Pattern verification is confirmed when the MATCH button is active.
- Click Save.
The dialog box closes and the list of redacted character string patterns updates to include the newly added pattern. Lightrun agents will fetch updated PII filters when they start up. To apply new filters to your existing agents you'll need to restart those agents.
Configure a PII redaction pattern using predefined patterns🔗
To help you easily configure PII redaction patterns, Lightrun has created a dedicated Regex Patterns library containing a set of predefined common PII patterns that conform with RE2 Google-compliant Regex expressions. The option to use predefined patterns from the Patterns library offers a practical advantage. This approach eliminates the need for custom pattern creation, saving time and effort. The library provides tested patterns, ensuring reliability in PII redaction.
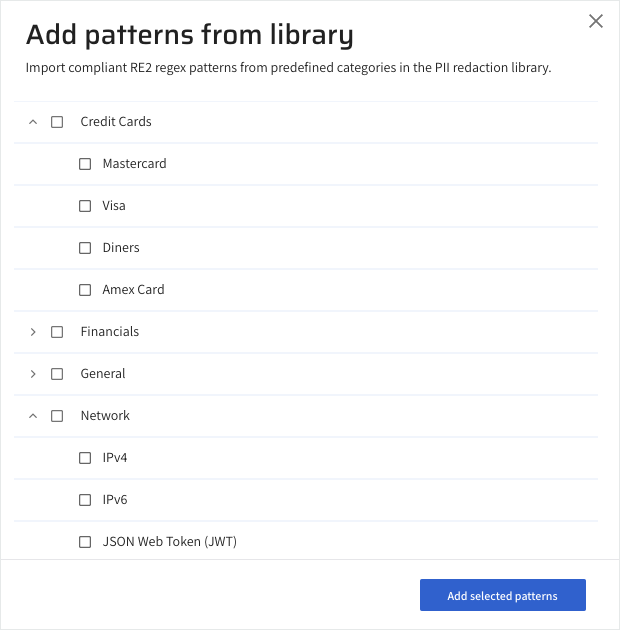
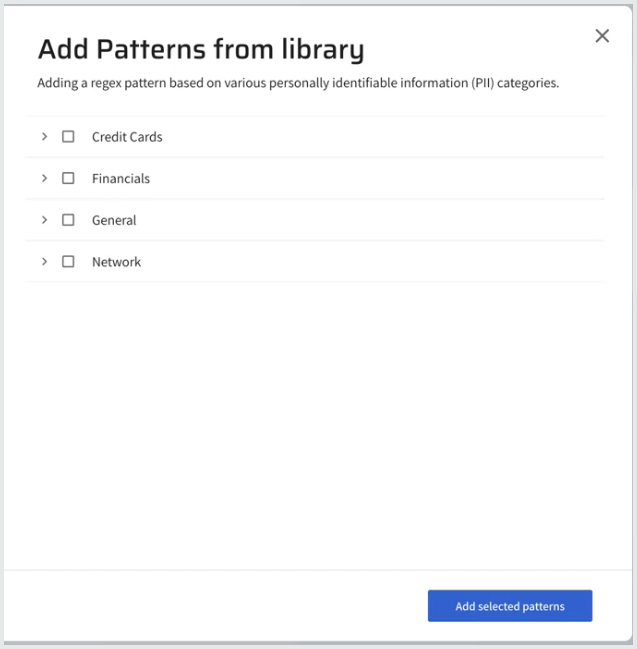
In the Patterns library, the patterns are grouped into main categories such as Credit Cards, Financials, General and Network. These categories help streamline the process of locating specific PII patterns based on their characteristics.
Adding a pattern creates a local copy which can be modified. It’s important to note that the changes made to your local version do not affect the original pattern located in the library and vice versa as the patterns in the library are read-only and cannot be modified. Additional predefined patterns will be incorporated into the central library over time.
Configure PII Redaction using predefined Regex patterns🔗
- Log in to your Lightrun account.
- Click Settings on the top right hand side of your screen to navigate to the Settings dashboard.
-
Select PII Redaction under Security in the Settings dashboard sidebar. The Data Redaction window opens with a table of existing patterns.
-
Click +Add Patterns from library.
The Add Patterns from Library dialog opens.
-
From the list, select the patterns you would like to add to your local patterns, and click Add selected patterns.
The patterns are added to the patterns list.
-
Select your required pattern.
The Edit Pattern dialog opens to the right and you can proceed to configure the pattern settings.
 7. Apply you changes and click Save.