Manage users with basic persona-based roles🔗
This article discusses how to manage users with the persona-based role mechanism within a non-RBAC environment.
Starting from version 1.70.2, Lightrun introduced a persona-based role mechanism that provides robust persona roles and greater control over permissions. For an overview, see Lightrun Roles.
Note
SaaS users are automatically upgraded to the latest version and will use the new role experience. To learn how users are migrated to the new system, see Role Migration FAQ.
Supported roles and permissions
When a user is created, they are automatically assigned the Developer role, which is the default role. You can also assign the Company Admin role to users who need administrative capabilities.
In addition to roles, there is a single permission checkbox — Allow Users to Ignore Quota — which can be enabled manually. This field allows a user to bypass snapshot and log quotes. This permission is not part of any role and must be manually selected in the User Details panel.
To determine which role best fits your needs, review the permissions associated with each role below.
| Role | Permissions |
|---|---|
| Developer | - Access the Lightrun Plugin and Management Portal - View custom sources, PII redaction patterns, and blocklists - View registered agents and their status - View actions and their details - View Debug Runbook case results - View and copy Lightrun MCP server setup instructions |
| Company Admin | - Includes all Developer permissions - Run API endpoints - Manage account settings, users, and authentication - Configure services, integrations, API keys, and webhooks - Set Autonomous Debugger global settings - Run system diagnostics - Manage audit events, runtime reachability, PII redaction settings, and Debugging Runbooks. |
For more information on Lightrun roles, see Lightrun Role Management Overview.
Create a new user🔗
You can manually add users to your Lightrun organization, one at a time. This is suitable for scenarios where you need to add a small number of users, such as when you're working in a small organization or when you want to add specific individuals.
To use this method, enter the user's details, such as their name, email address, and any other required information, directly into Lightrun's user management interface. The user will then receive an email requiring them to authenticate their credentials.
To create a user:
- Log in to your Lightrun account.
- Click Settings located at the top menu bar of your Management Portal.
-
Select Users User Management under Identity and Access Management.
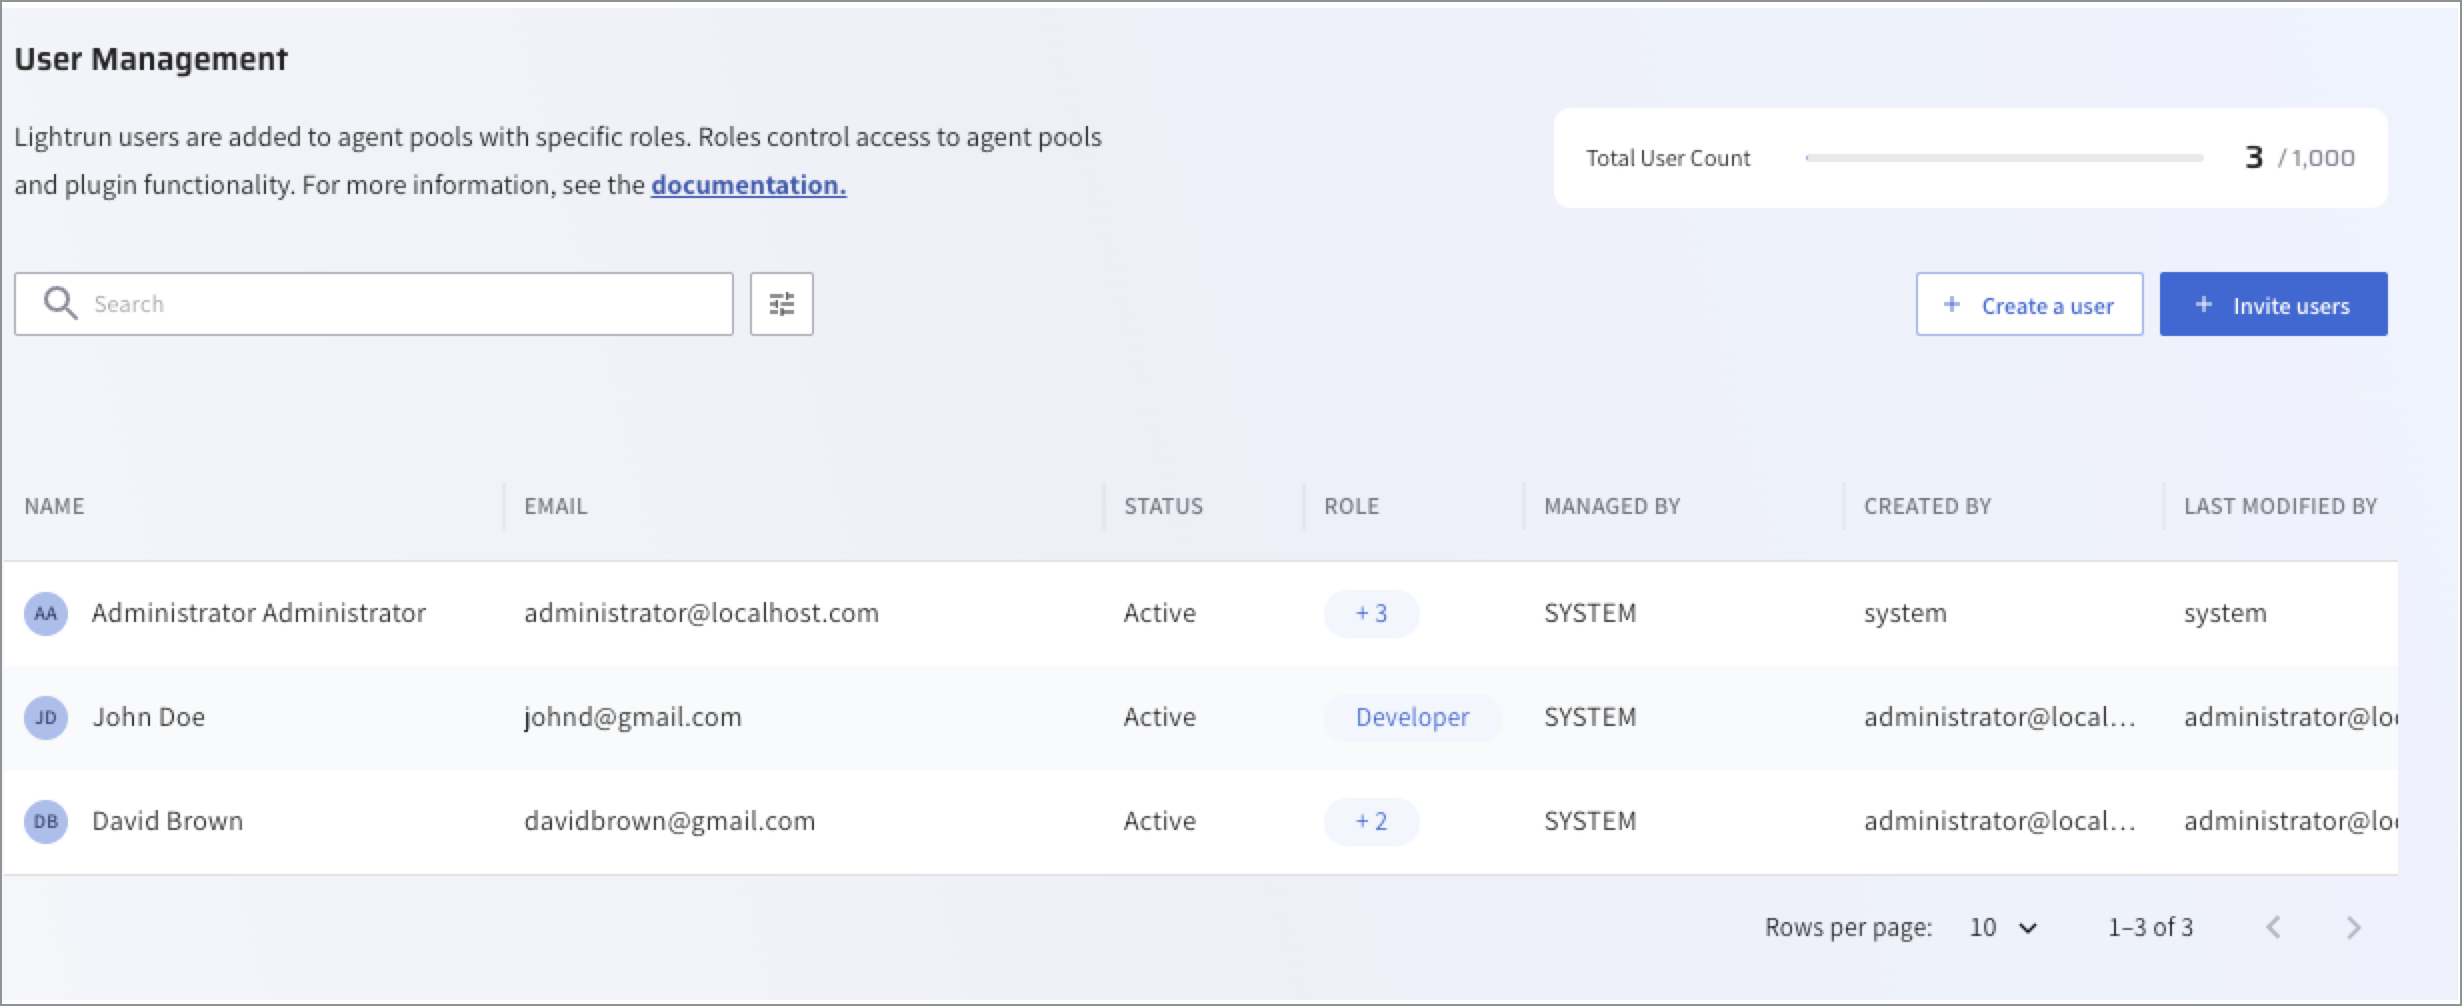
The User Management page opens.
-
Click Create a user
The Create User dialog opens.
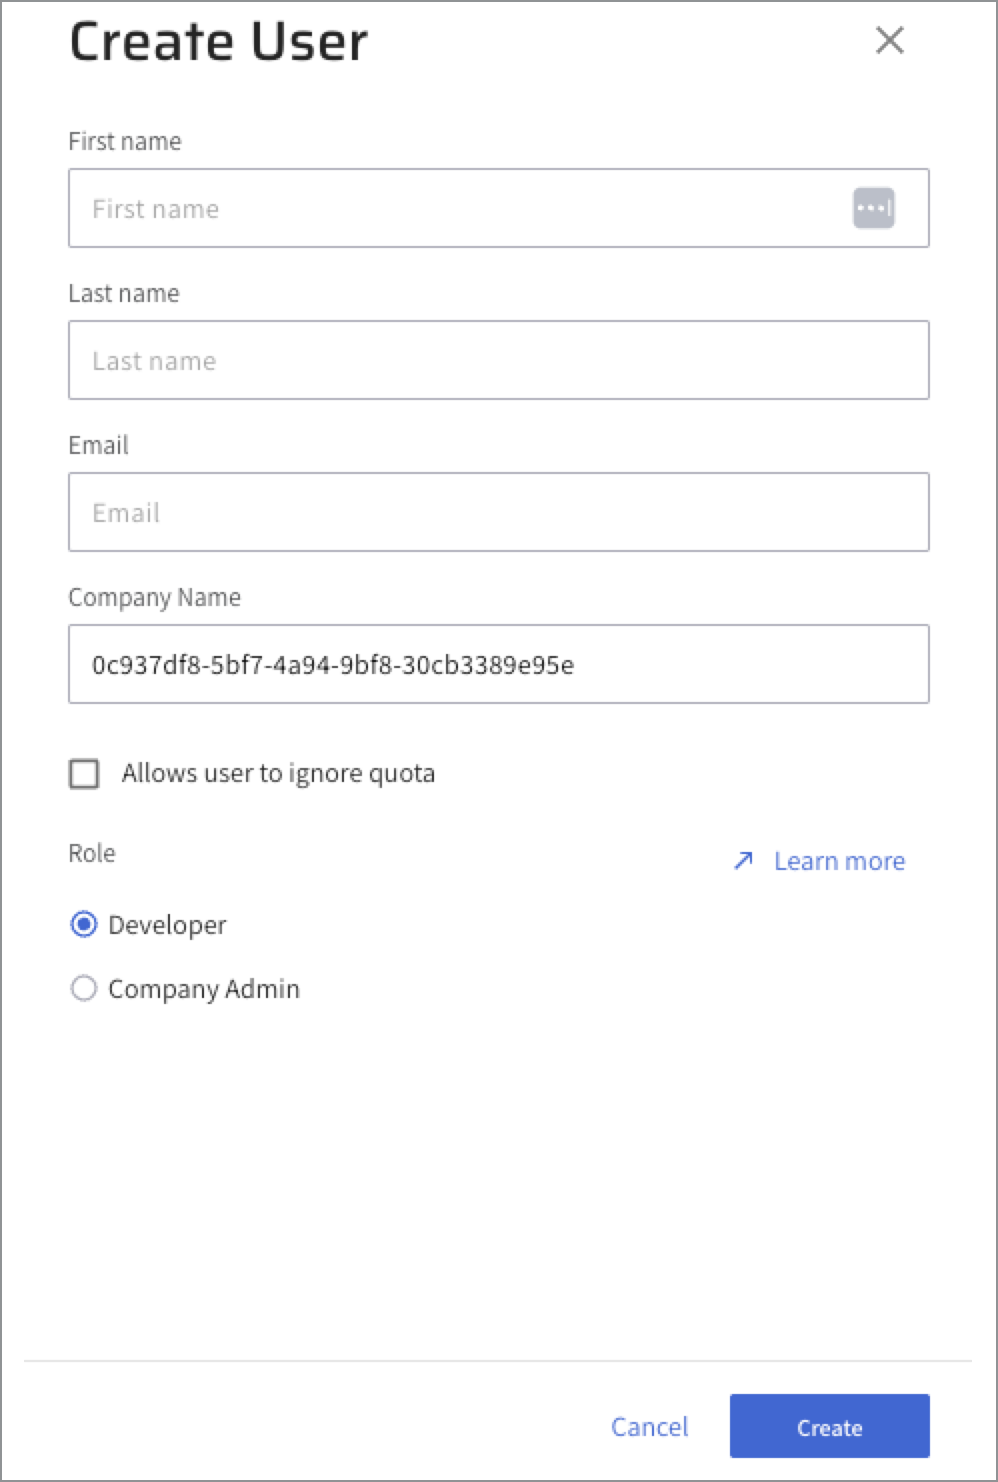
-
Set the First name, Last Name and Email information.
By default, the user is set to Active and is assigned the Developer.
-
[Optional] Select the Allows users to ignore quota check box. When selected, this permission is added and is counted as role.
- [Optional] Click Company Admin to grant the admin permissions. By default, users are assigned the Developer role.
- Click Save. The User is set as Active.
Manage users🔗
You can perform the following administrative tasks including viewing the status of your users, editing, or removing a user.
View user status🔗
In the User Management page, the following status indicators for each of the users are displayed to help know if your users are registered or not.
| Status | Description |
|---|---|
| Active | The user is active and has completed the activation process. |
| Deactivated | The user was disabled. The Active toggle is disabled in the User Details page. |
| Pending | The user is active but has not yet completed the activation process. |
Find users by persona role🔗
- In the User Management page, click the Filter icon next to the Search bar.
- From the list, select the required persona role.
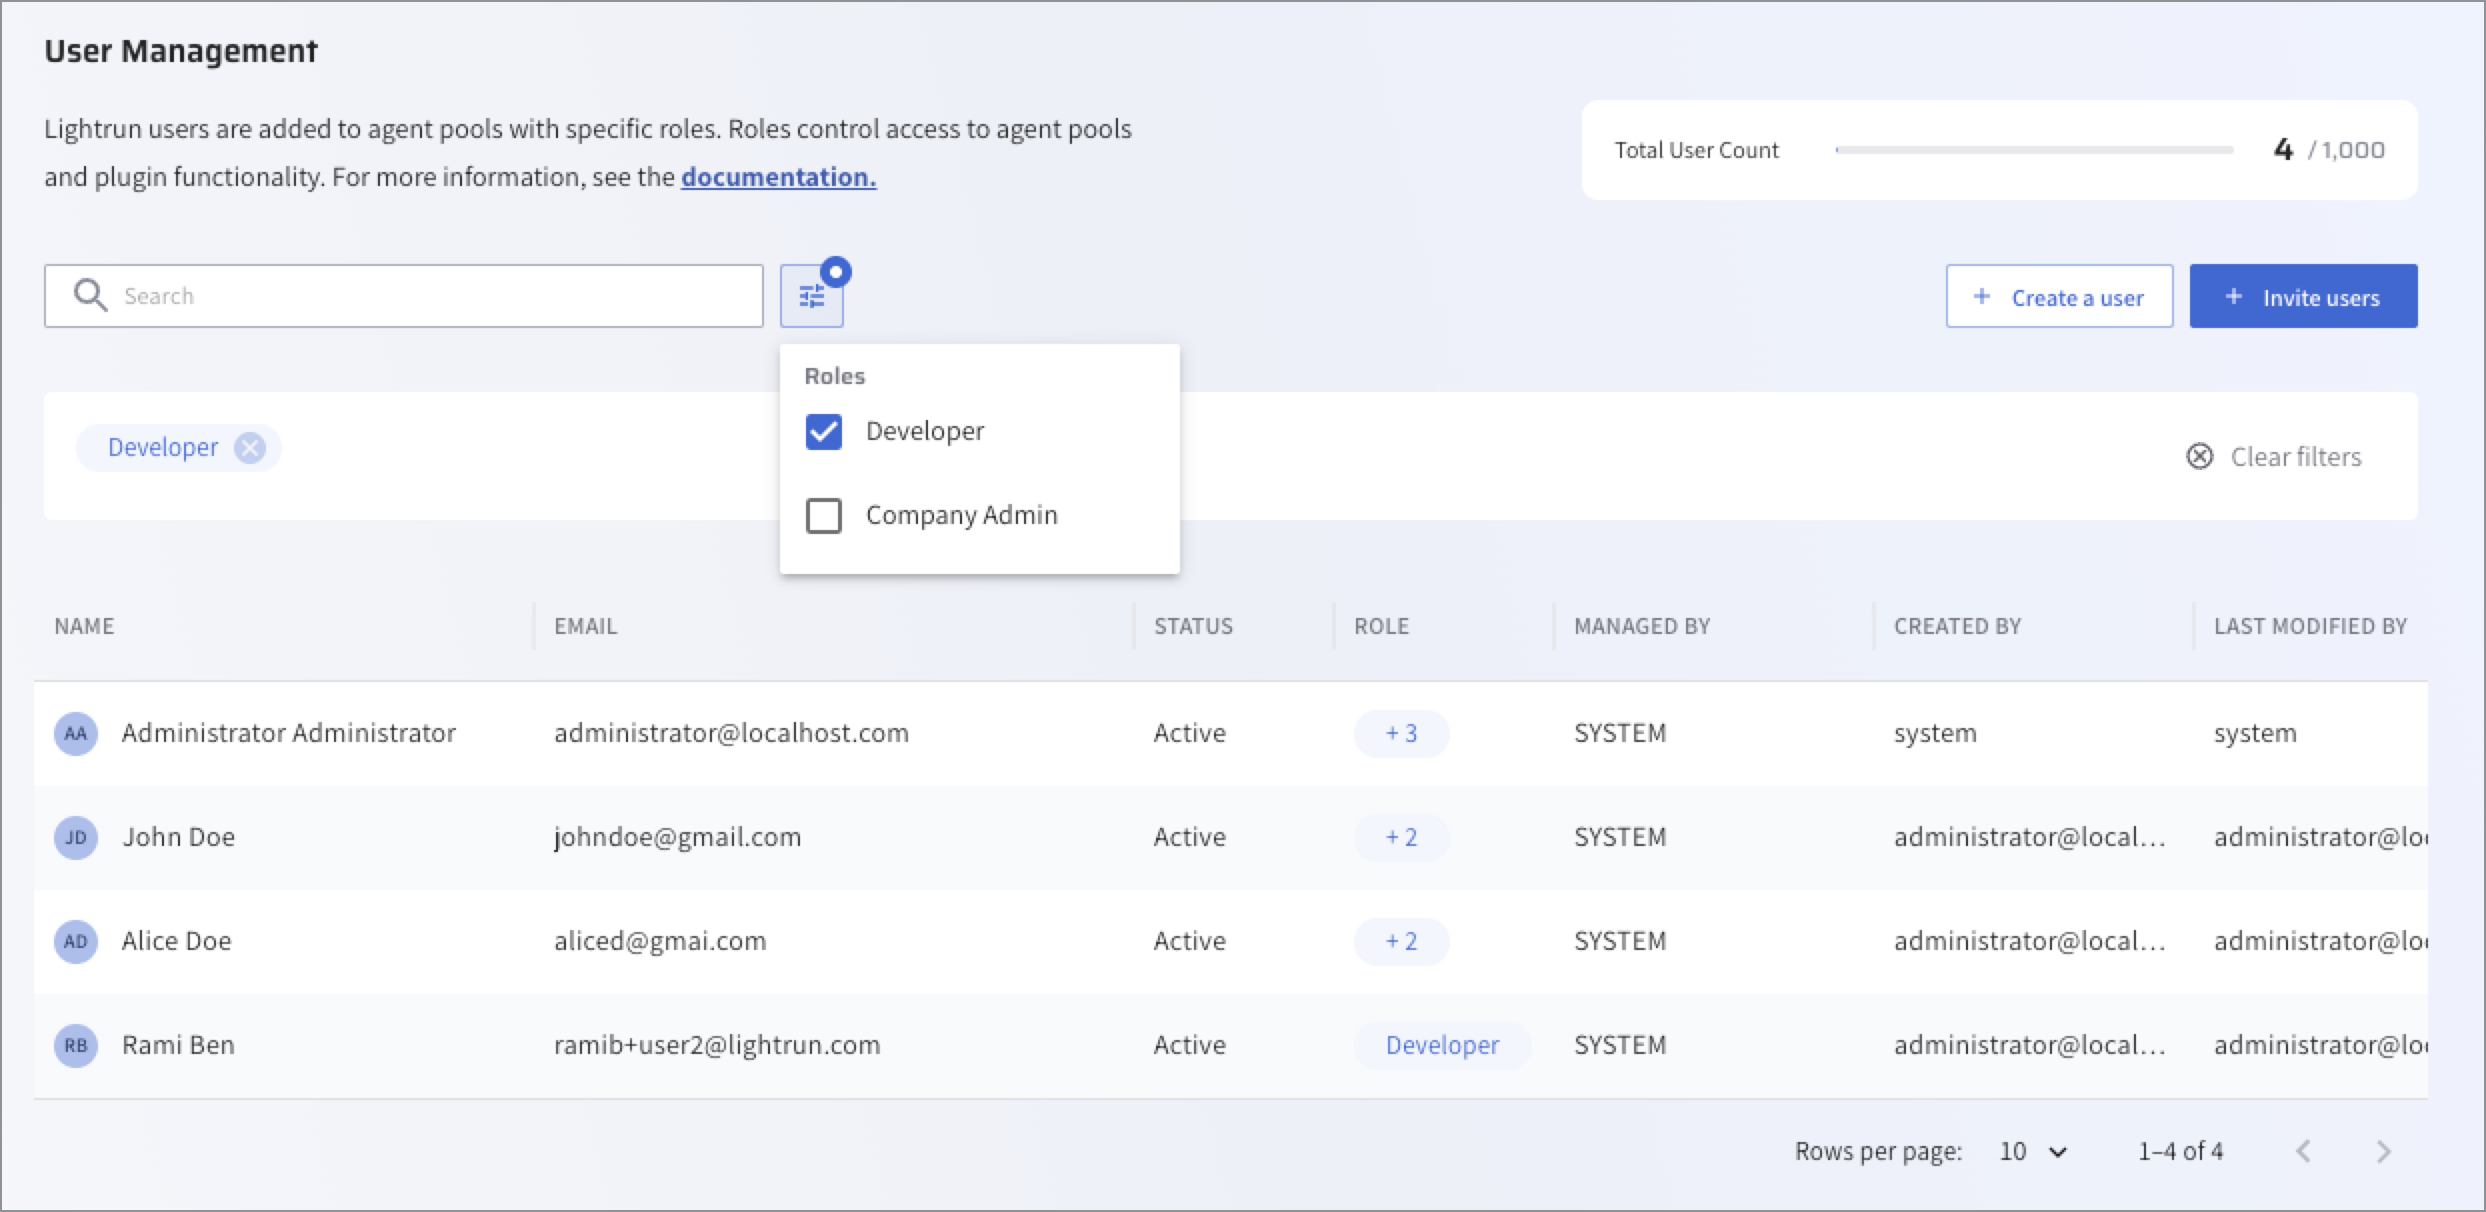
Users matching the selected role are displayed.
Edit a user🔗
-
In the User Management page, click the required user in the user list.
The User details pane opens.
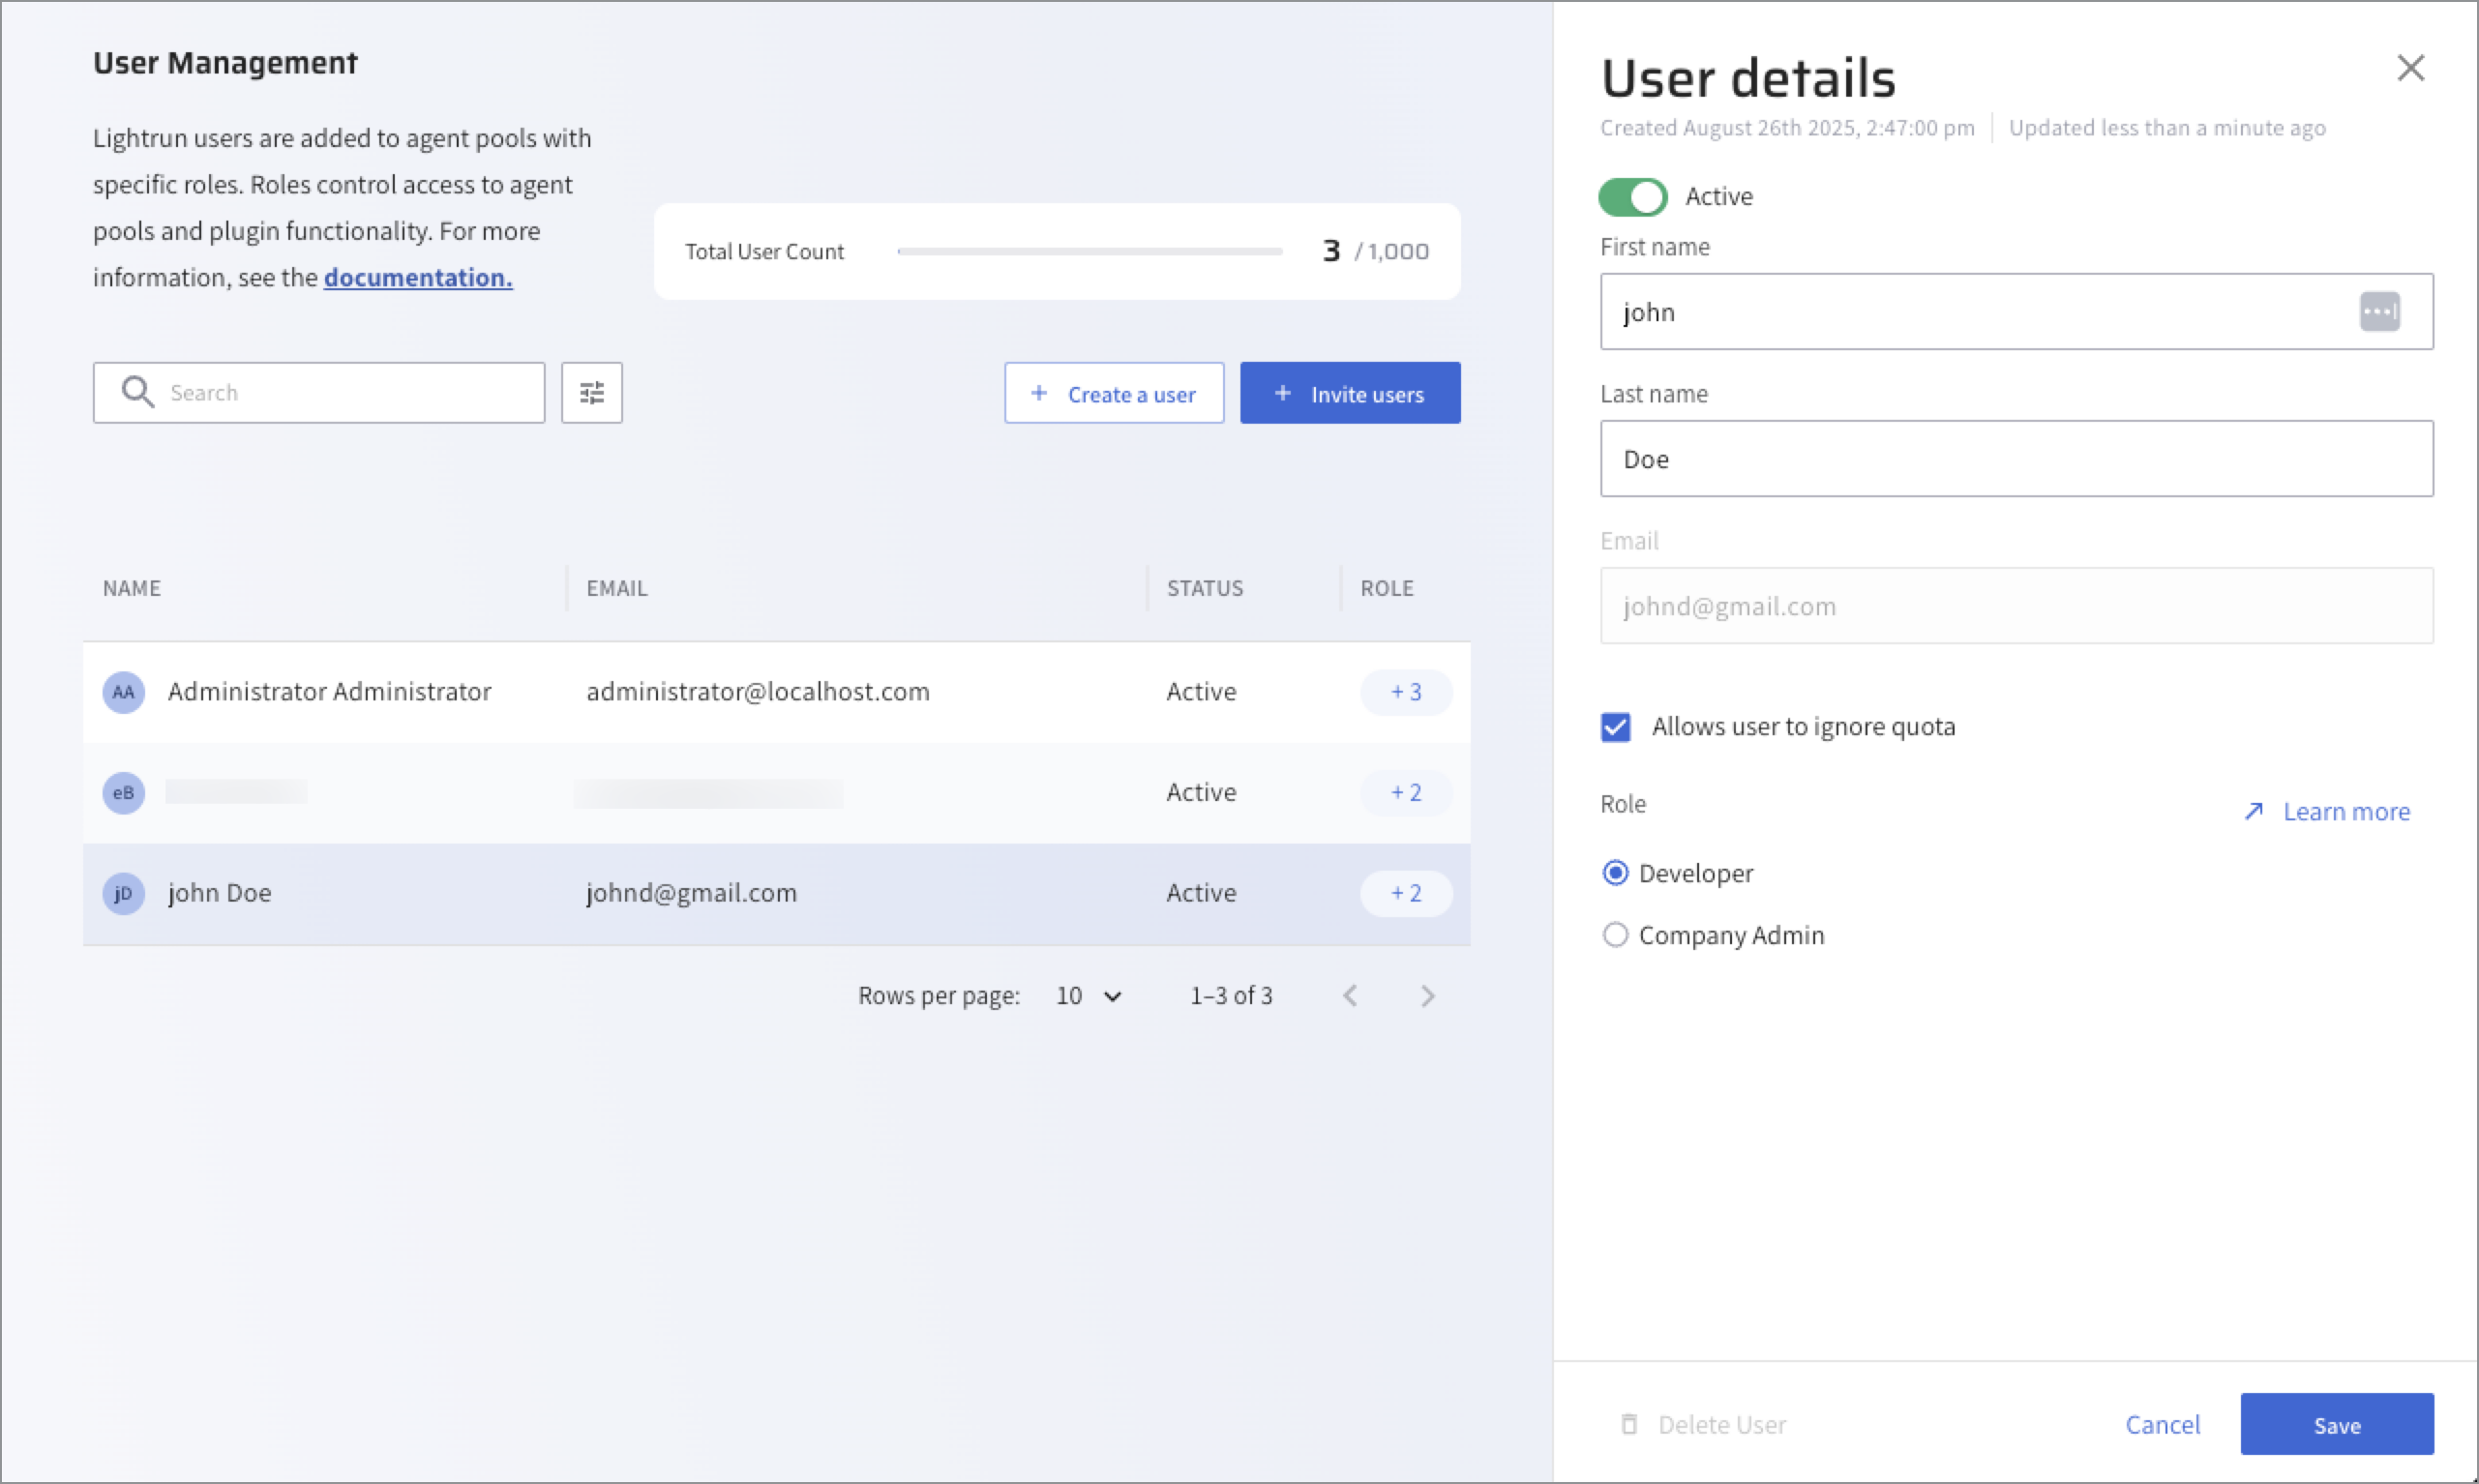
-
Apply the changes and click Save.
Delete a user🔗
- In the User Management page, click the required user in the user list. The User details pane opens.
-
Toggle Active off to deactivate the user, and click Save.
The Delete User option becomes active and appears in red.
-
Reopen the User details pane and click Delete User.
-
Click Save.
Manage users with Lightrun REST API🔗
Starting from version 1.53, you can run user-related operations using the Lightrun REST API. For more information, see Lightrun REST API.