Manage Dynamic Traces🔗
After you have set up Traces, You can perform the following administrative operations related to Traces. For more information on Traces, see Work with Dynamic Traces for Jave in jetbrains.
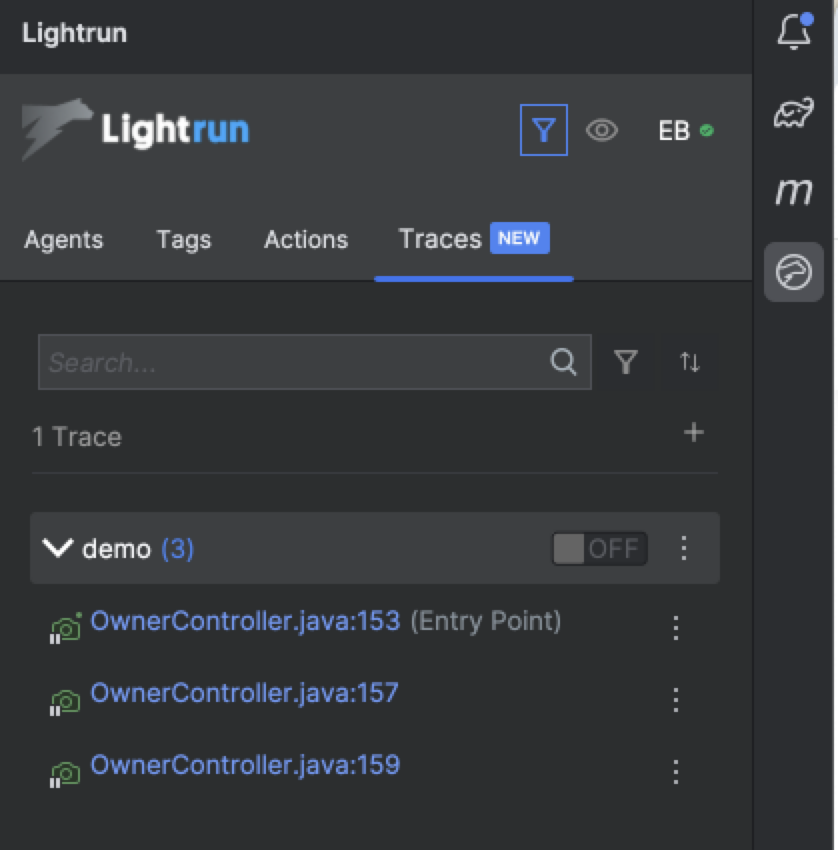
View a list of Traces🔗
The Traces tab in the Lightrun Console displays a list of Traces. When you expand a trace instance, a list of its associated Trace Snapshots is displayed. Clicking on a Trace Snapshot will focus the IDE’s editor on the corresponding code line.
View Trace details🔗
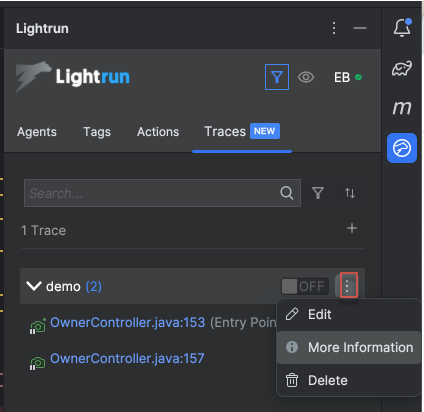
To view the details of a Trace, click the vertical ellipsis (⋮) next to the Trace and select More Information.
The Trace Details dialog opens.

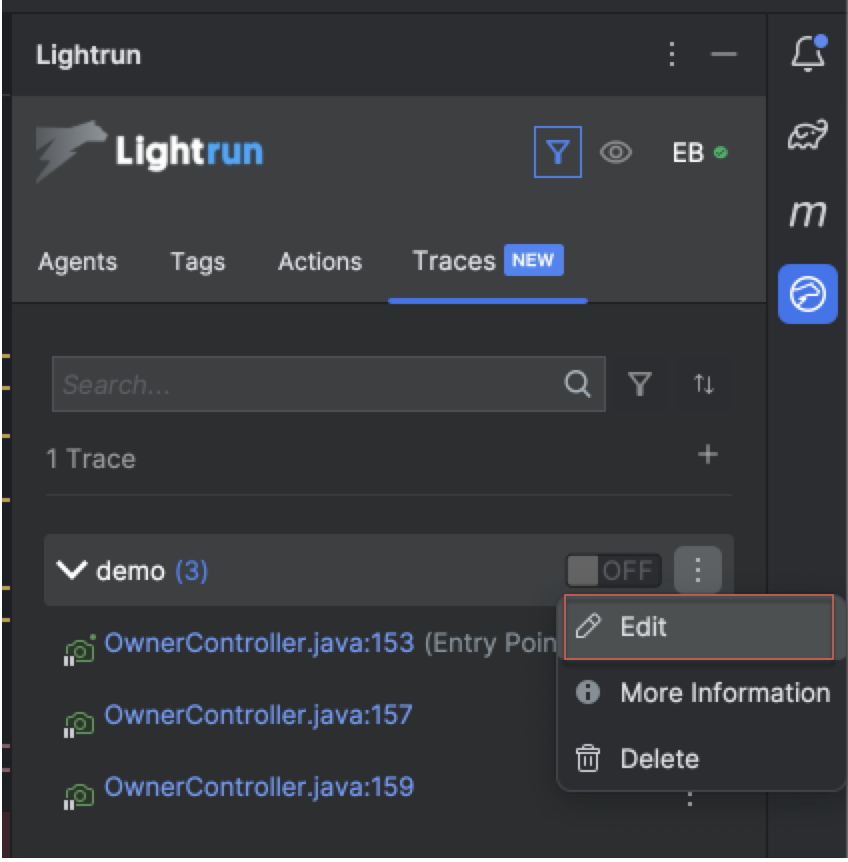
Edit a trace🔗
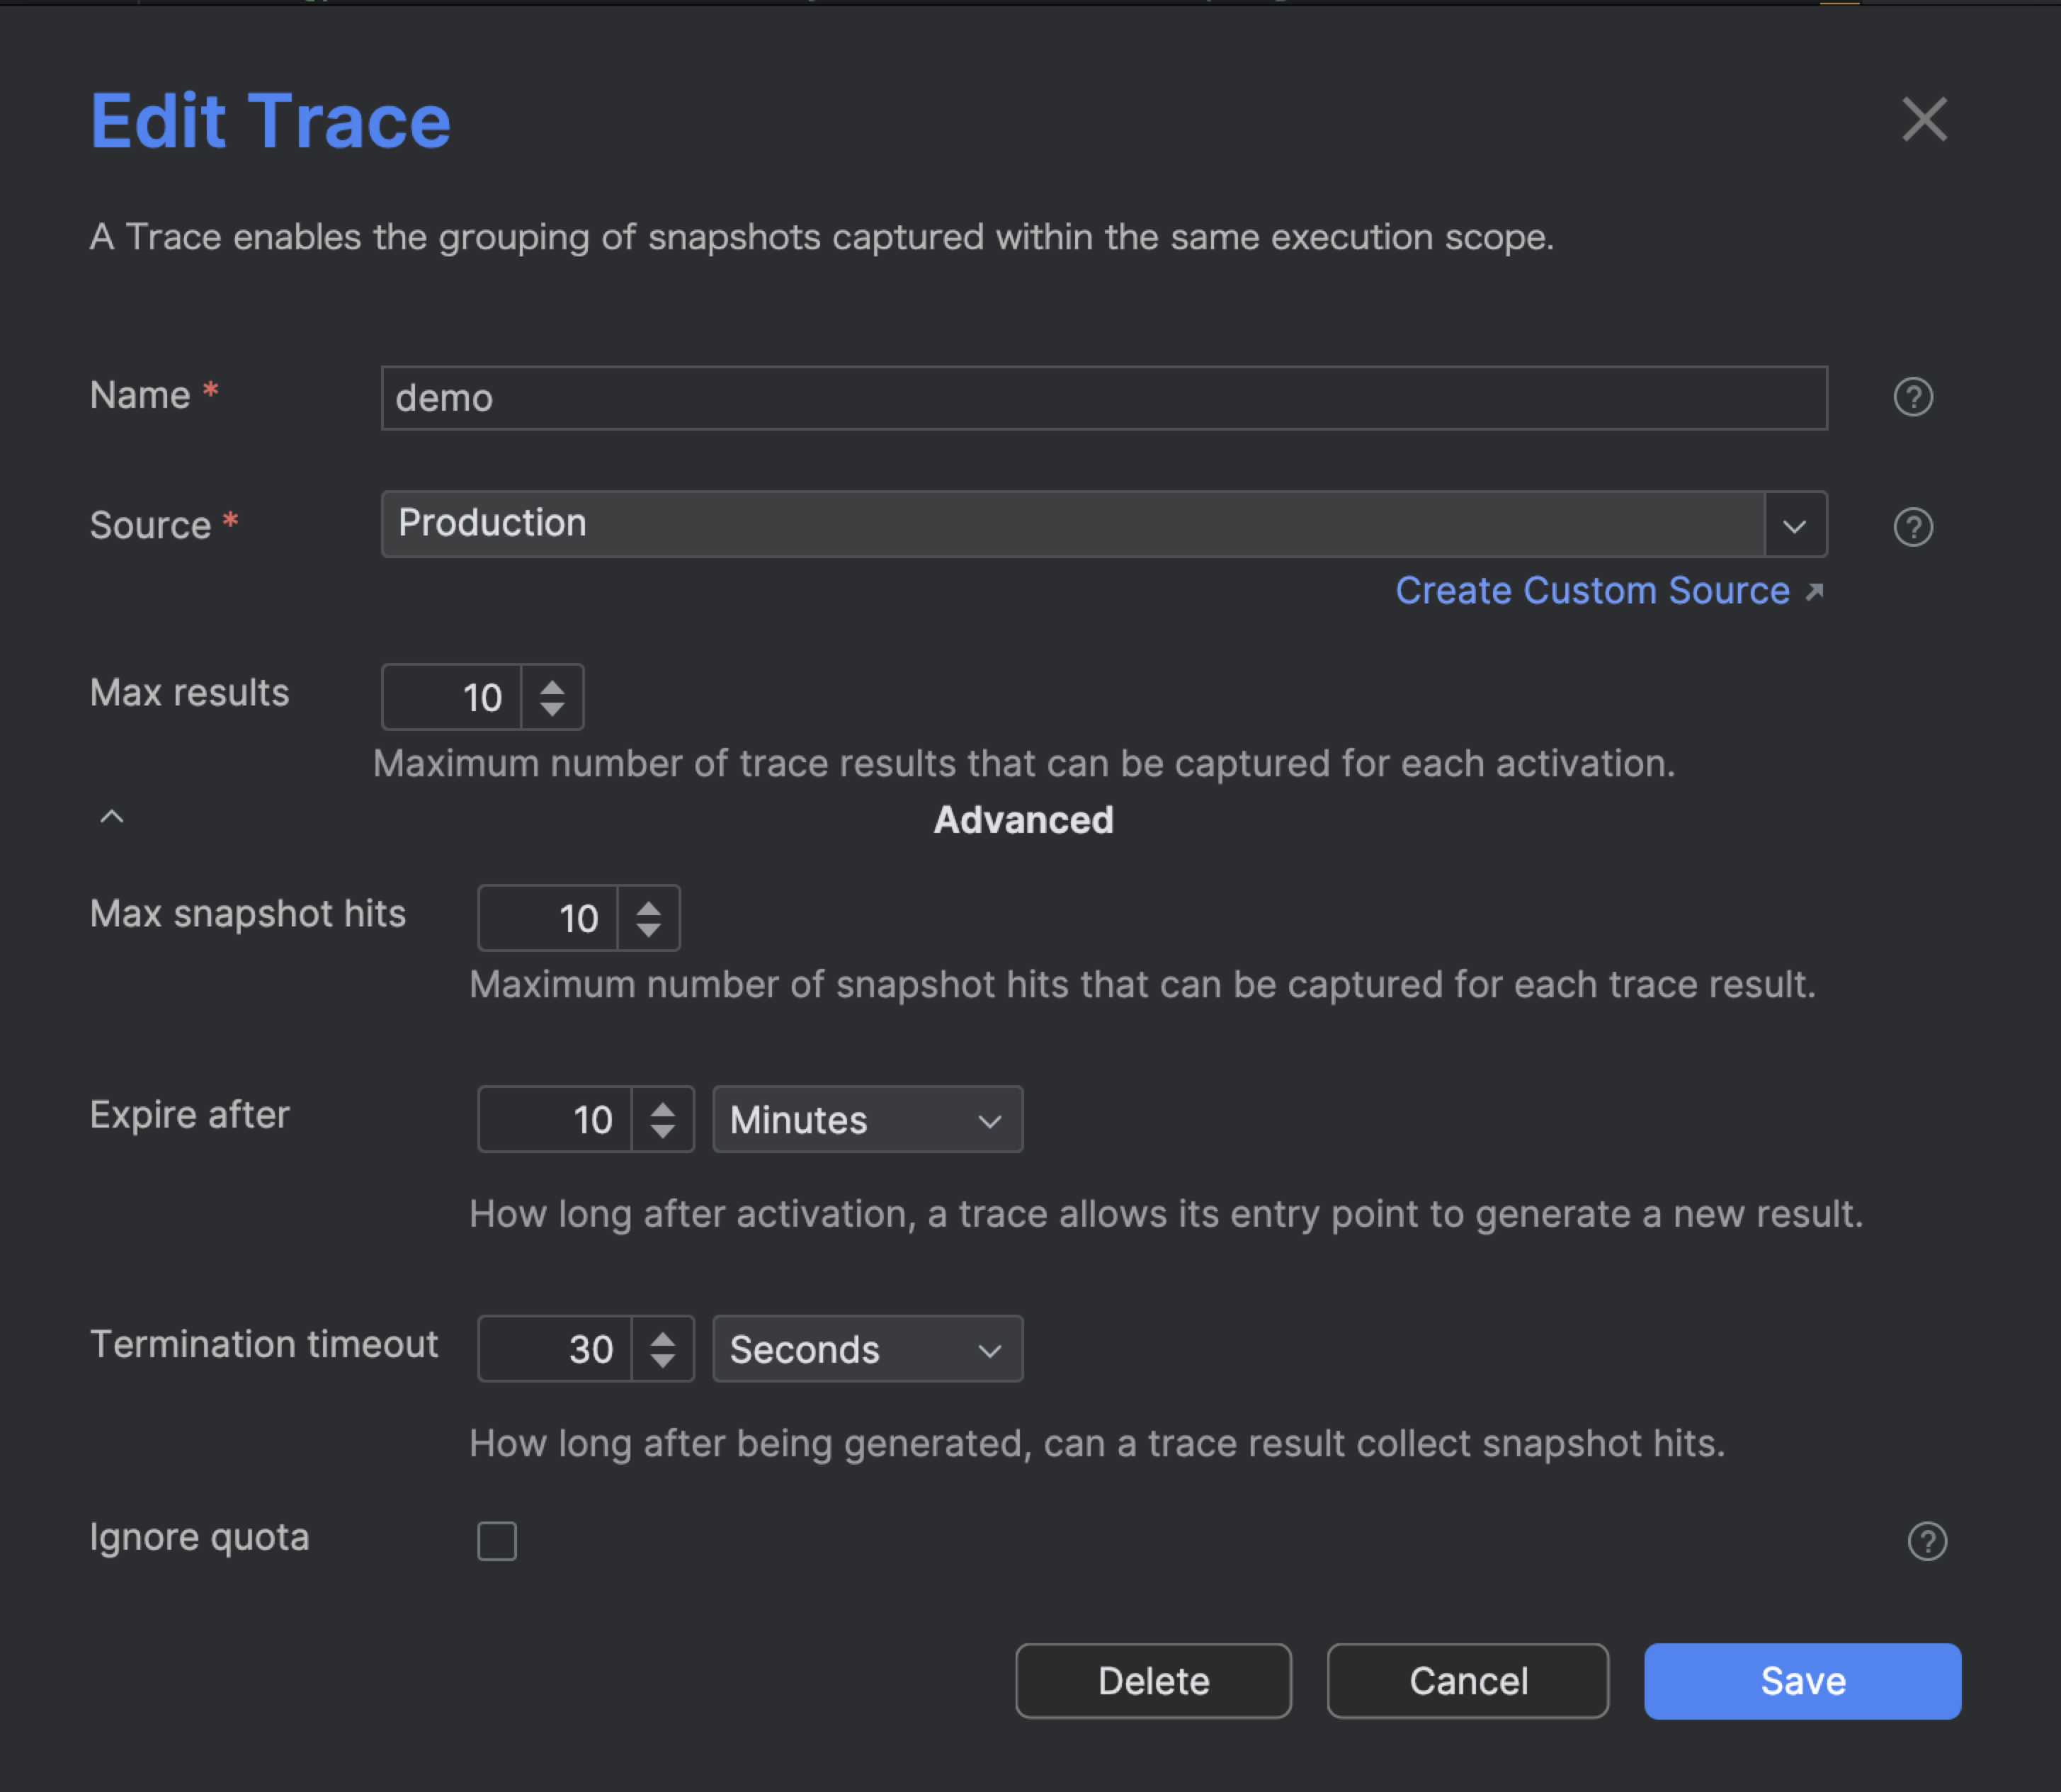
When editing a Trace, you may want to adjust its settings, modify existing Trace Snapshots, or add and remove Trace Snapshots. One advanced option is limiting the number of Trace Snapshots hits per Trace. While this feature offers fine control, it is typically recommended only for users who need to customize trace behavior in detail, as sensible defaults are already in place.
To edit an existing Trace, you must first deactivate it. Once deactivated, you can modify the Trace configuration, add new Trace Snapshots, or remove any unwanted Trace Snapshots. After making the necessary changes, reactivate the Trace. Deactivating and reactivating the Trace ensures that changes can be made without affecting ongoing Trace Results. This approach is especially useful when you need to add several new Trace Snapshots and want to make all changes effective at once, rather than having each new Trace Snapshot start capturing immediately.
Note that editing a Trace generates a new trace ID for the revised Trace.
To edit a trace:
- Go to the Traces tab in the Lightrun plugin.
- Click ON next to the Trace you want to edit.
-
Click the vertical ellipsis (⋮) next to the Trace and select Edit.
The Edit Trace dialog opens.
-
Make the required changes.
- Click Save and set the Trace to On.
Delete a Trace or Trace Snapshot🔗
To delete a Trace, you need to set the Trace to ***OFF**. You can delete an entire Trace including the Trace Snapshot included in it and you can also delete a Trace Snapshot within a Trace directly when you select Edit Trace Snapshot.
- Go to the Traces tab in the Trace panel.
- Click OFF next to the Trace you want to delete.
-
Click the vertical ellipsis (⋮) next to the Trace and select Delete.
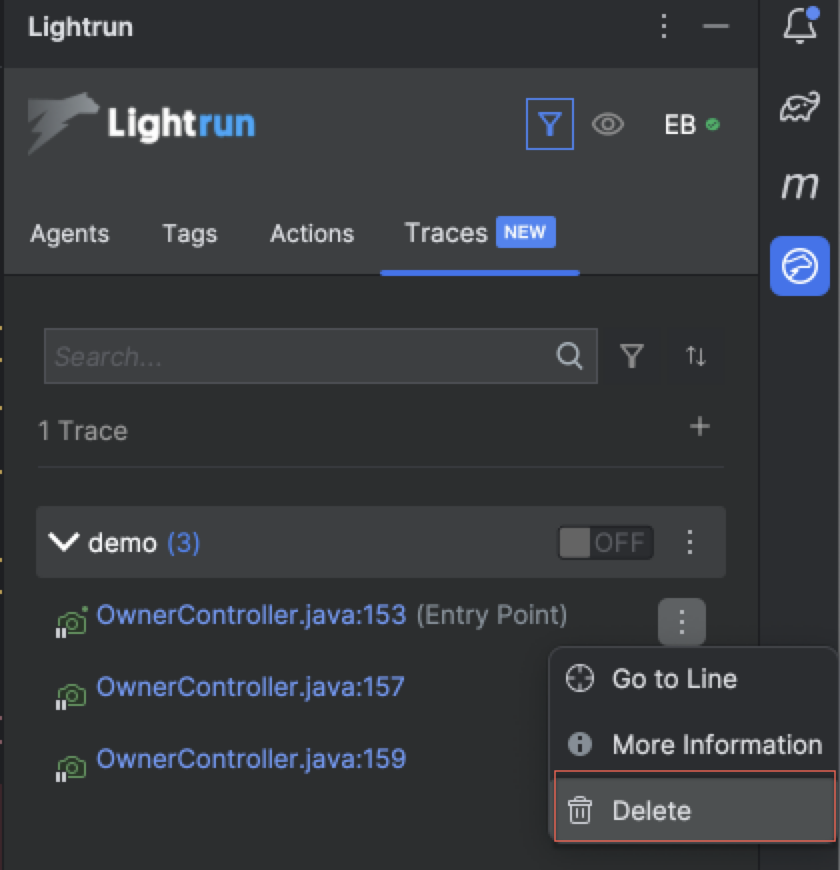
The Trace is removed from the Trace list.