Add and invite users to your organization🔗
Required Roles
| Up to version 1.69 inclusive | From version 1.70.4 and higher |
|---|---|
ROLE_MANAGER | Company Admin |
Lightrun offers a number of methods to add users to your Lightrun organization:
- Add Manually: Add users in the User Management page in the Lightrun Management Portal.
- Personalized Invite: Send users a personalized email invitation to join the organization.
- Self-service Link: Share a standardized invitation link that users can use to sign up on their own. This link can be copied and shared across the organization.
Add users manually🔗
You can manually add users to your Lightrun organization, one at a time. This is suitable for scenarios where you can add a small number of users.
To use this method, enter the user's details, such as their name, email address, and any other required information, directly into Lightrun's user management interface. The user will then receive an email requiring them to authenticate their credentials.
Based on the version you are currently running, you can add users as follows:
| Access method | Up to version 1.69 inclusive | From version 1.70 and higher |
|---|---|---|
| Basic Access (Non-RBAC) | Manage users with basic legacy access | Manage users in persona-based access |
| RBAC | Manage users in RBAC legacy environment | Manage users in persona-based access |
Invite users with a personalized email🔗
This method is ideal for medium-sized organizations that want to control who is added and provide a more personalized invitation than a general URL.
Tip
Get quick access to  on the main menu bar.
- Log in to your Lightrun account.
- Click Settings in the bottom left corner of your Management Portal.
-
Select Users under Identity and Access Management.
The User Management page opens.
-
Click + Invite users.
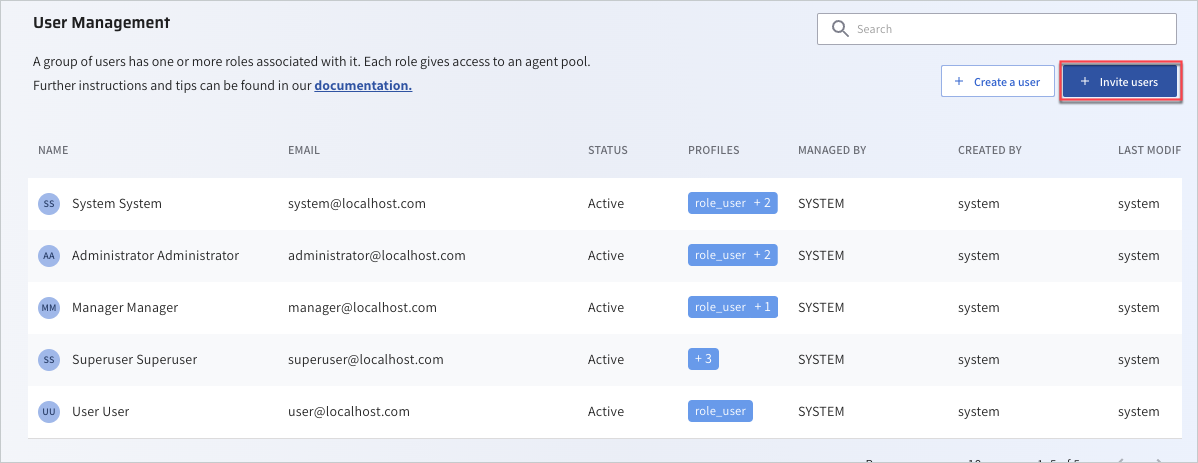
The Invite new users page opens.
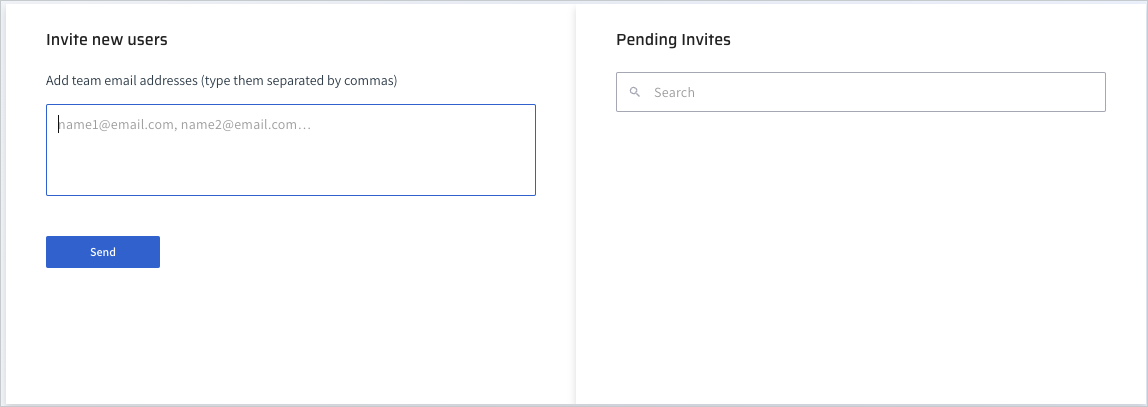
-
Enter the users' email addresses.
- Click Send to dispatch the invitations.
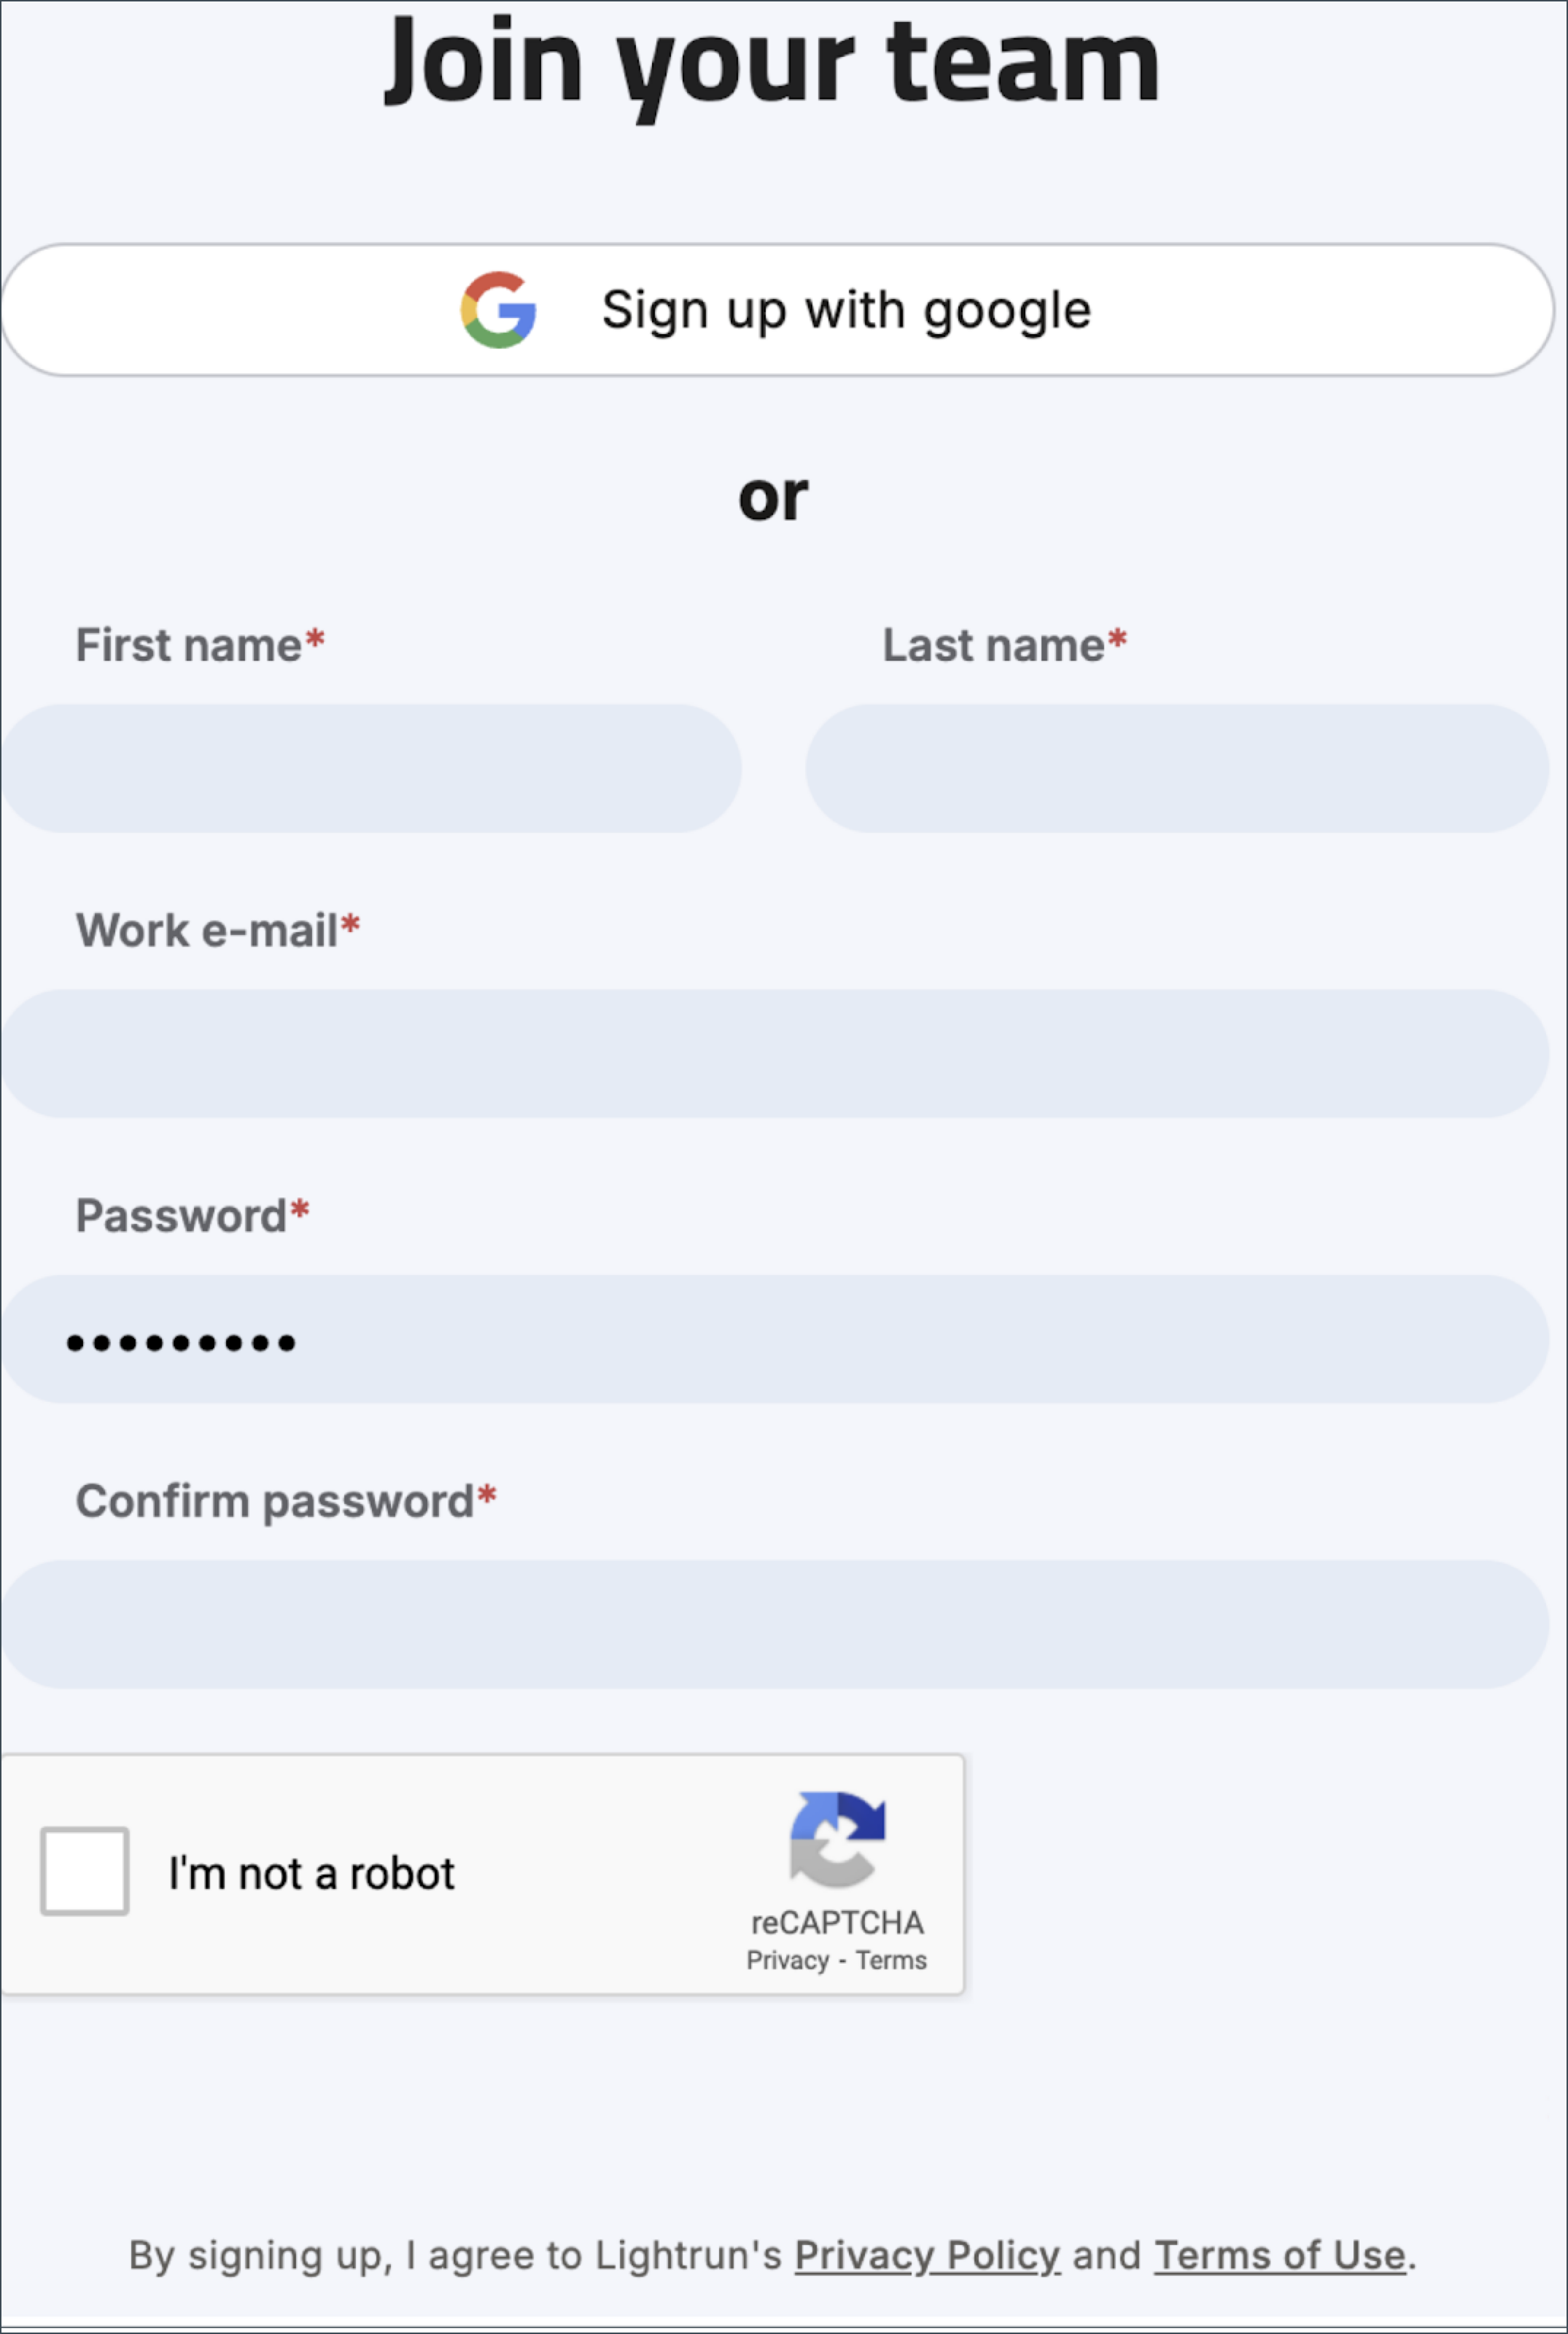
Self register using a predefined link🔗
For larger organizations that need to onboard many users, self-registration via a preset URL allows users to independently enter their credentials and complete the registration process.
Using the Self Service feature, you can generate a unique, unmanaged link, to share across your organization. Note that this link is unmanaged, meaning that anyone with access to it can register. Users will be directed to a registration page where they can fill in their details, and join your organization.
Domain control with allowlist🔗
To manage who can register using the Self-Service link, you can restrict registration to specific domains through the Domain Allowlist. Only users from the allowed domains will be able to register.
Rules and guidelines🔗
- The Self-Service feature is enabled by default and should be disabled when configuring SCIM.
- Direct email invitations can still be sent to users even if their domain is not in the allowlist.
Set up a self service invite🔗
- Log in to your Lightrun account.
- Click Settings located at the bottom left corner of your Management Portal.
-
Navigate to Identity Configuration under Identity and Access Management.
The Identity Configuration page opens.
-
Scroll down to the Provisioning section, and ensure the Self Service toggle is enabled (it is enabled by default).
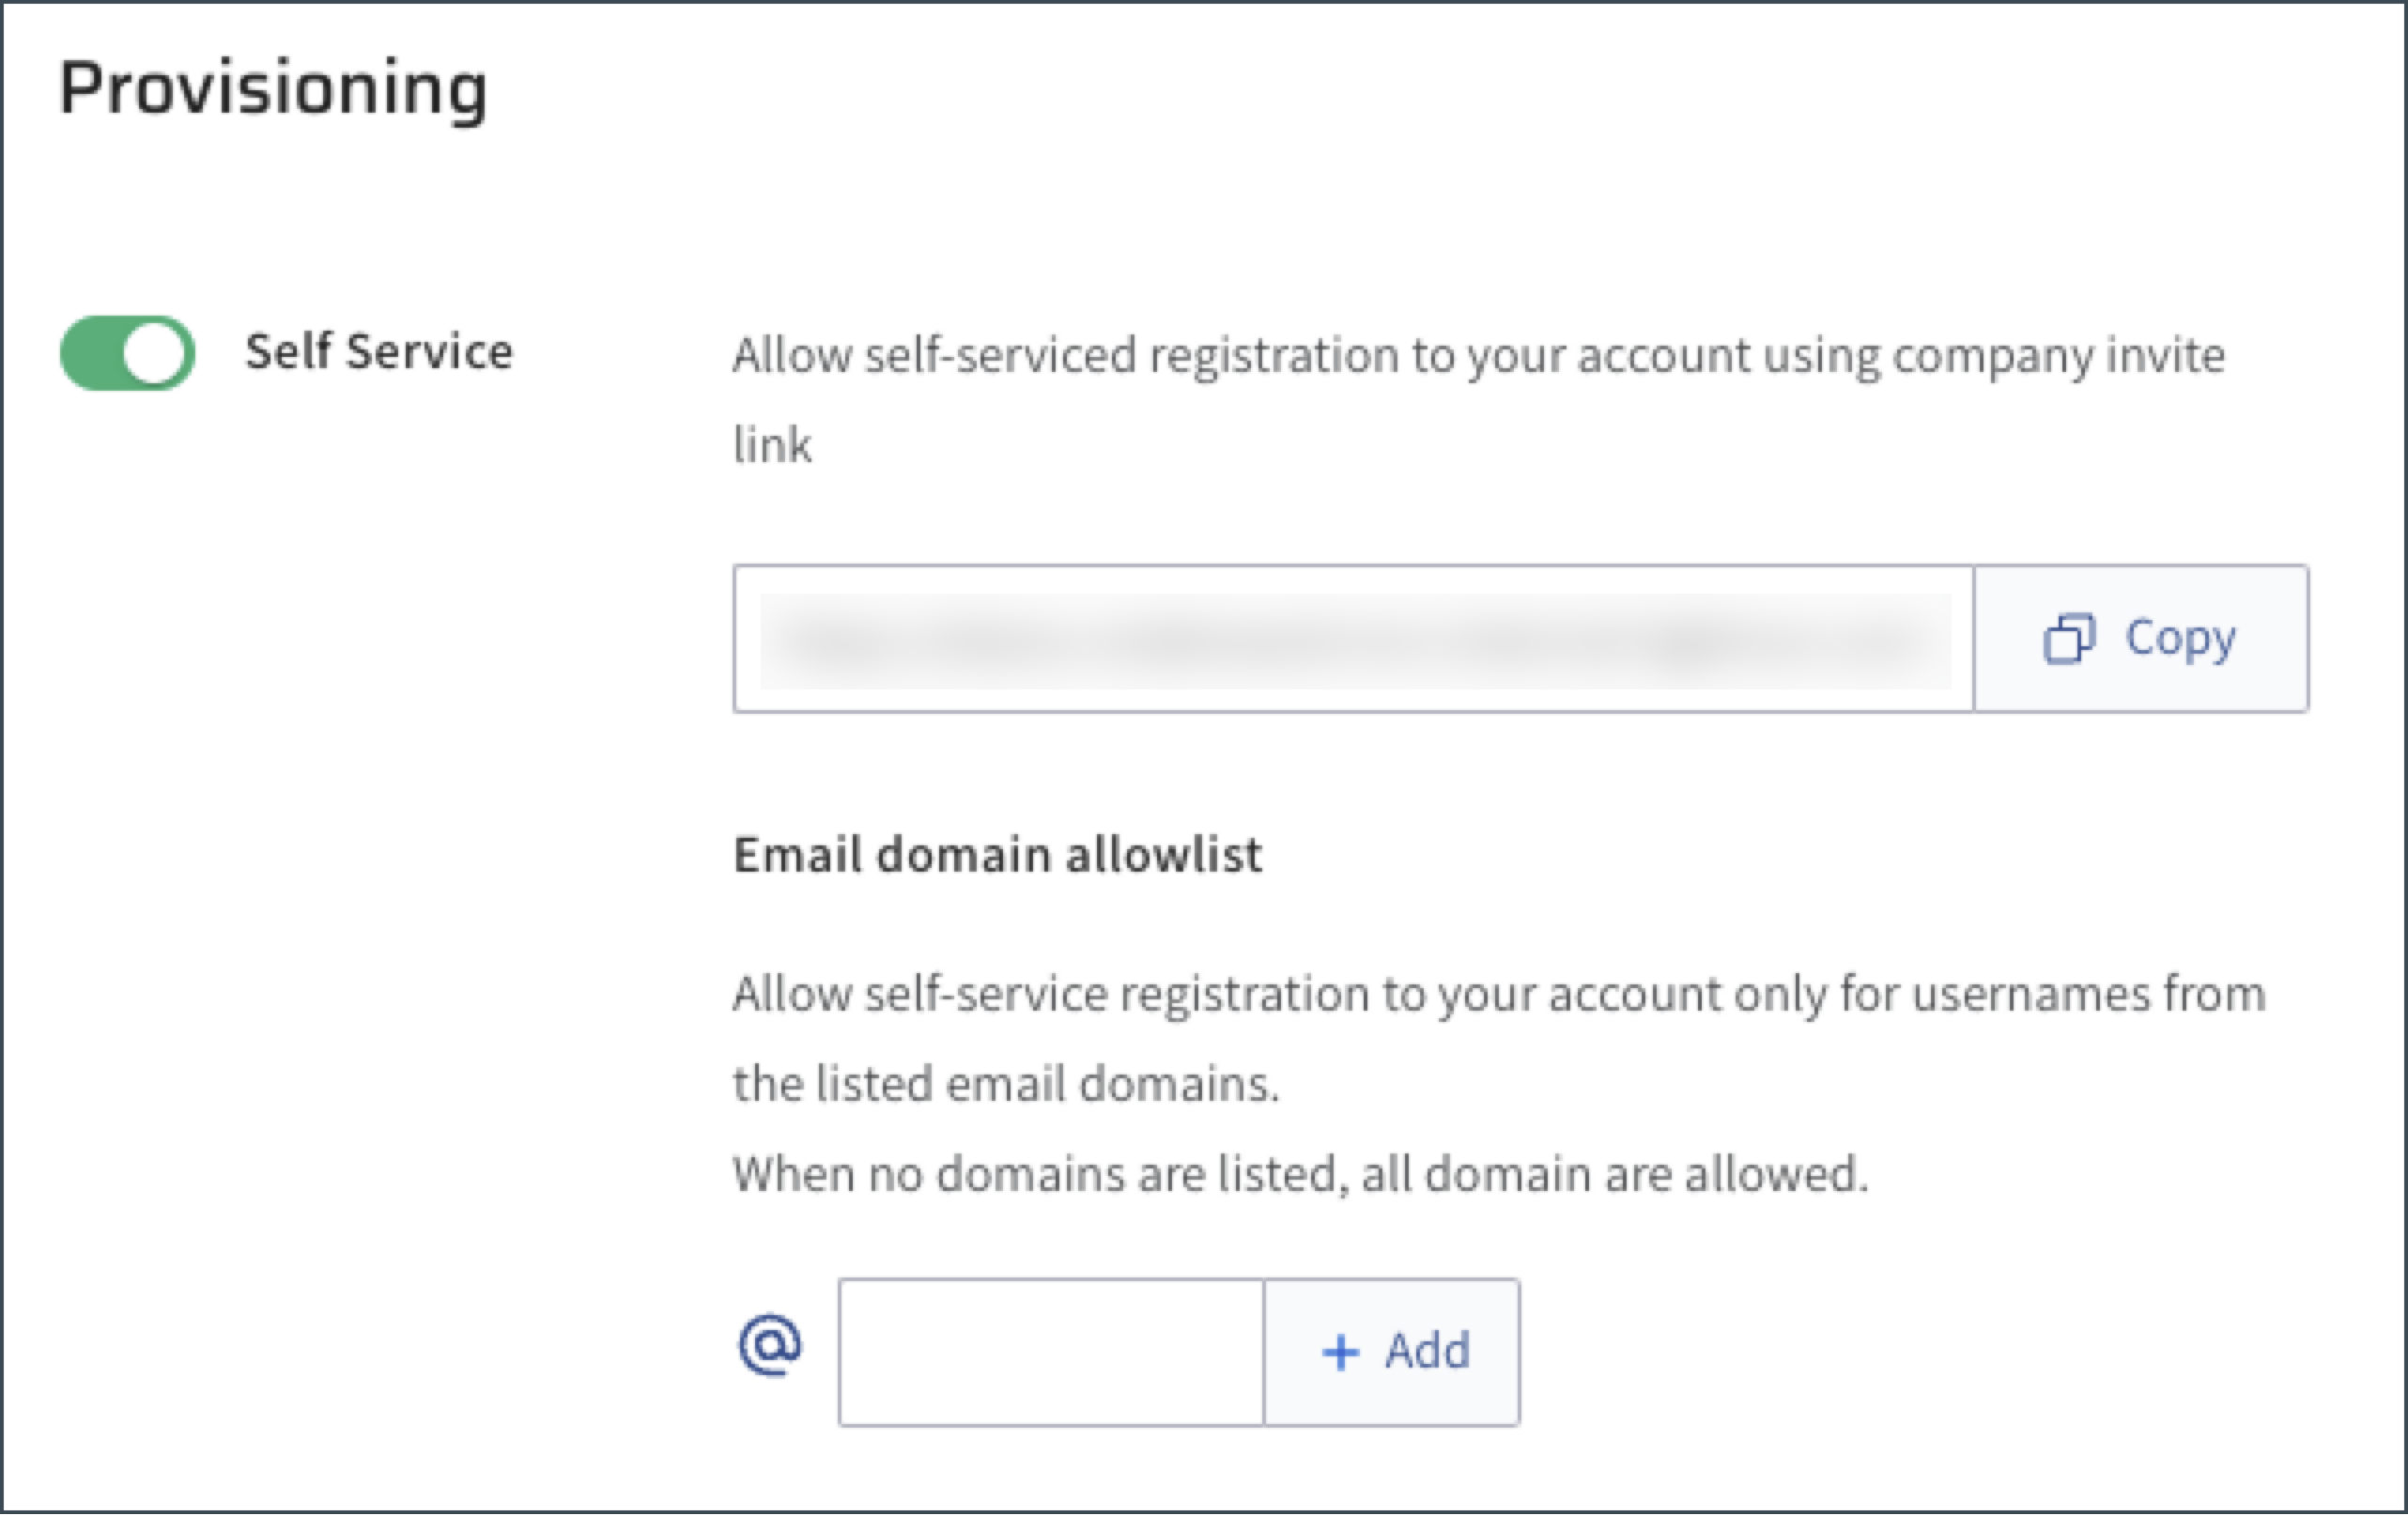
By default, registration emails can be sent to all email addresses under any domain within the organization.
-
(Optional) To limit registration to specific domains, list the allowed domains by listing their suffixes (e.g.,
@company-name.com,@google.com,@gmail.com). Domains not listed here will be excluded. - Click Copy to copy the URL and share it with selected users.
-
Click Save.
When the user clicks the link, they will be directed to the Lightrun login page to complete their registration.