Configure SAML SSO with Ping Identity for your organization🔗
🔒 Enterprise plan required. Contact Support for access.
Lightrun offers support for Single Sign-On (SSO) using Ping Identity as the identity provider (IdP) by integrating Lightrun with the SAML 2.0 integration in Ping Identity.
Using SAML, Lightrun functions as a service provider, receiving user authentication information from Ping, which serves as the external identity provider. When SSO is enabled, Lightrun is no longer responsible for user authentication, but still manages the redirection of login requests to the identity provider and verifies the integrity of the response from the identity provider.
Terminology🔗
- Identity Provider (IdP): A service that manages user accounts, providing authentication services to applications. Lightrun supports Ping Identity for this purpose.
- Service Provider: The website that hosts apps. In our case, it is Lightrun.
- Service Provider Entity UID: The URL is used to uniquely identify your service provider and is generated in the SSO page in the Lightrun Management Portal.
- Single Sign on URL: This endpoint URL is generated in the SSO page in the Lightrun Management Portal.
- Single Sign on Service URL: The URL is used for sending authentication requests (
SAMLAuthnRequest) and is generated in Ping Identity.
Step 1: Copy URLS in Lightrun Management Portal🔗
- Log in to your Lightrun account.
- Click Settings on the top right-hand side of menubar.
-
Set SAML as your SSO Protocol based on your version:
- For version 1.54 and higher.
- Navigate to the Identity Configuration > Login Method tab.
- From the list, select Single Sign-On (SSO).
- Select SAML as your SSO protocol.
- For version 1.53 and earlier.
- Navigate to the Identity and Access Management > Identity Configuration > Provisioning.
- Select SAML as your SSO Protocol.
- Select Other as your Identity Provider.
- For version 1.54 and higher.
-
From the Service Provider's Redirect URL field, click Copy.
This field will serve as the redirect URL used when configuring the identity provider.
-
From the Service Provider's Entity ID field, click Copy. This field will serve as the unique identification of the SAML Service provider.
Step 2: Set up Lightrun Application in Ping Identity🔗
- Sign in to Ping Identity.
- In the Administration console, Navigate to Connections > Applications, and click the + (plus icon) to create the application. The Add Application window opens.
- Enter a user-defined name for the application. For example:
<lightrun-app>. - Under Application Type, select SAML Application.
- Click Save.
- Select the Configuration tab.
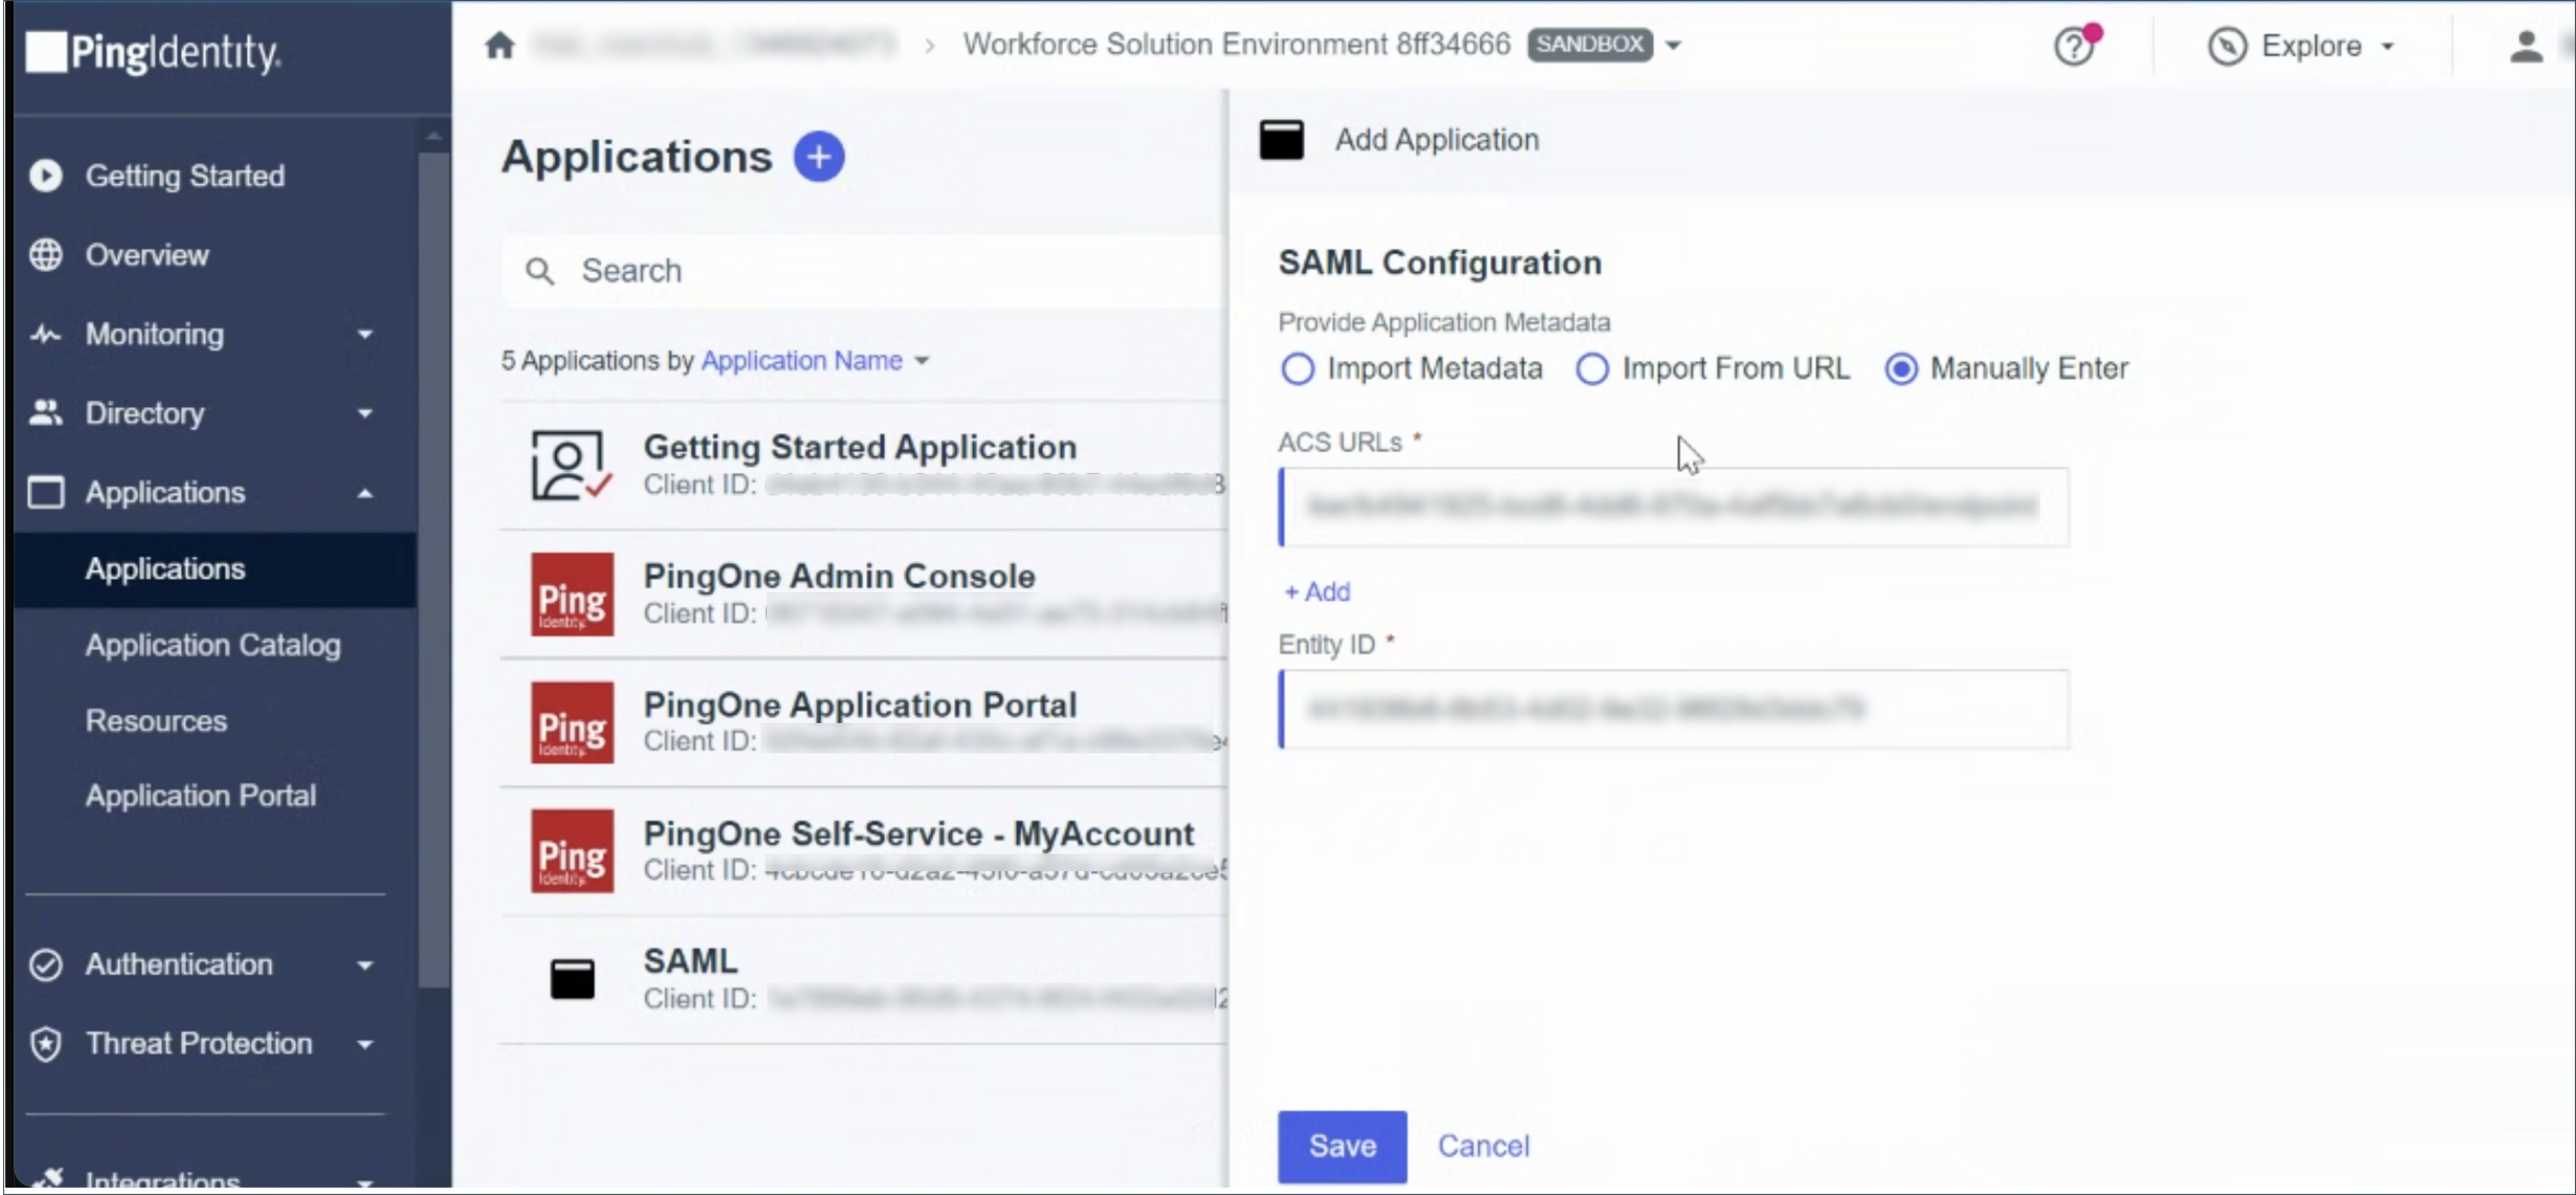
- Select Manually Enter.
- In the ACS URLs field, paste the Service Provider's Redirect URL that you copied from the Lightrun SSO settings in the previous step.
- In the Entity ID field, paste the Service Provider's Entity ID that you copied from the Lightrun SSO settings in the previous step.
- Click Save.
Step 3: Copy URLS in Ping Identity🔗
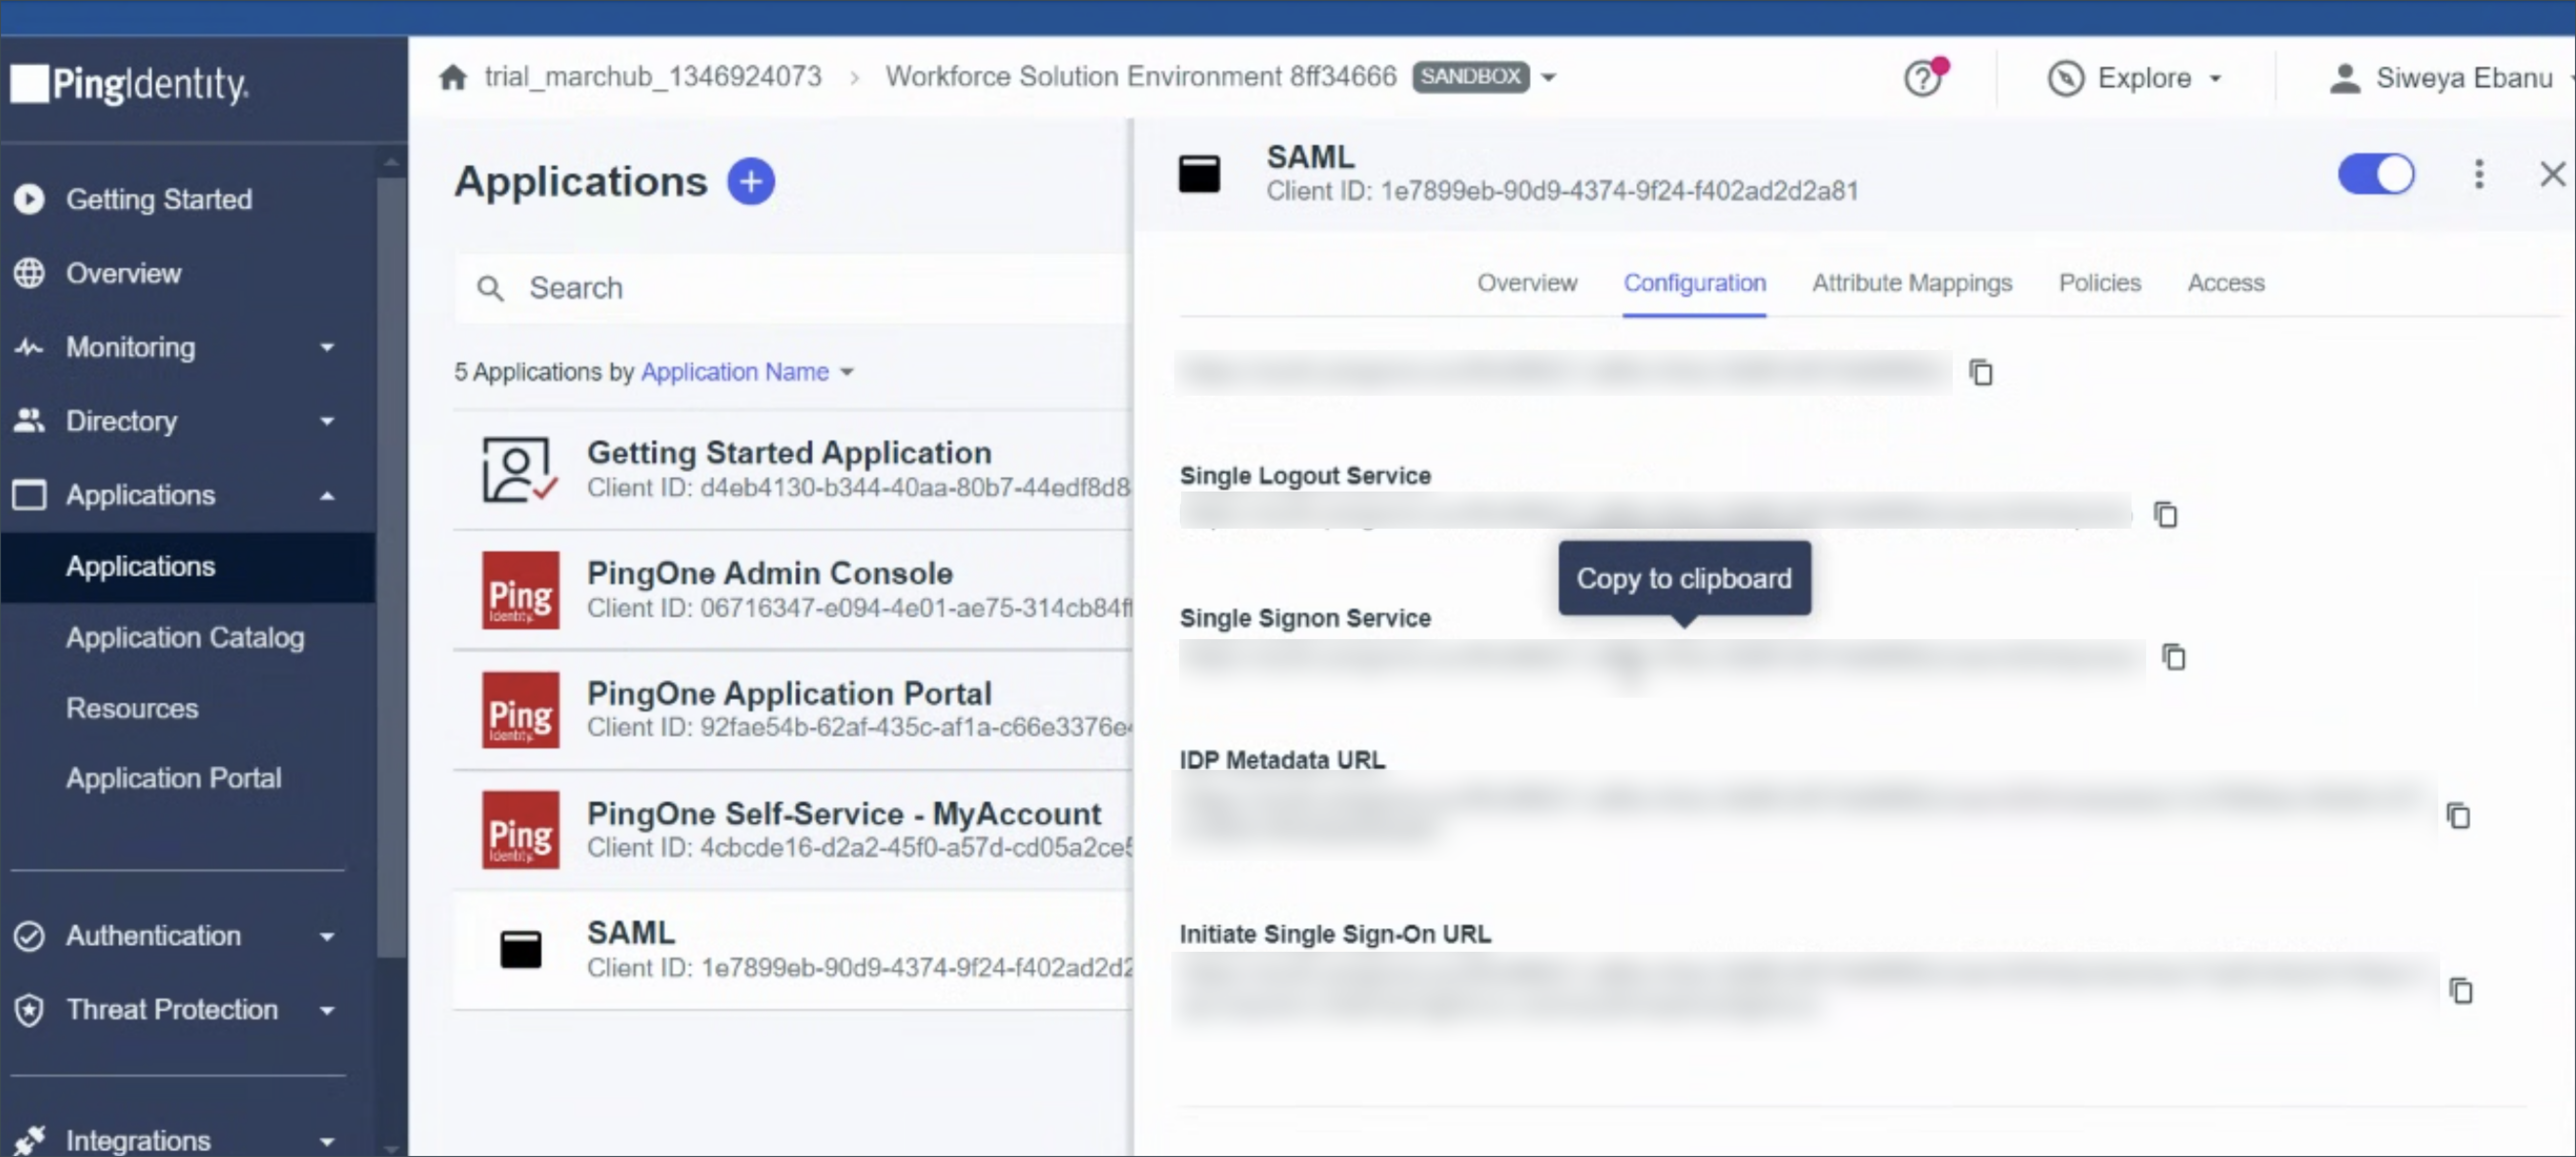
- In Ping Identity, access your
<lightrun app>that you configured in the previous stage. - Select the Configuration tab.
- Scroll down and copy the Single Signon Service URL.
Step 4: Configure and enable SSO in Lightrun🔗
Setting up the SSO in the Lightrun Management Portal includes these main steps.
- Log in to your Lightrun account.
- Click Settings on the top right-hand side of menubar.
-
Set SAML as your SSO Protocol based on your version:
- For version 1.54 and higher.
- Navigate to the Identity Configuration > Login Method tab.
- From the list, select Single Sign-On (SSO).
- Select SAML as your SSO protocol.
- For version 1.53 and earlier.
- Navigate to the Identity and Access Management > Identity Configuration > Provisioning.
- Select SAML as your SSO Protocol.
- Select Other as your Identity Provider.
- For version 1.54 and higher.
-
In the Identity Provider's SSO URL field, paste the Single Signon Service you copied in the previous step, which is used to send authentication requests (SAMLAuthnRequest).
-
[Optional, supported from version 1.66] In the Custom Fallback URL field, enter a URL to redirect users to if the SSO login process cannot be completed. This is useful for guiding users to your company’s helpdesk, support portal, or an alternative login page. If left empty, users see a default error message.
-
Click Save.