SCIM provisioning using Okta🔗
🔒 Enterprise plan required. Contact Support for access.
Lightrun supports adding SCIM user provisioning capabilities with Okta. For more information, see SCIM provisioning overview.
Using the open standard System for Cross-domain Identity Management (SCIM), Lightrun enables you to:
- Provide seamless access to Lightrun for your users using Okta.
- Add, remove, and assign users to Lightrun's basic or manager roles in your organization.
- As of version 1.51, provision Lightrun groups through SCIM, enabling delegation of group management to a supported identity provider (IdP). For more information, see Provision Lightrun Groups using SCIM.
Prerequisites🔗
To implement SCIM provisioning in Lightrun, ensure the following prerequisites are met:
- Lightrun supports Cross-domain Identity Management (SCIM 2.0).
- Set up SAML SSO with Okta for your organization.
- Generate a dedicated API Key for SCIM integration. For more information, see Lightrun System API Keys.
- To provision SCIM groups, ensure that RBAC is enabled and that the relevant Lightrun groups are pre-configured in the identity provider before migrating group management to SCIM.
Set up SCIM in Lightrun🔗
- Log in to your Lightrun account.
-
Navigate to the Identity and Access Management tab > Identity Configuration > Provisioning.
-
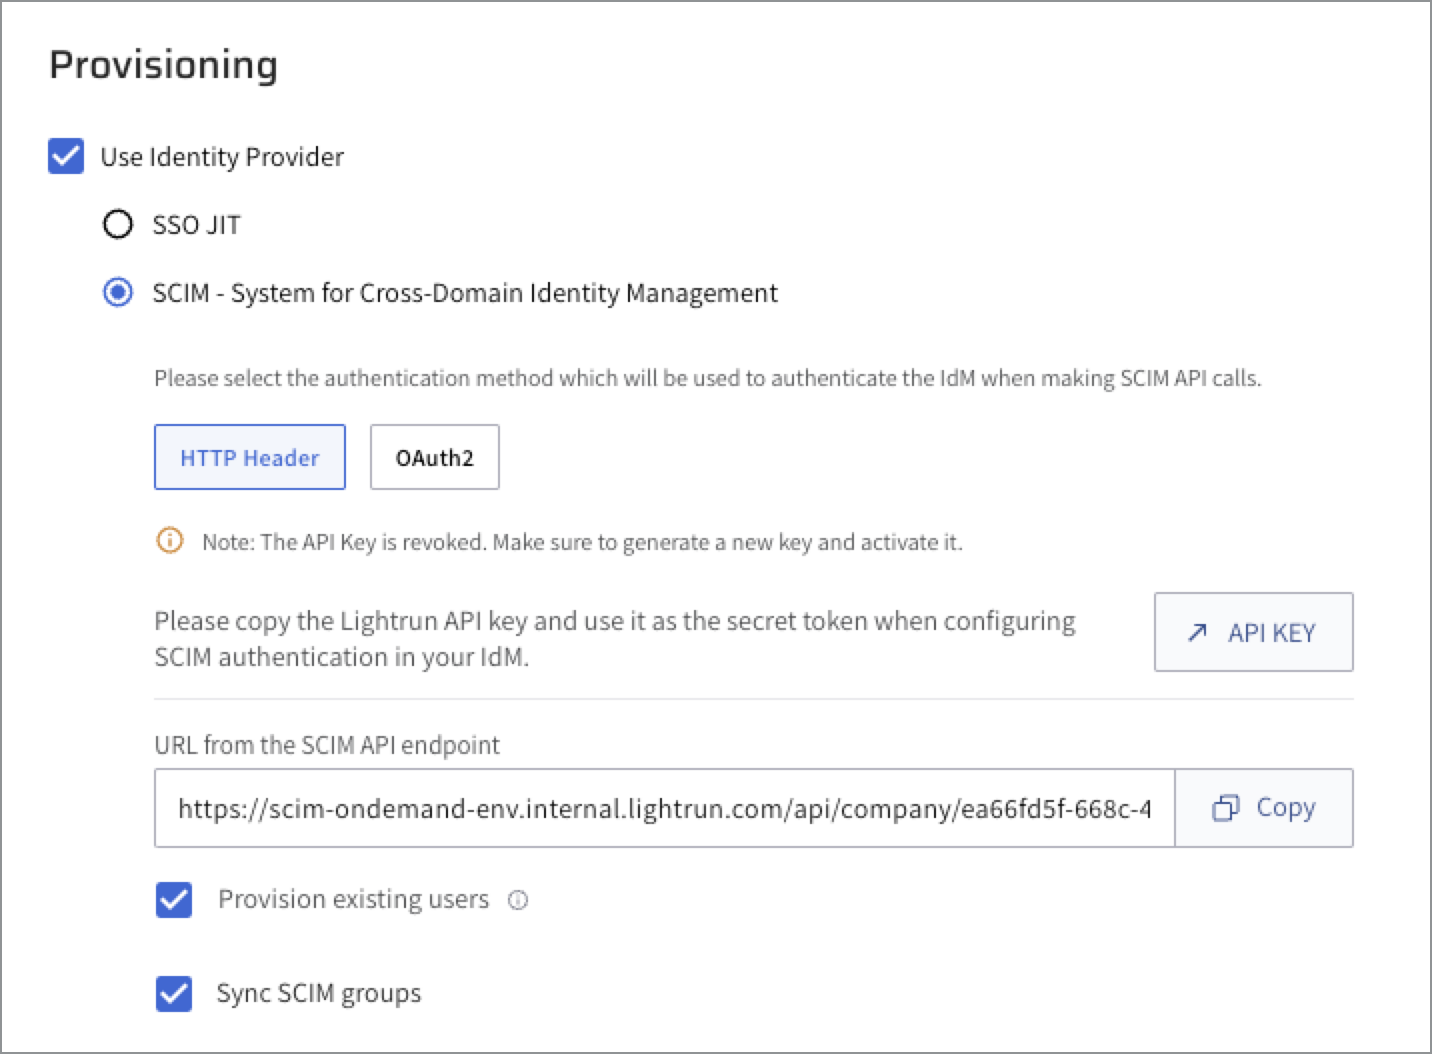
Select the Use Identity Provider checkbox.
- Select HTTP Header as your authentication method.
- Click Save.
- In the API KEY field, click API KEY to be routed to the API key page. You will need to generate an API Key and copy it to Okta’s SCIM settings. The API Key is used for authentication and authorization between the SCIM server and the connected Lightrun Management Portal. For more information, see Lightrun API Keys.
- In the URL from the SCIM API endpoint field, click Copy and save the URL.
- Select the Provision existing users check box to shift the responsibility of managing your current Lightrun users to a chosen identity provider. For more information, see Provisioning Existing Lightrun Users with SCIM.
-
(Optional) Select the Sync SCIM groups checkbox. For more information, see SCIM provisioning overview.
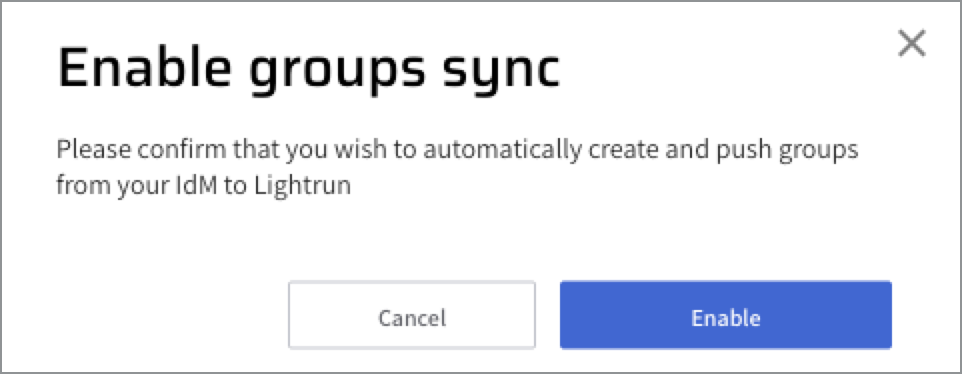
The Enable groups sync dialog opens.
-
click Enable.
Proceed to configure SCIM in Okta.
Configure SCIM in Okta🔗
CONFIGURE LIGHTRUN-SCIM INTEGRATION IN OKTA🔗
- In Okta, go to the Lightrun custom app in Okta located under Okta > Application > select lightrun's app, and open the General tab.
- in App Settings section, click Edit in App Settings section, and then under the Provisioning field, select SCIM, and click Save.
-
Go to Provisioning tab, and select Integration > SCIM Connection section and click Edit.
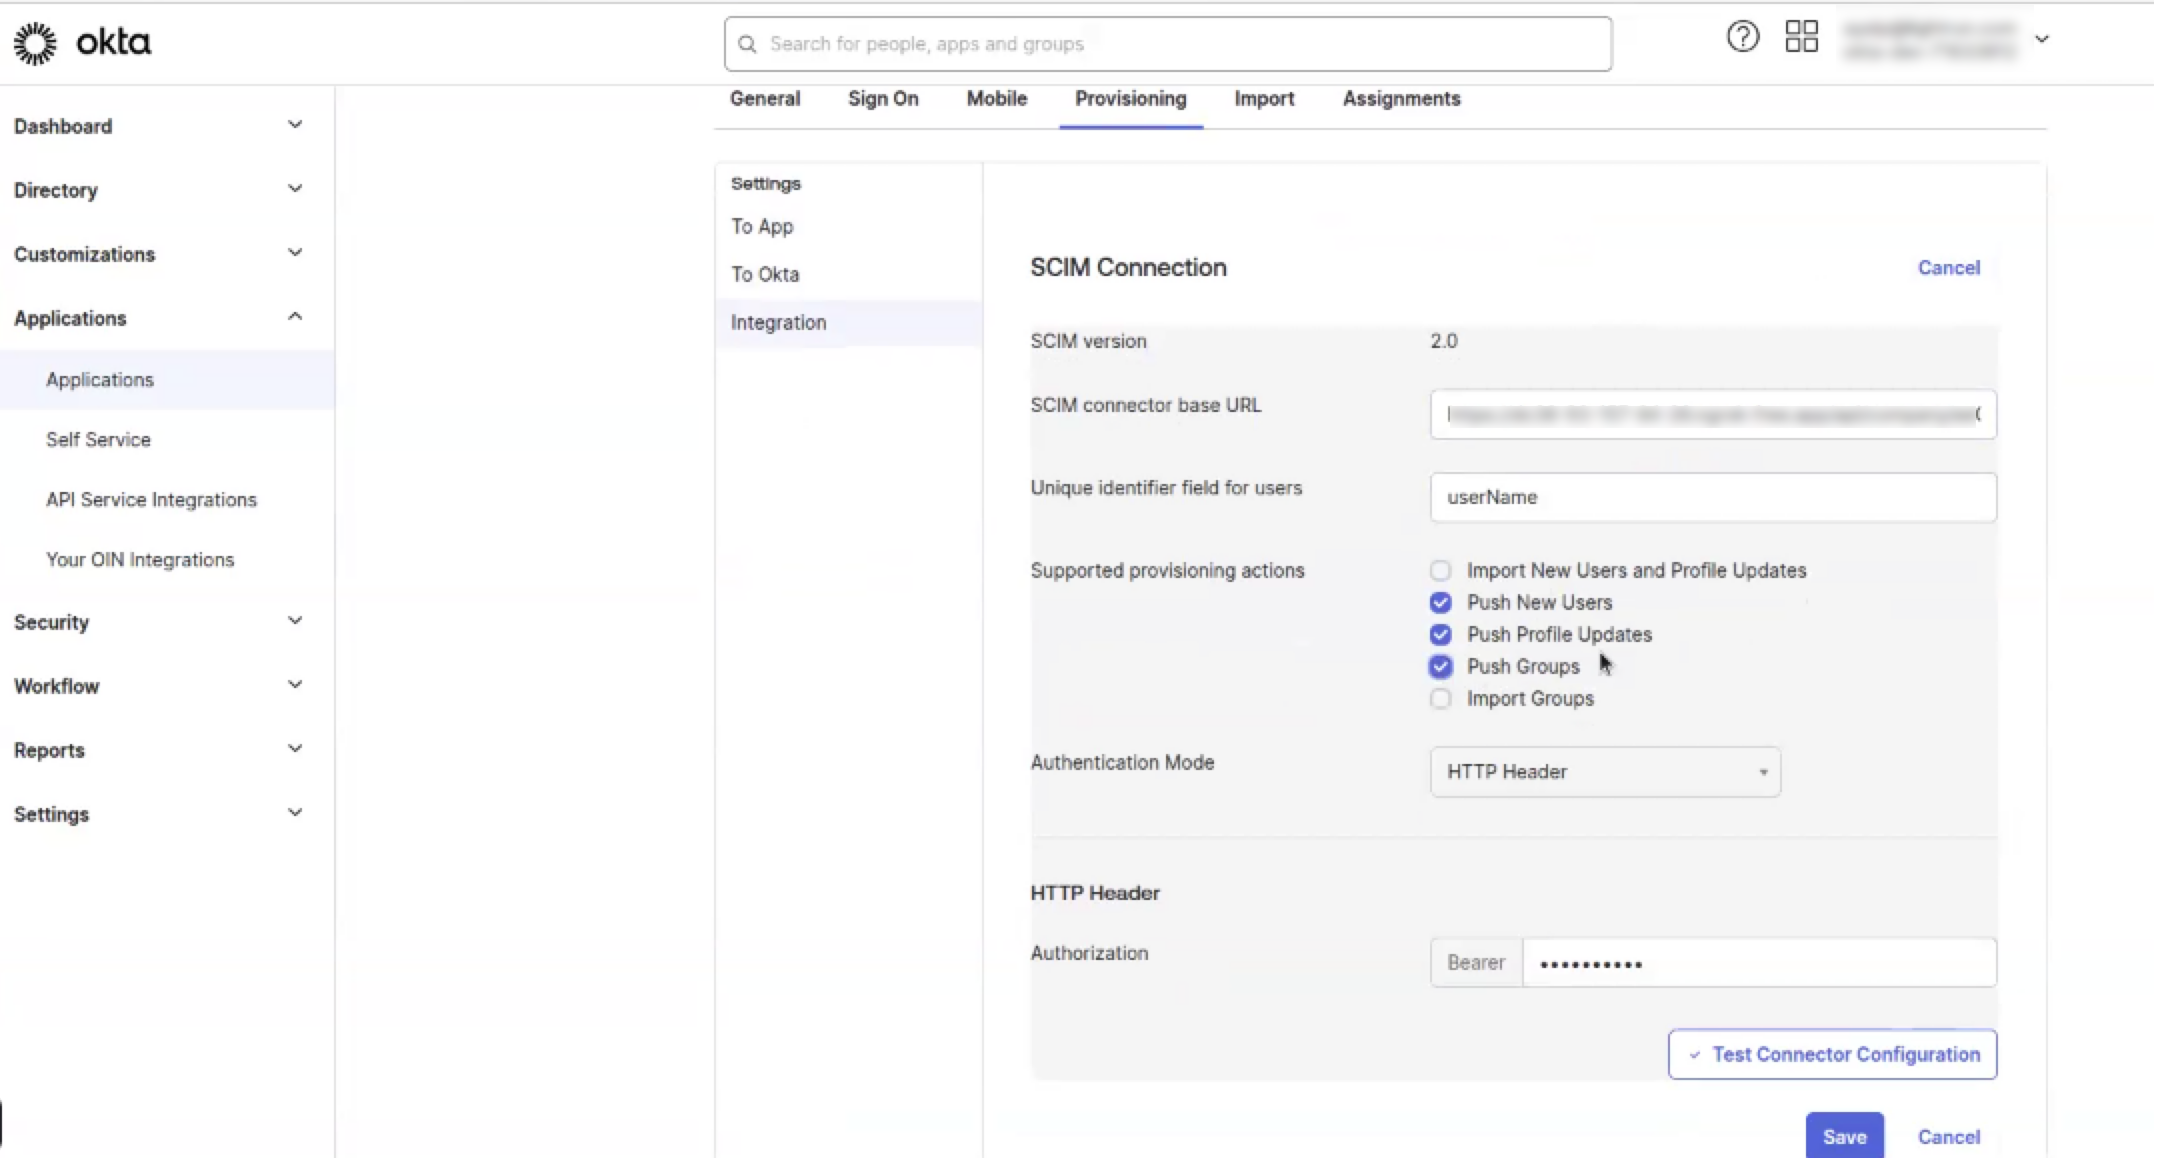 4. Enter the following fields:
- For the SCIM connector base URL, paste the URL you copied from the URL from the SCIM API endpoint field in the SCIM page in your Lightrun Management Portal.
- Unique identifier field for users: Enter userName
- Push New Users: Select the checkbox
- Push Groups: Select the checkbox
- Push Profile Updates: Select the checkbox
- Authentication Mode: Select HTTP Header from the list
- Under HTTP Header section, in the Authorization field, paste the SCIM token you copied from OAuth Bearer Token in the SCIM page in your Lightrun Management Portal.
-
Click Test Connector Configuration.
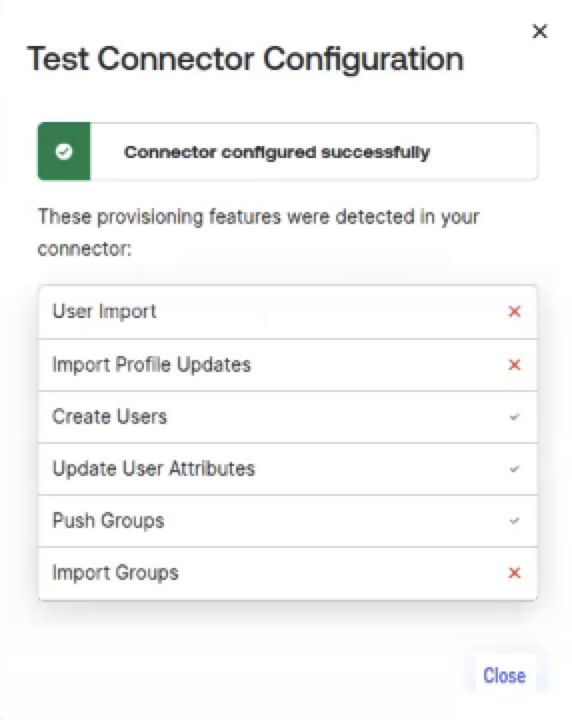
-
Click Close.
- Click Save. Proceed to provision users and groups in Okta.
Provision Lightrun users in Okta🔗
- Select Provisioning to App Settings.
- Click Enable for these fields:
- Create Users
- Update User Attributes
- Deactivate Users
- Scroll down to the Attribute Mappings section.
- Click Save.
-
Click Go to Profile Editor.
The Profile Editor page opens.
-
Under the Attributes section, click Mappings.
- In the Lightrun to Okta User tab, change the email mapping from appuser.email to appuser.userName.
As the users are assigned to the Lightrun app, they will automatically be added and displayed as Read-Only in the Users Management tab under the Settings section of the Lightrun Management Portal. - Click Save.
Provision Lightrun groups in Okta🔗
In the previous procedure, when you set up the connection, the Push Groups tab was added to the menu in the Lightrun application. For more information on Lightrun Groups using SCIM Overview, see SCIM Overview.
-
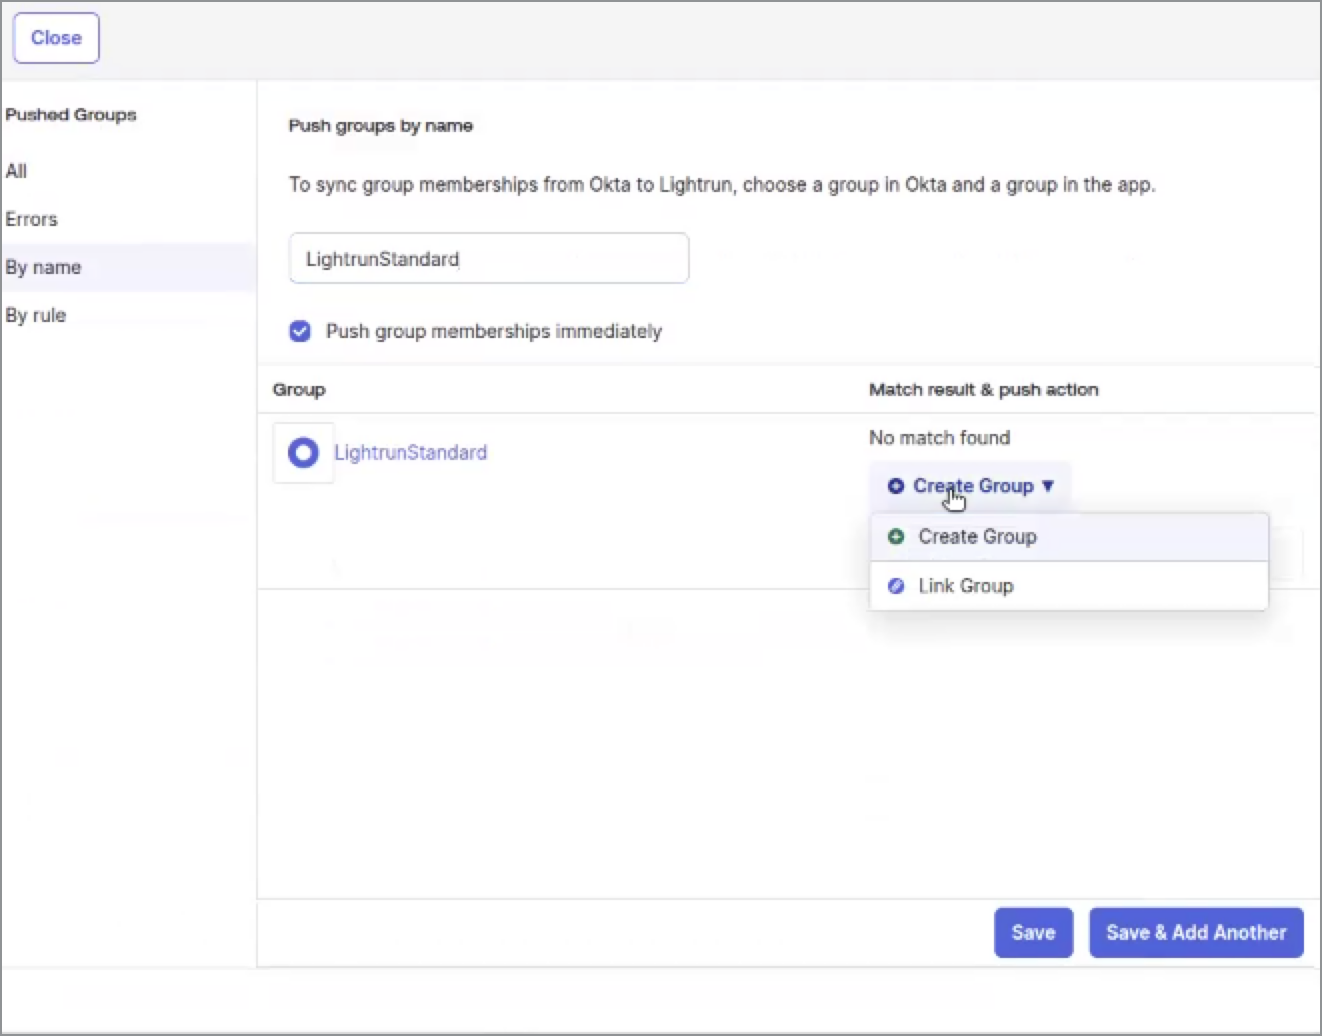
Under your application, click the Push Groups tab and select Push Groups.
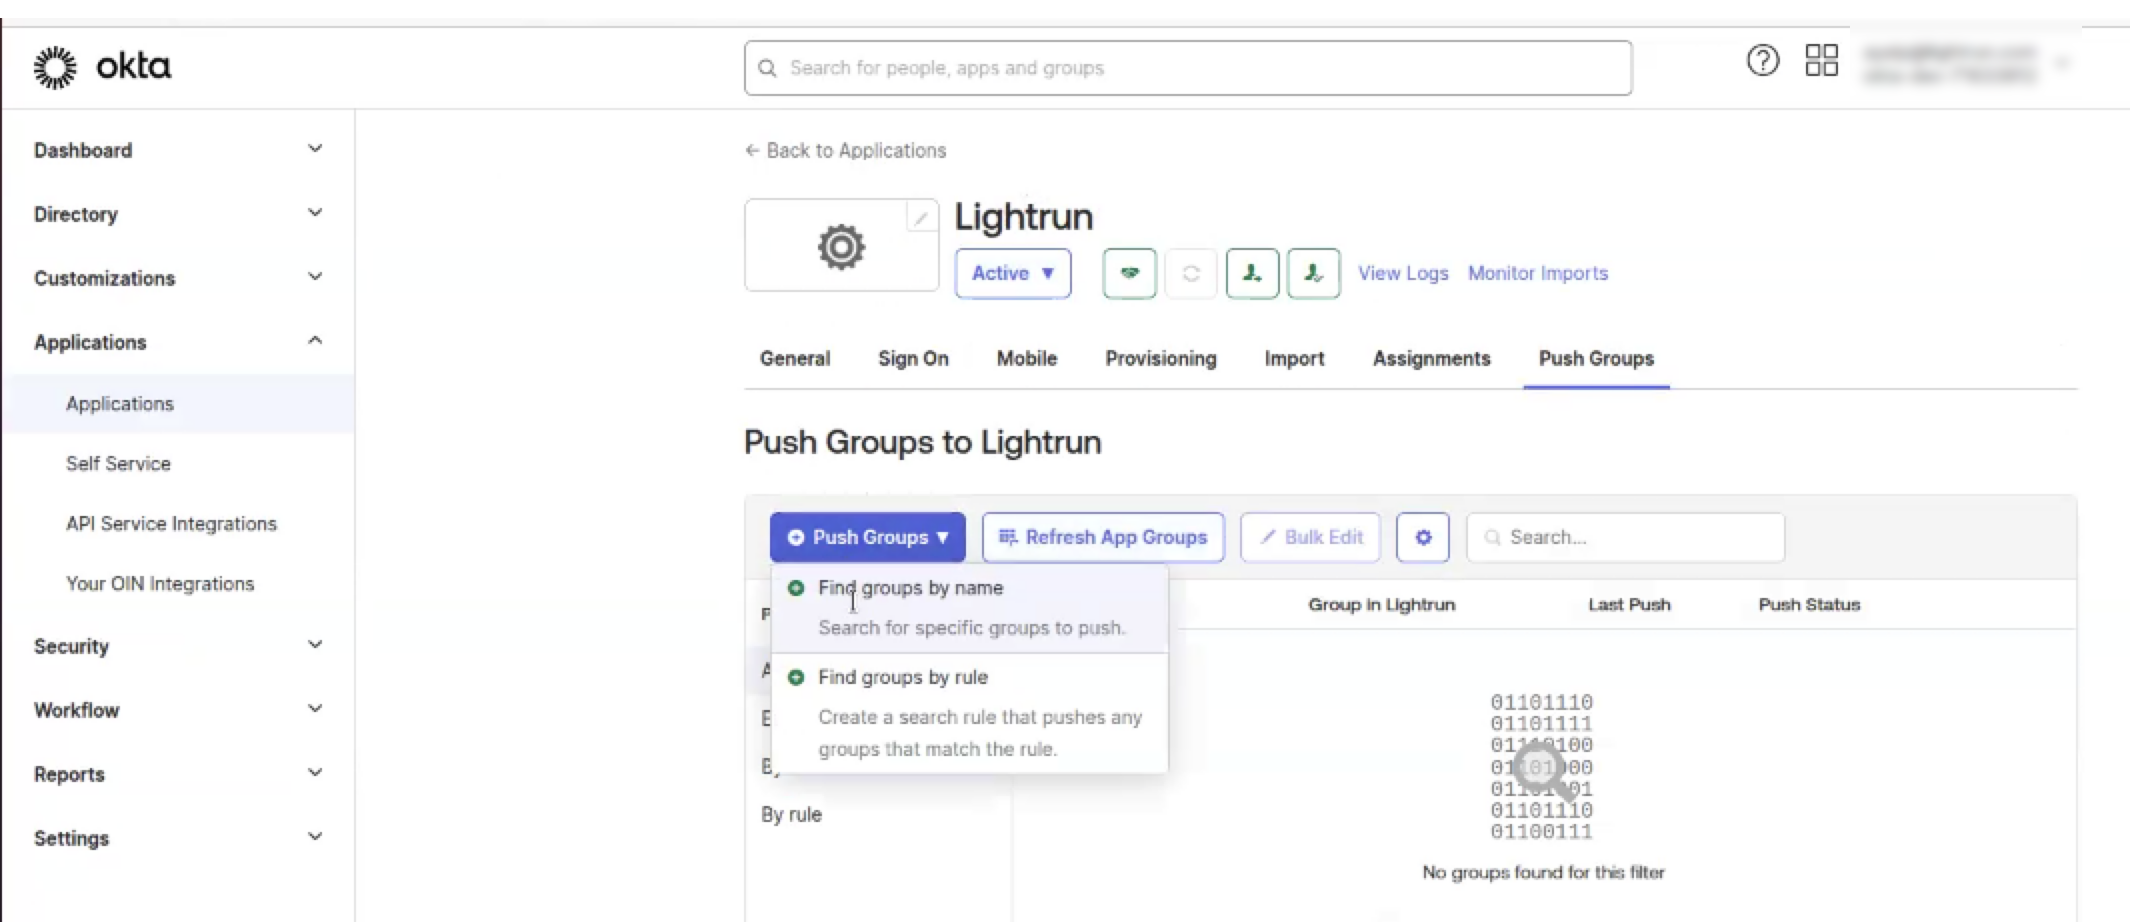
-
Search for the group from a list. Select the group you would like to sync. For example, 'LightrunGroup'.
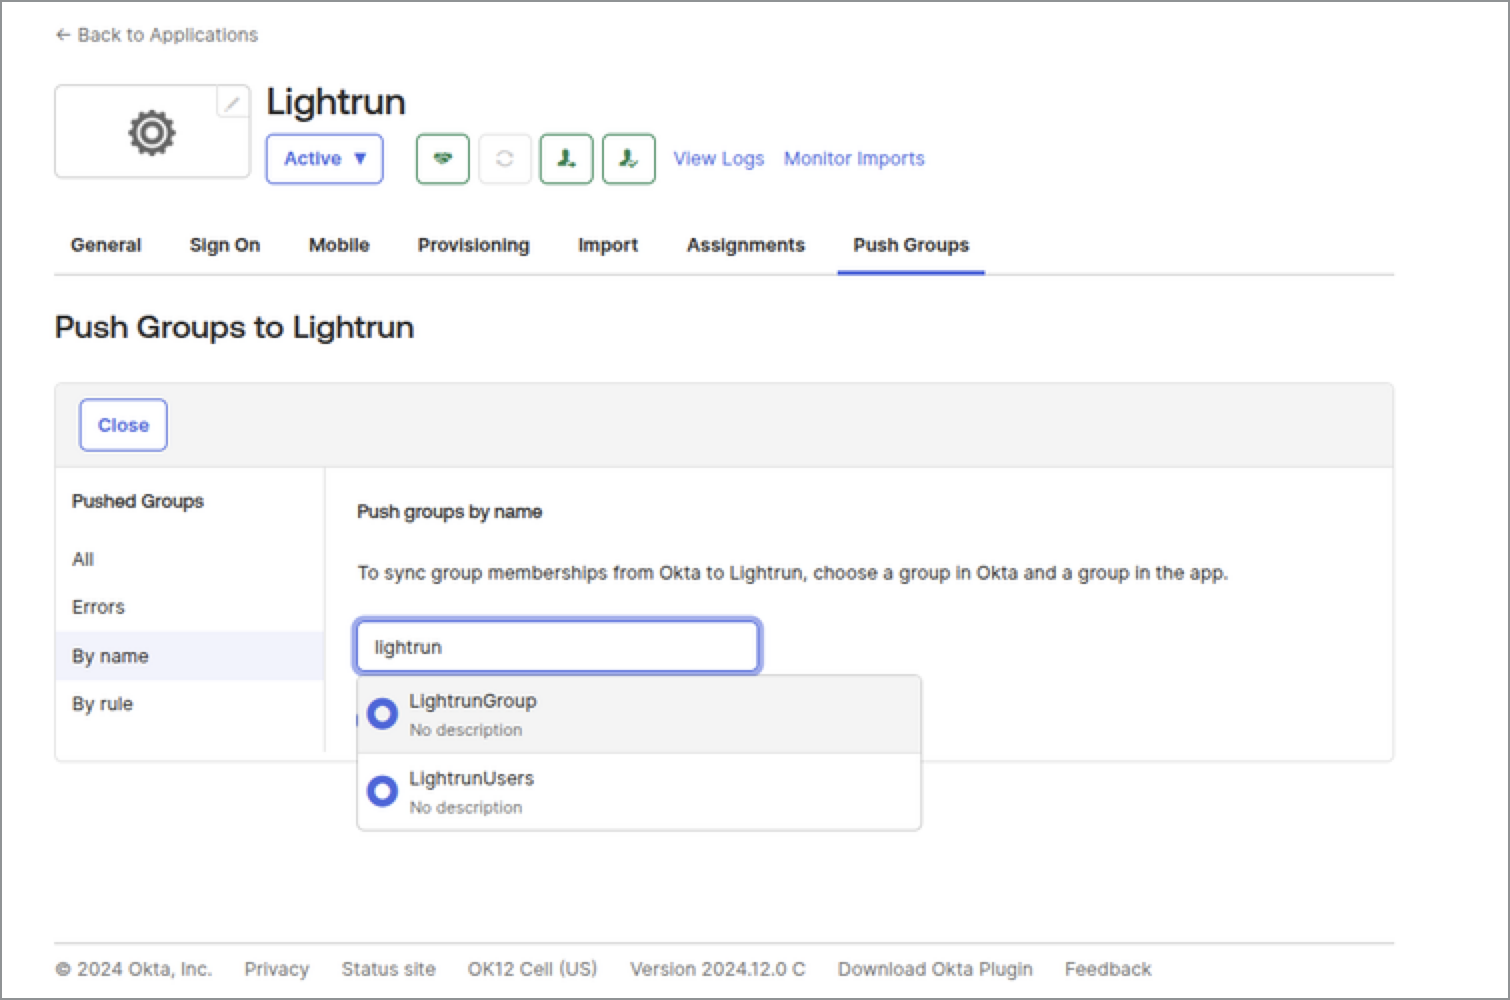
The selected group is displayed.
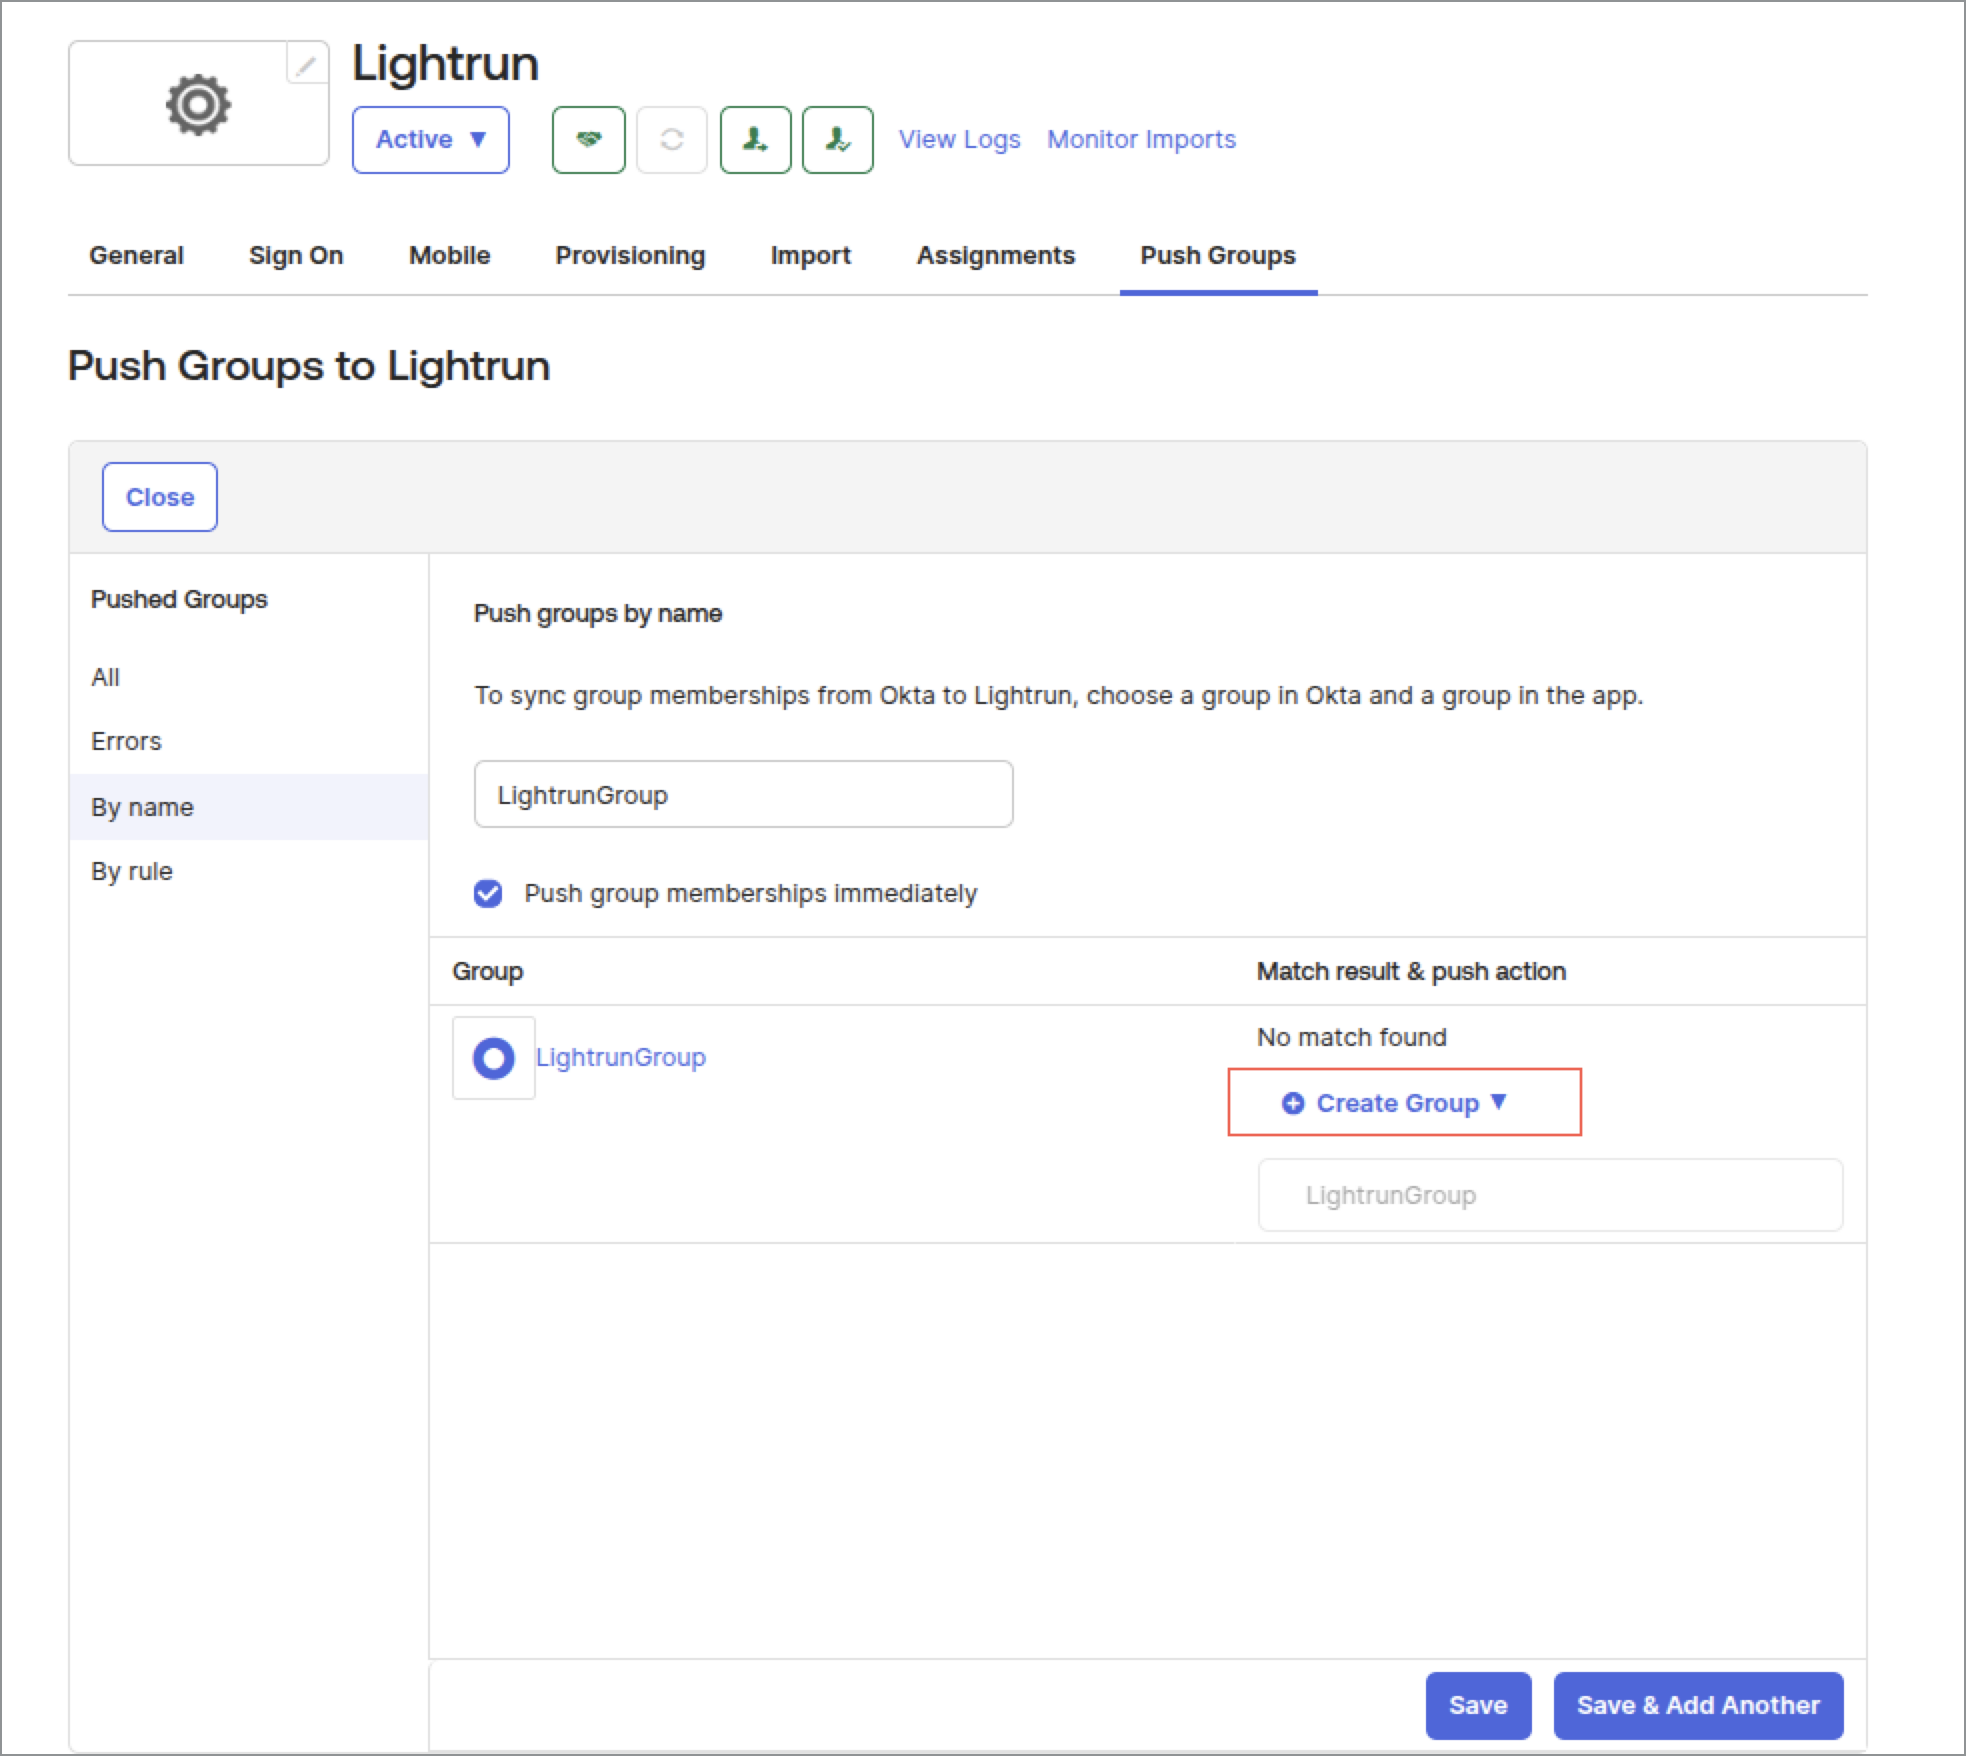
-
Click Create Group and select Create Group from the List.
Note that Linking groups is not supported.
-
Click Save.
The group is added to the list of Pushed Groups.
-
Verify that the group was successfully synced and added to the Lightrun Management Portal.
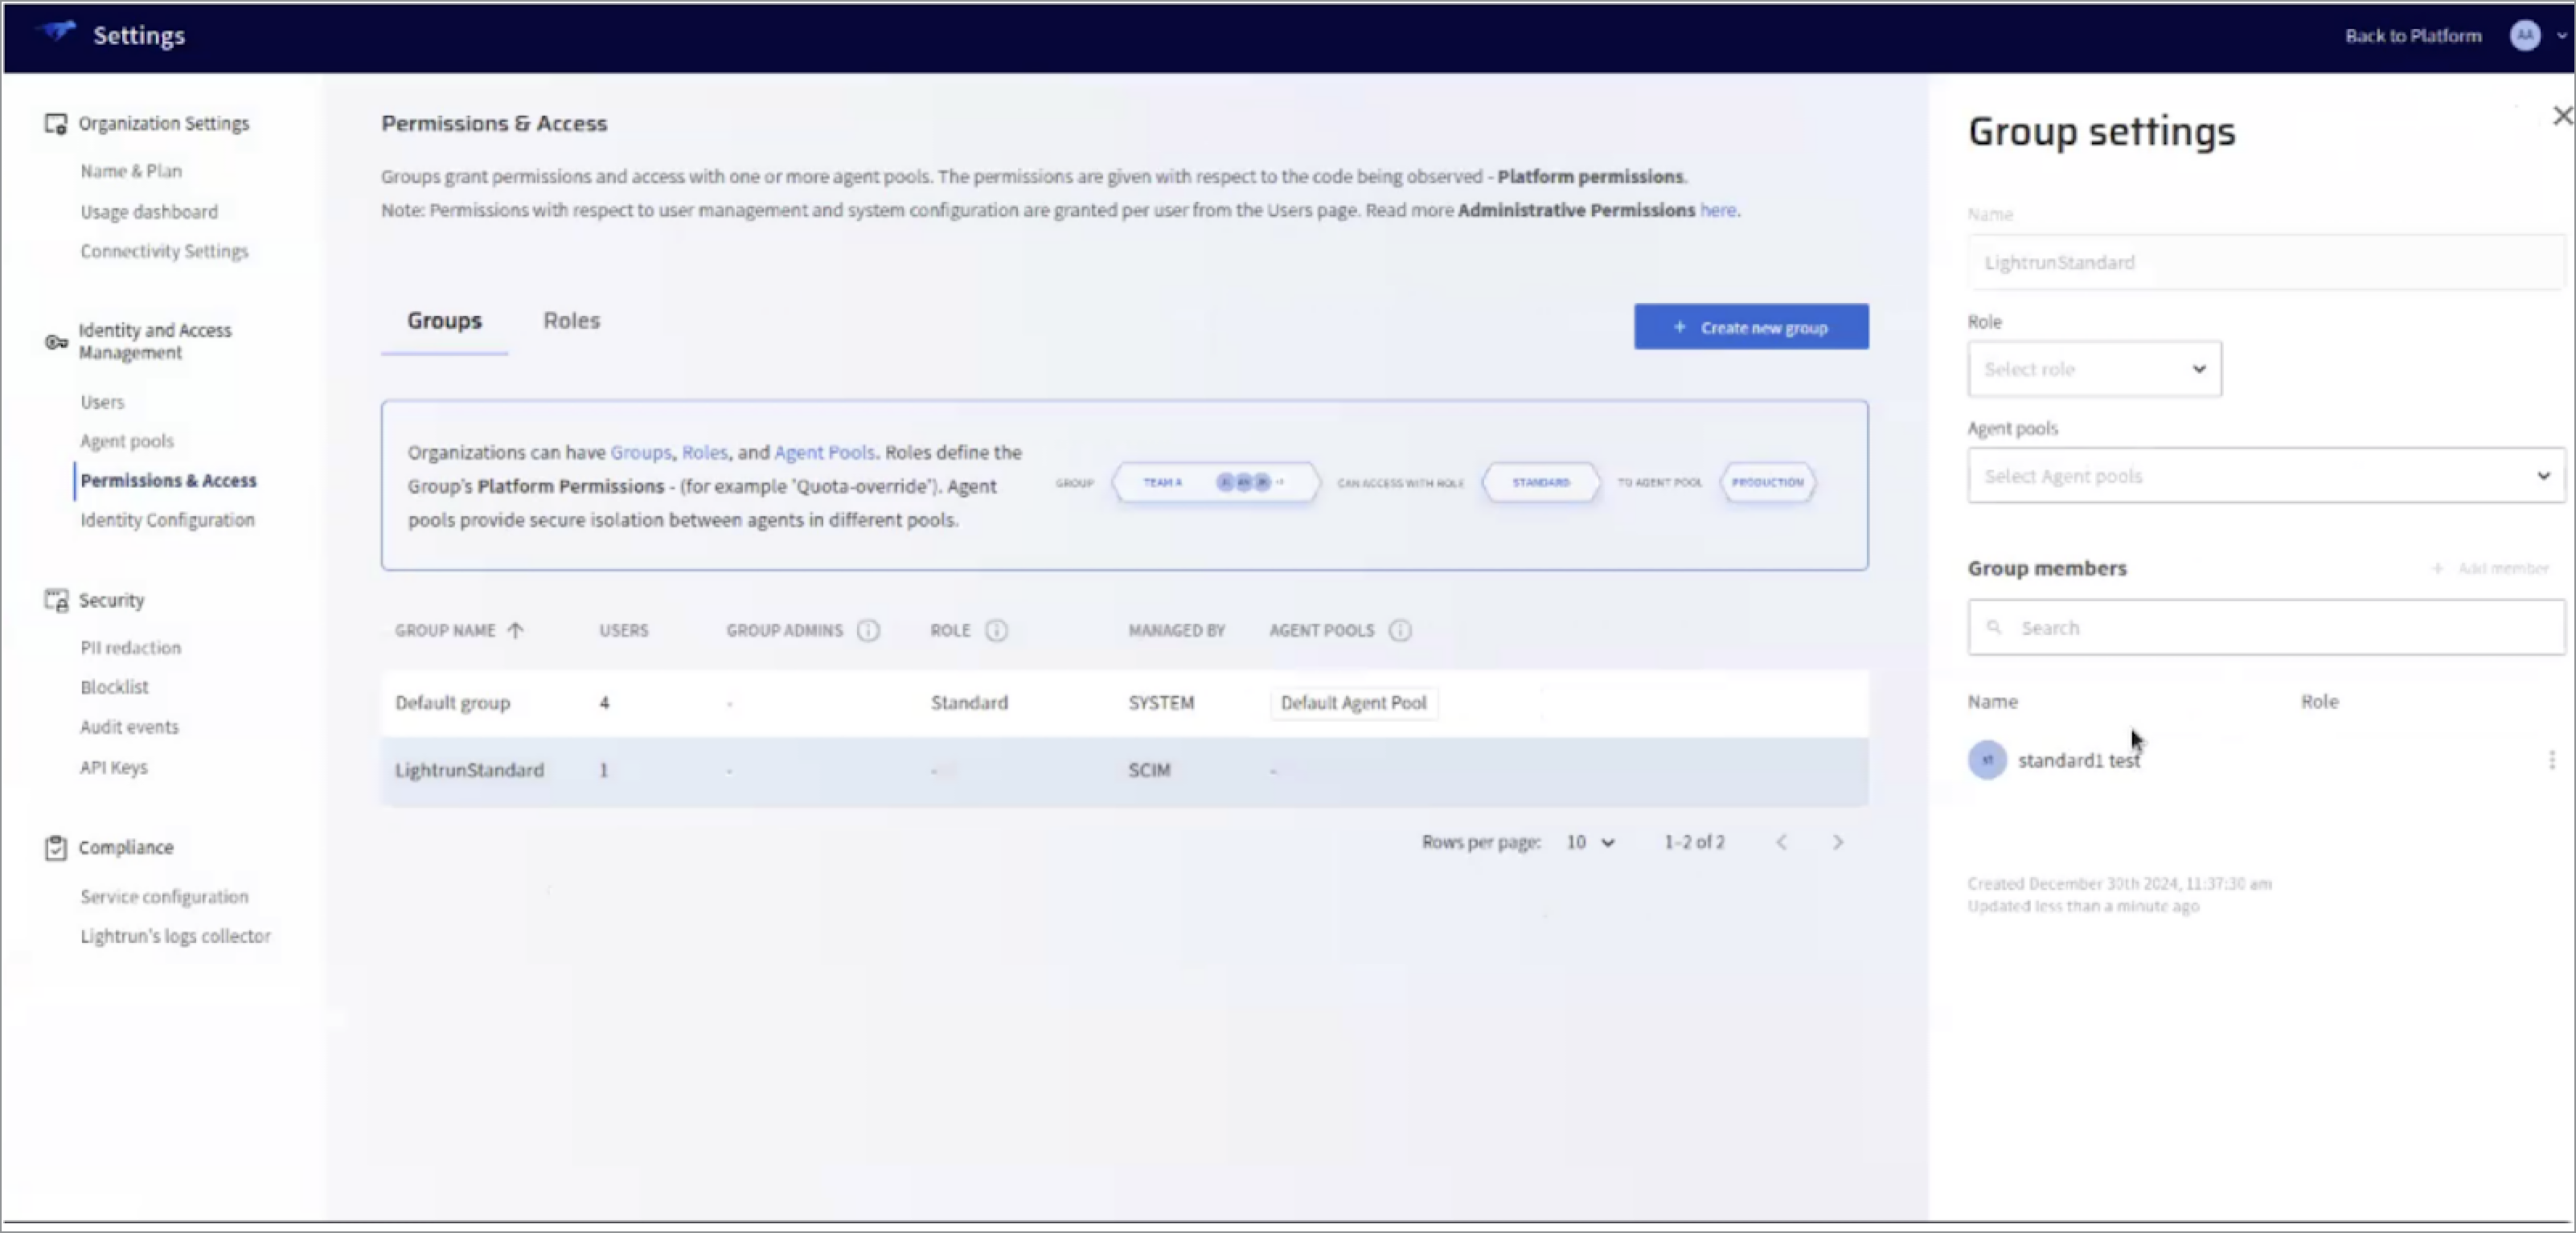
While group details cannot be modified, you can assign Lightrun permissions to the group, and agent groups directly from the Lightrun Management Portal.
- Open the Permissions and Access page in the Lightrun Management Portal.
- Confirm that the lightrunStandard group appears in the list of groups, as shown in the provided example.